This is a step-by-step tutorial on how to triple-boot FreeBSD, Linux, and Windows (11) on a single machine. The steps below can be done using only the target machine, but for convenience, I will assume you have an additional "helper" machine running FreeBSD (to prepare the ISOs and whatnot). I'm also assuming you have access to an 8GB+ flash drive ("installer drive") for creating bootable installers.
Shared partitions
As part of our setup, we will create two shared partitions accessible by all OSs (read/write). One will be FAT32, and the other NTFS. The former has universal support, but has a file size limit of 4GB. NTFS doesn't have that limitation, but from my experience, it's a bit inconsistent on FreeBSD. I'm not saying it doesn't work, it's just that I have occasionally faced unexpected behaviors, like files disappearing after a reboot. The forum post from the previous link suggests this can be solved by making sure you manually unmount the partition before a shutdown/reboot, or by rebuilding fusefs-ntfs without libublio. Your mileage may vary. I've never had a problem with a shared FAT32 partition, but use NTFS at your own risk.
Swap space for FreeBSD and Linux
While it's possible to share a single swap partition between FreeBSD and Linux, I'm not going to do that in this guide. I generally create swap space that is twice the amount of RAM on the system. The test machine has 16GB of RAM, so that's 2x32GB swap partitions. I know, I know, it may be a waste of space, but hey, storage is fairly cheap, and I have 512GB of storage, so we still have plenty of room for everything else.
Boot manager/OS selector
Since most computers nowadays use the UEFI standard, I will not be using a boot manager like rEFInd. In fact, I even find it inconvenient. There are two reasons for this. First of all, modern firmware allows you to load a boot menu with a single key press at boot time and select what you want to boot. Secondly, 90% of the time, I find myself booting into my "main" OS, FreeBSD for example. The other OSs are only occasionally used. In this guide, FreeBSD will be our first boot entry, followed by Linux, and then Windows. This way, when you power up your machine, it will automatically boot into FreeBSD as if it's the only OS installed. If you want to boot into Linux or Windows, you can then bring up your boot menu and select the desired OS. Much more convenient, and no need for any additional boot managers.
Overview of the installation process
Although it is possible to install the three operating systems in any order, doing Windows, then Linux, then FreeBSD is more convenient and will require less work/tweaking overall.
The target machine is a ThinkPad P14s Gen 5 (affiliate link, AMD variant) with 16GB of RAM and 512GB of storage. I'll set aside 120GB for Windows, 80GB for the NTFS shared partition, 40GB for the FAT32 shared partition, 85GB for Linux, 32GB for the two swap partitions (each), and the remaining space for FreeBSD.
Installing Windows
From the (FreeBSD) helper machine, head over to the the Microsoft Windows 11 download page (https://www.microsoft.com/en-us/software-download/windows11) and download the appropriate ISO image for your machine. At the time of this writing, there is only one unified ISO to download: "Windows 11 (multi-edition ISO for x64 devices)". Select your preferred language and click "Confirm". Finally, start your download by clicking "64-bit Download". If the download page detects a Windows machine, you may not be able to download the raw ISO and will have to use the Windows 11 Installation Assistant. Just follow the instructions if that's the case.
Once the ISO is downloaded, plug in your installer drive, fire up the terminal, and run the following command (as root):
# dd if=PATH/TO/ISO_FILE.iso of=/dev/daX bs=1mWait for dd to finish then unplug your flash drive. Make sure you supply the correct paths for the ISO file and the dev node of your drive. Check dmesg for the device node name. This process will overwrite the contents of the drive.
Now boot the installer drive on the target machine (most, if not all, Lenovo ThinkPads use F12 to bring up the boot menu at boot, but your hardware manufacturer may use a different hotkey). You should now be inside the Windows 11 installer.
Follow the instructions on the screen till you get to the "Select setup option" screen. Select "Install Windows 11":
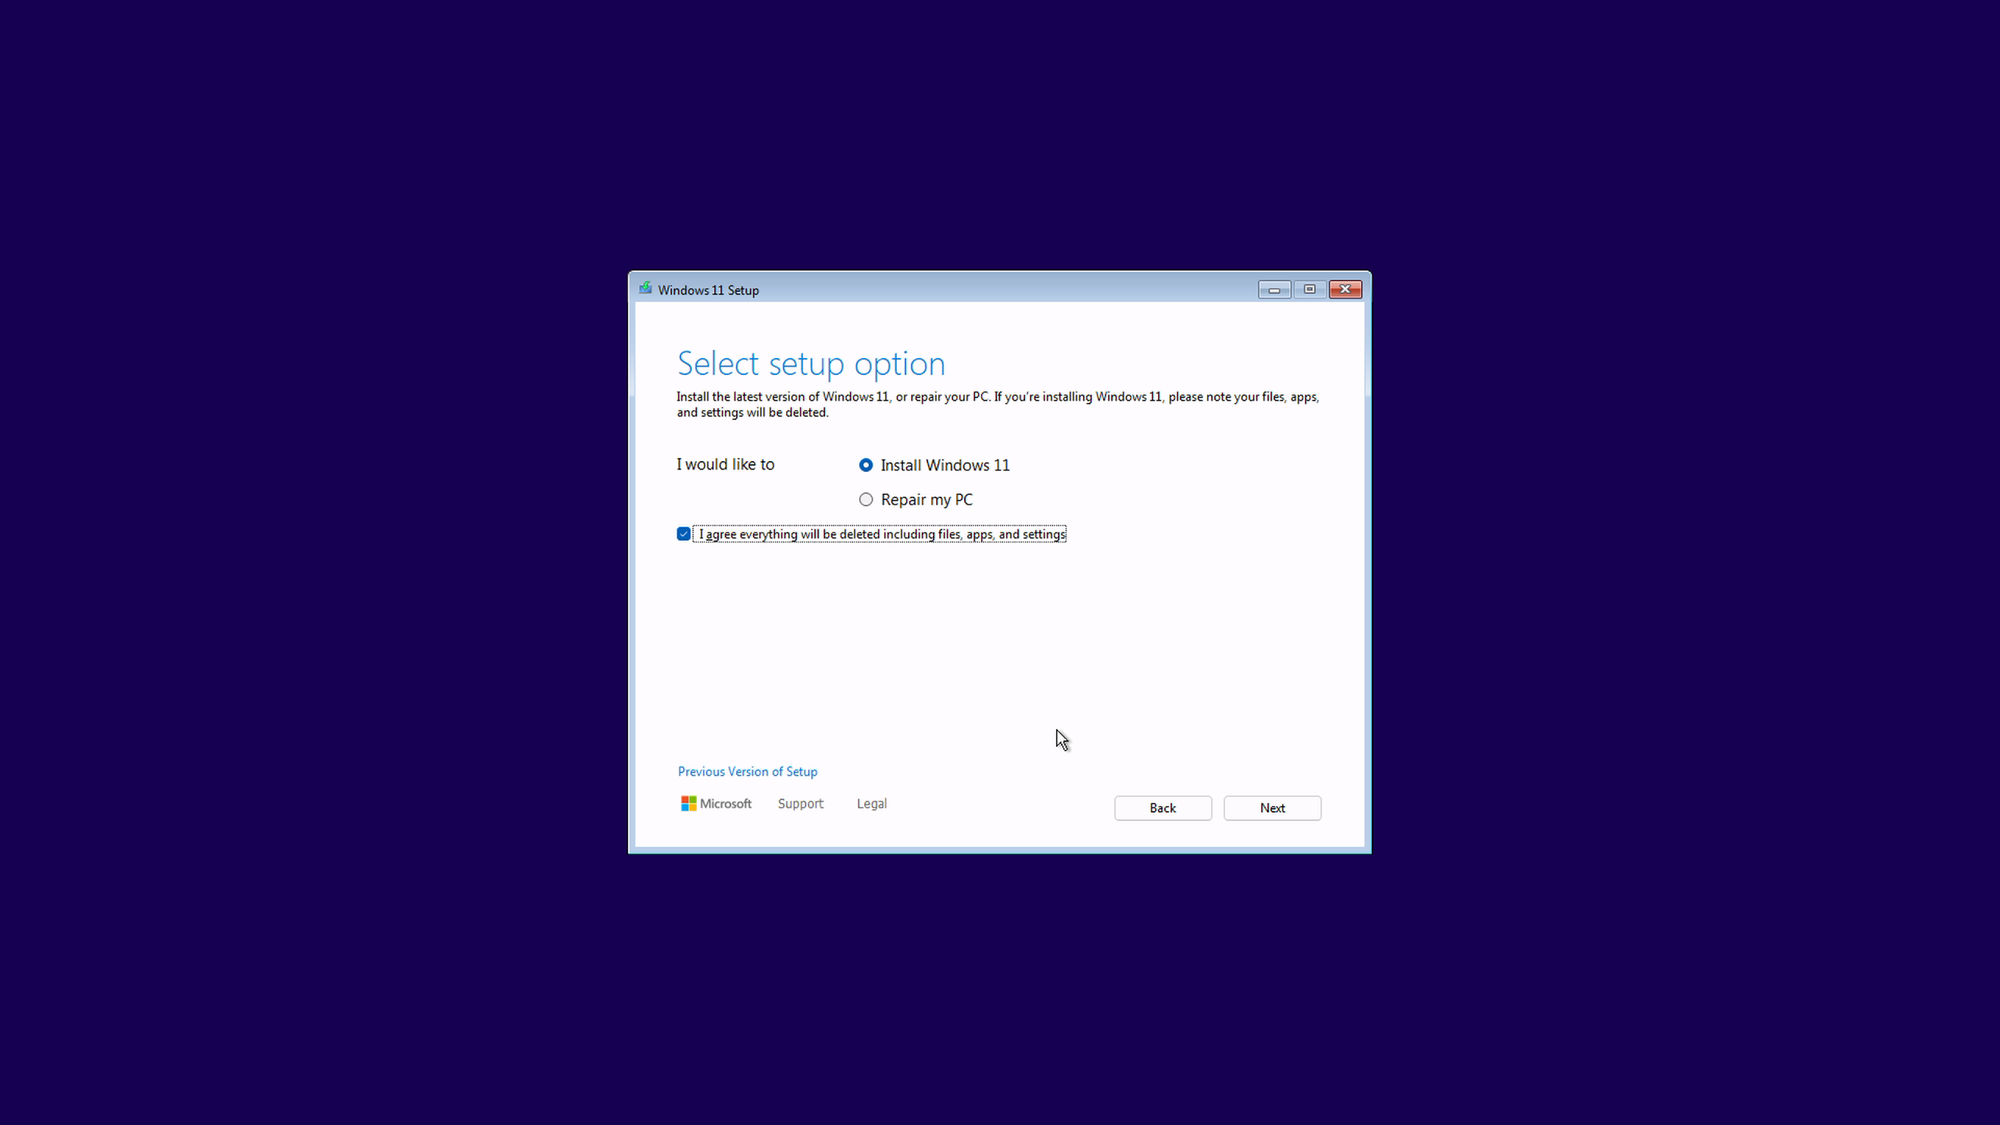
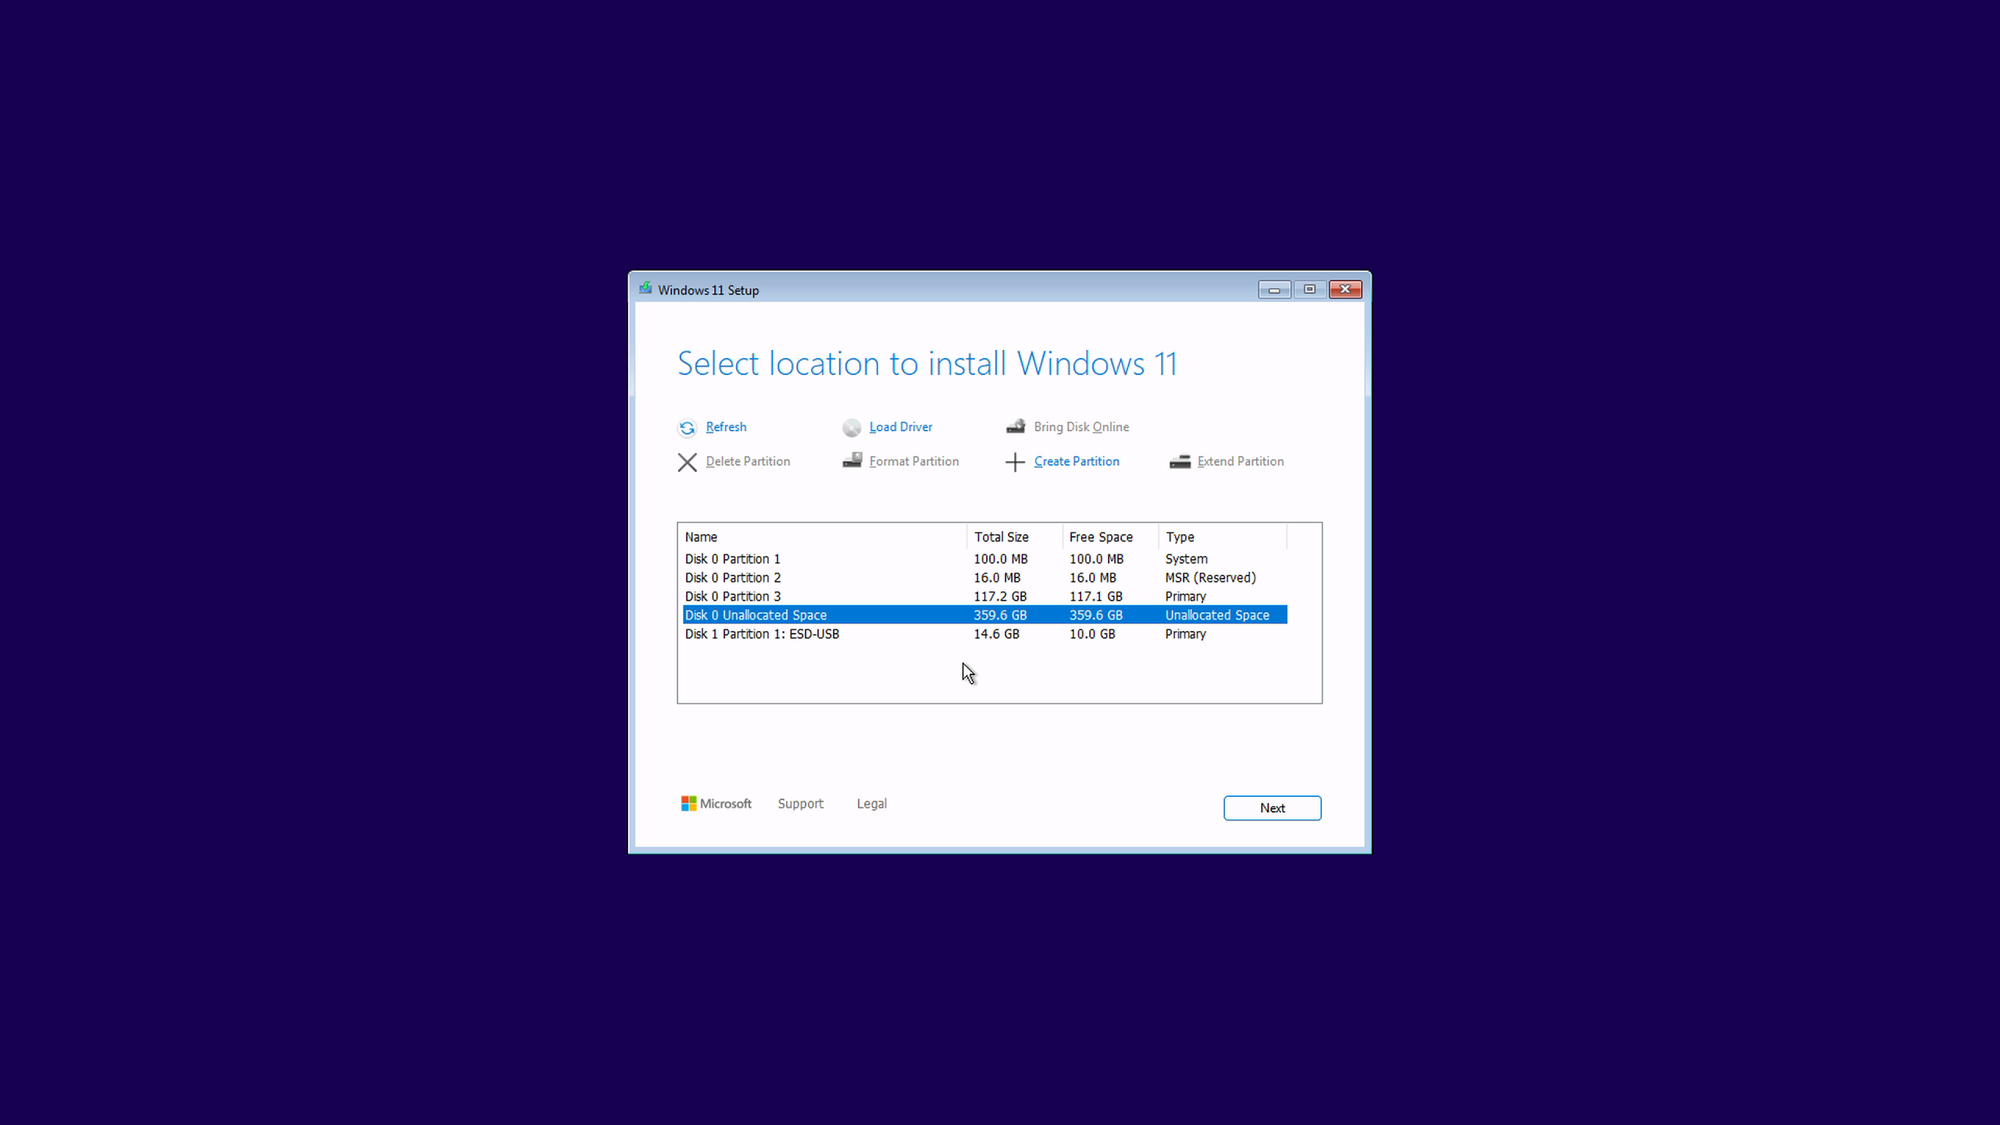
You should be presented with the following screen:
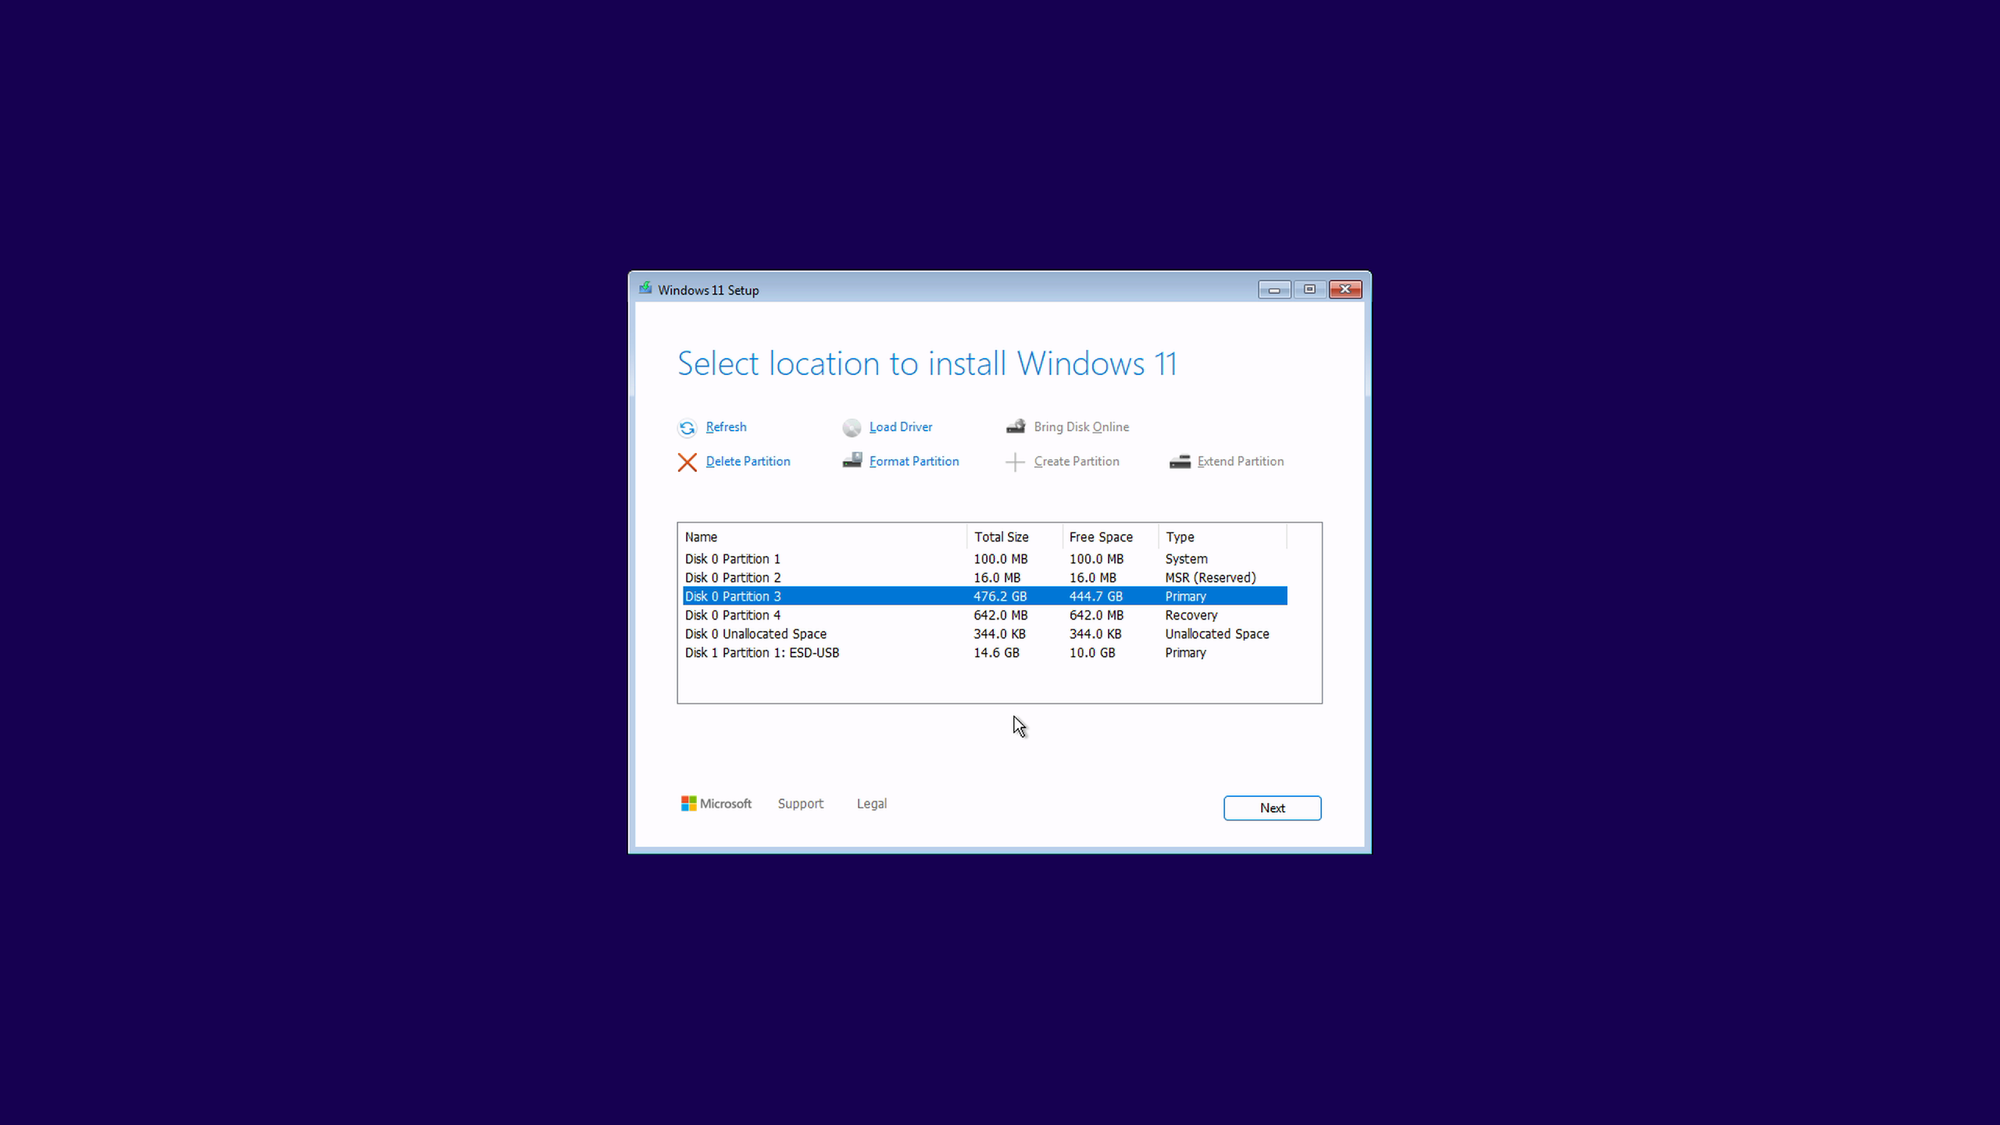
Delete all partitions on your primary disk, leaving only "Unallocated Space". Make sure you only delete the partitions on the primary disk. The flash drive, for example, will also be listed – make sure you don't delete that! You should end up with the following:
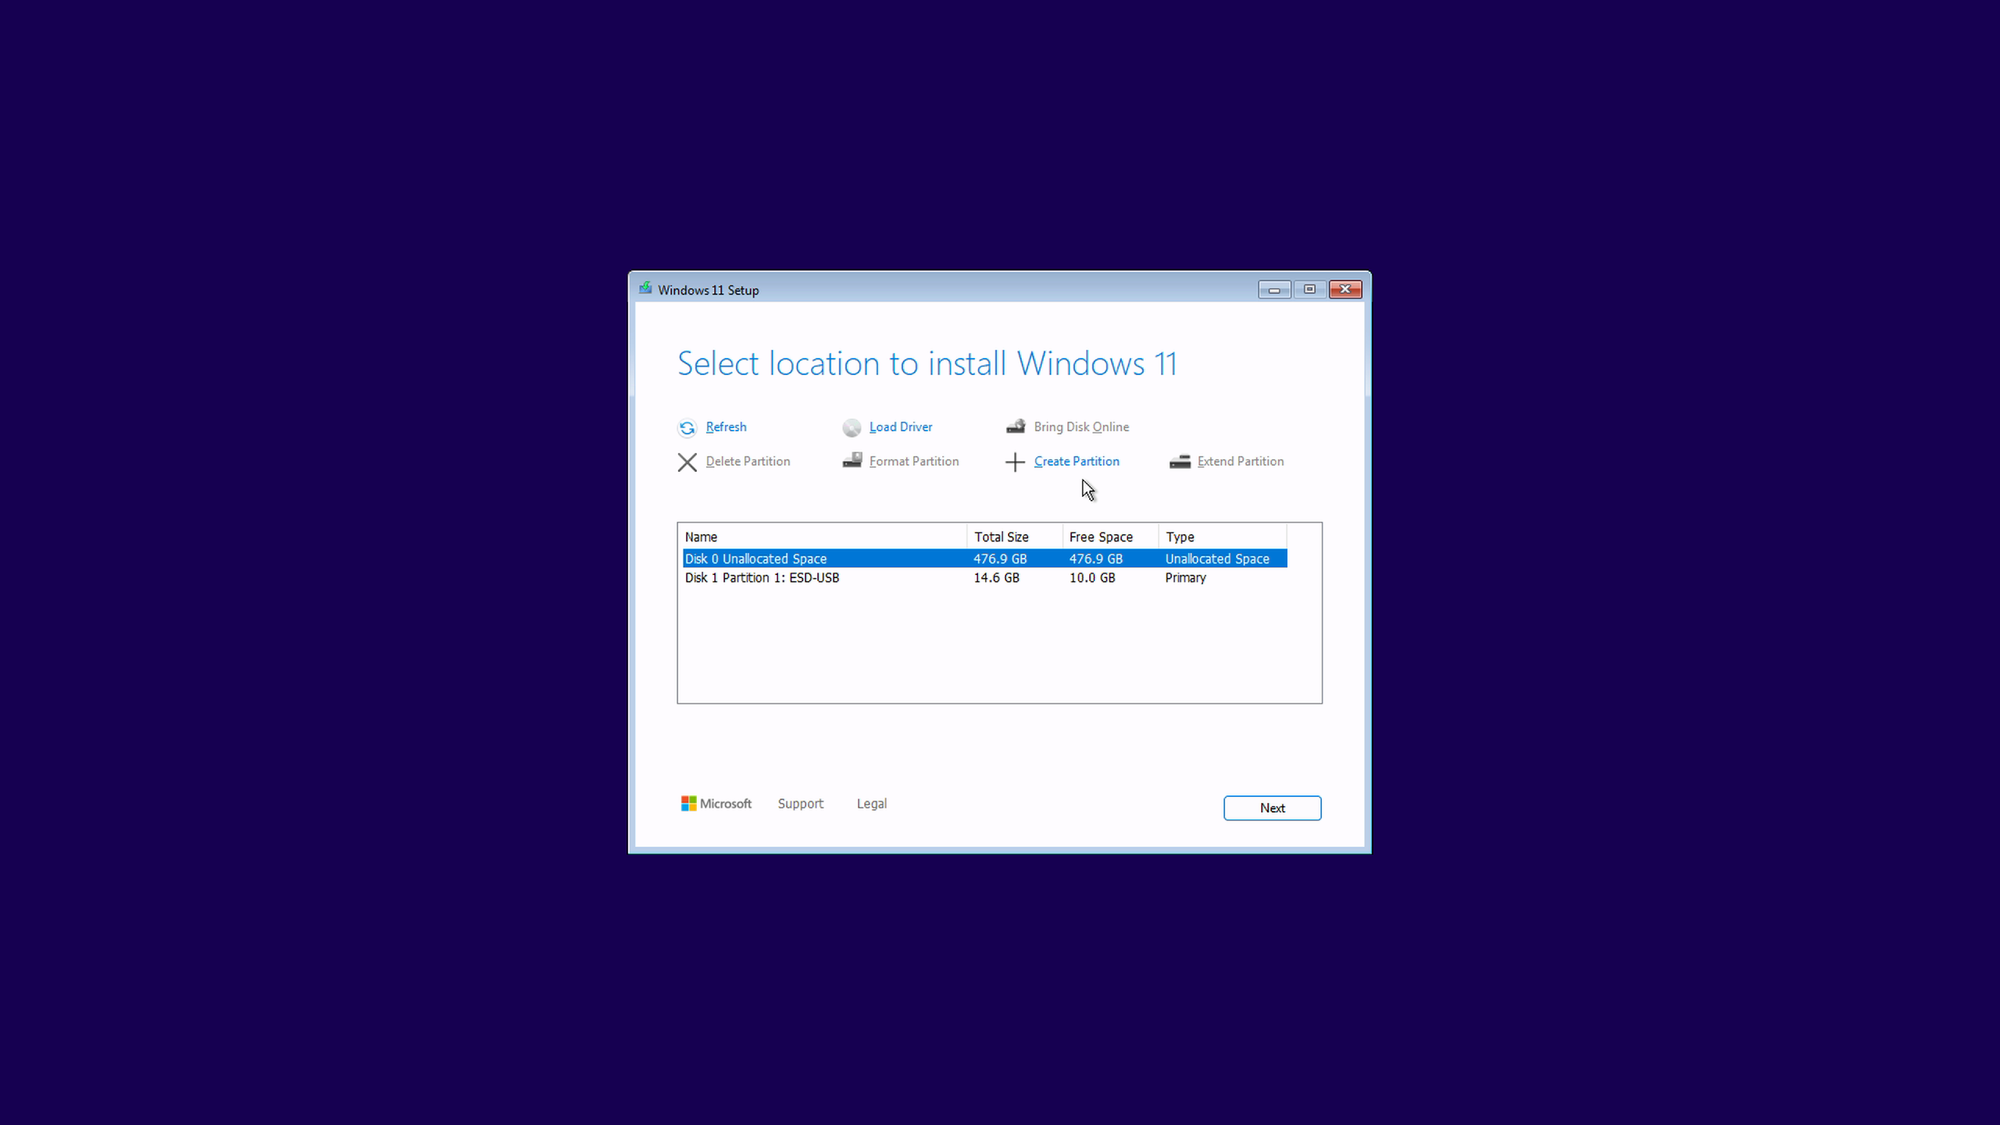
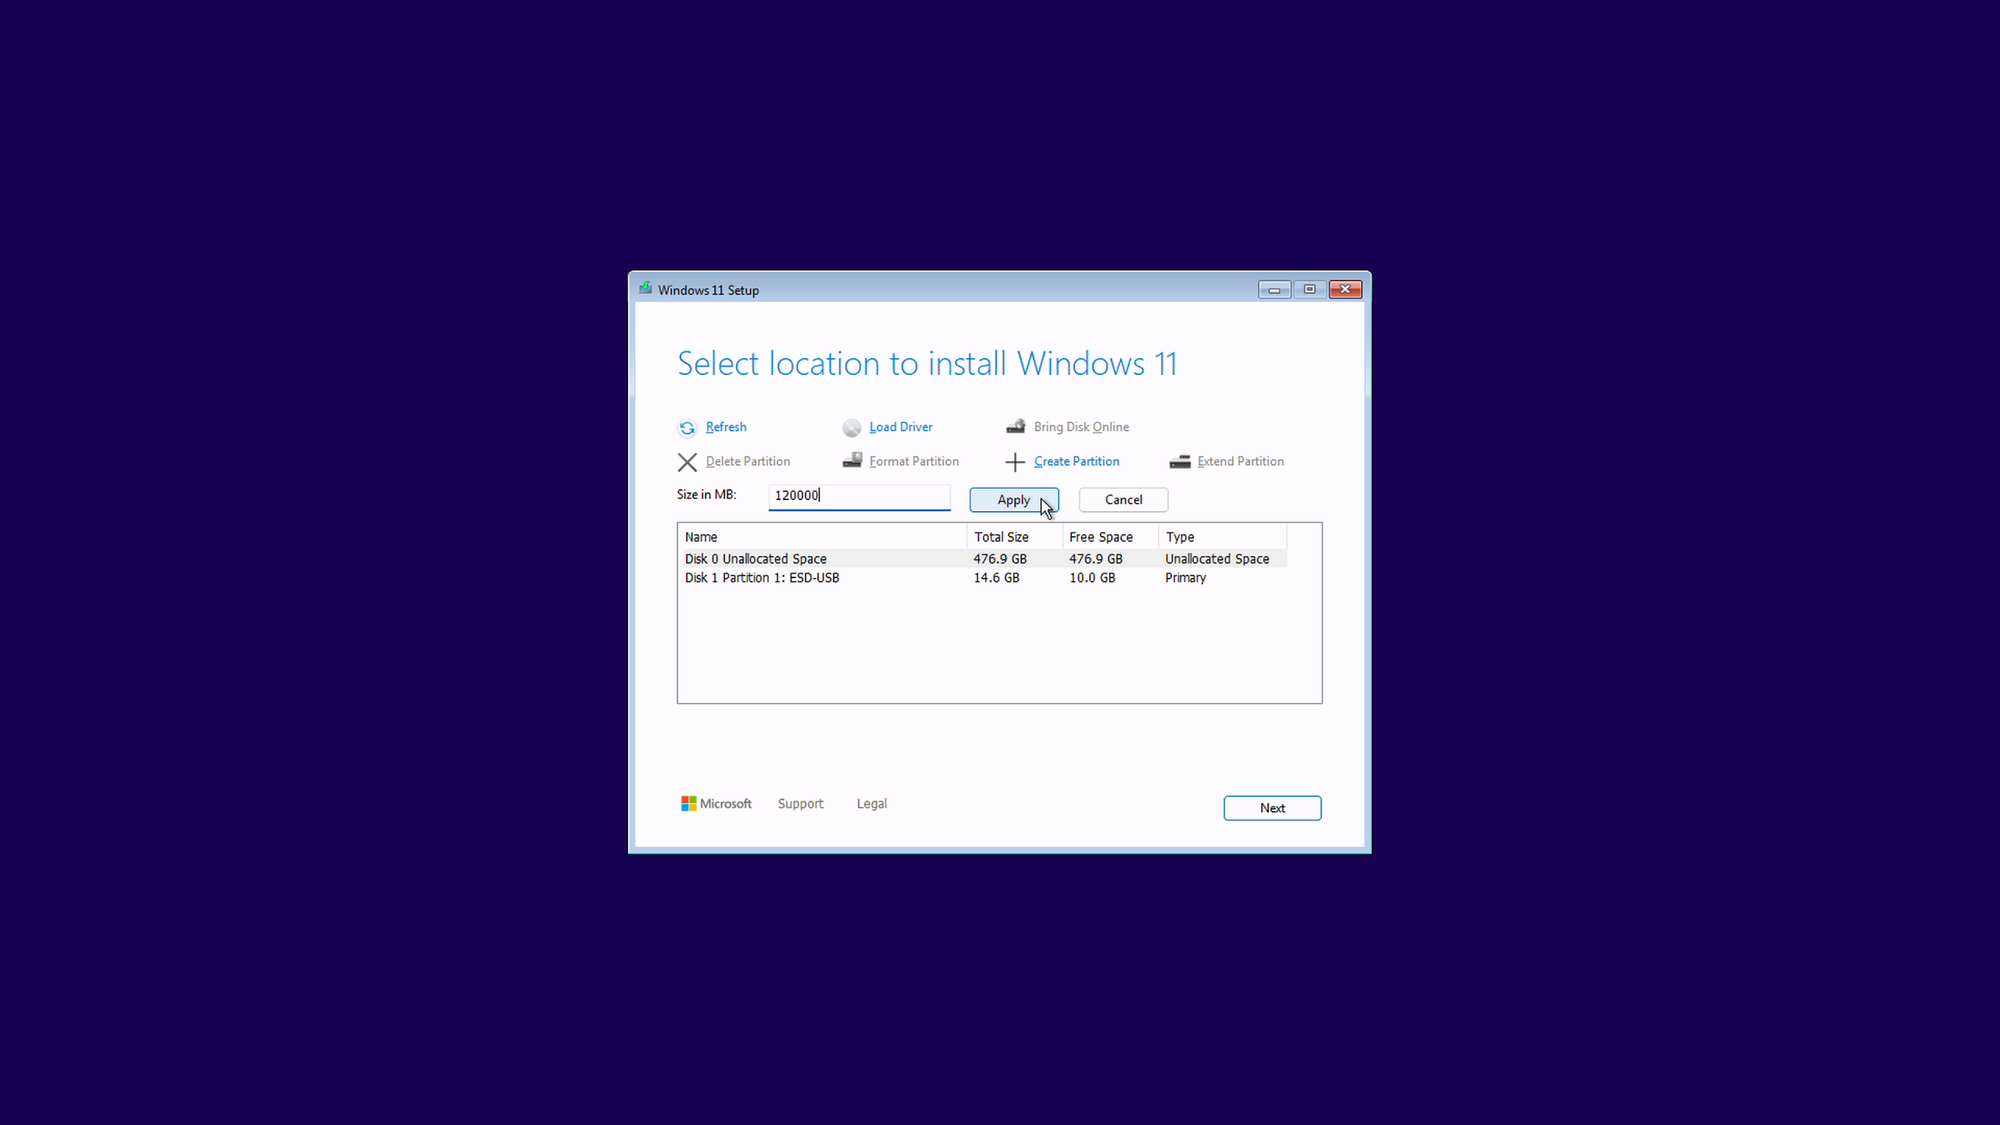
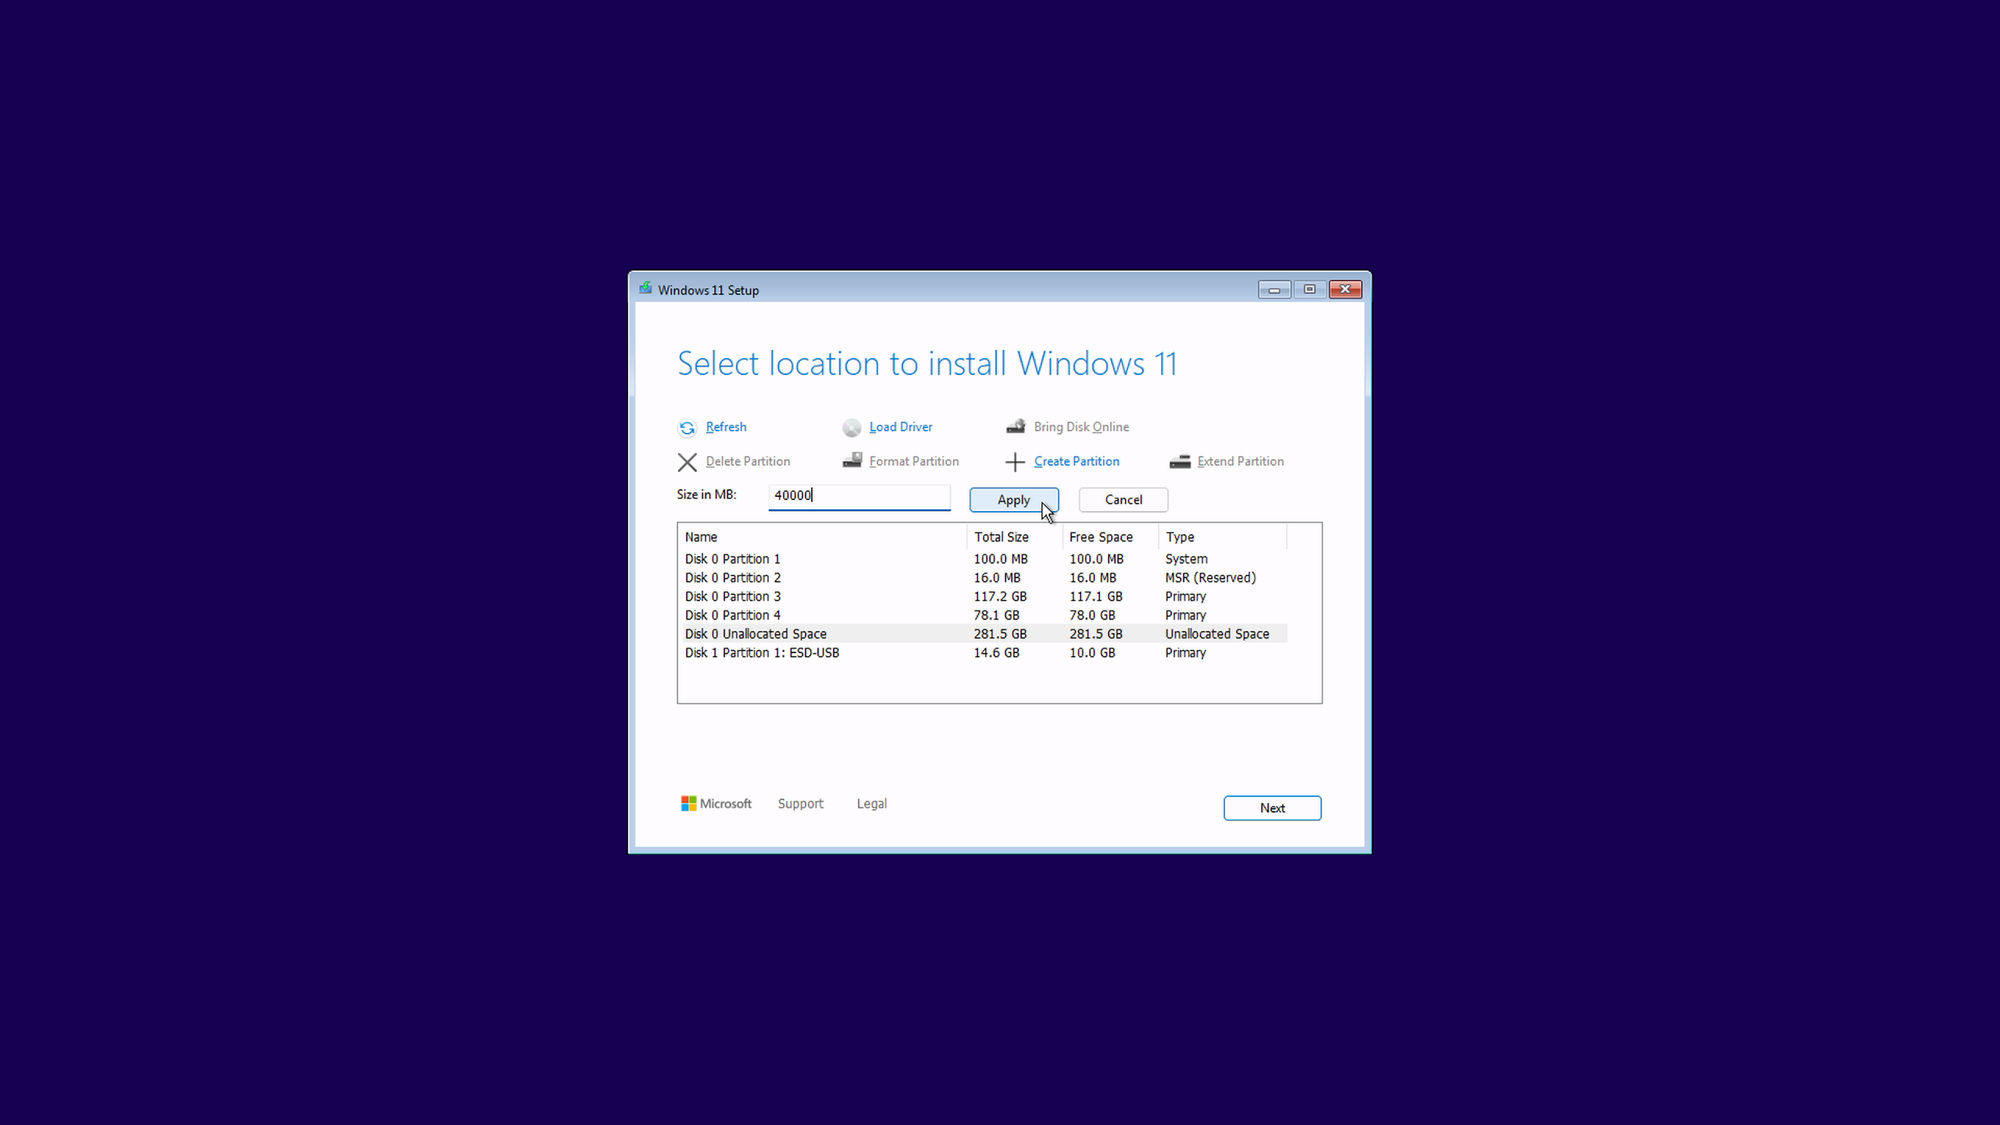
Select the unallocated space, click "Create Partition", set its size to "120000", then click "Apply":
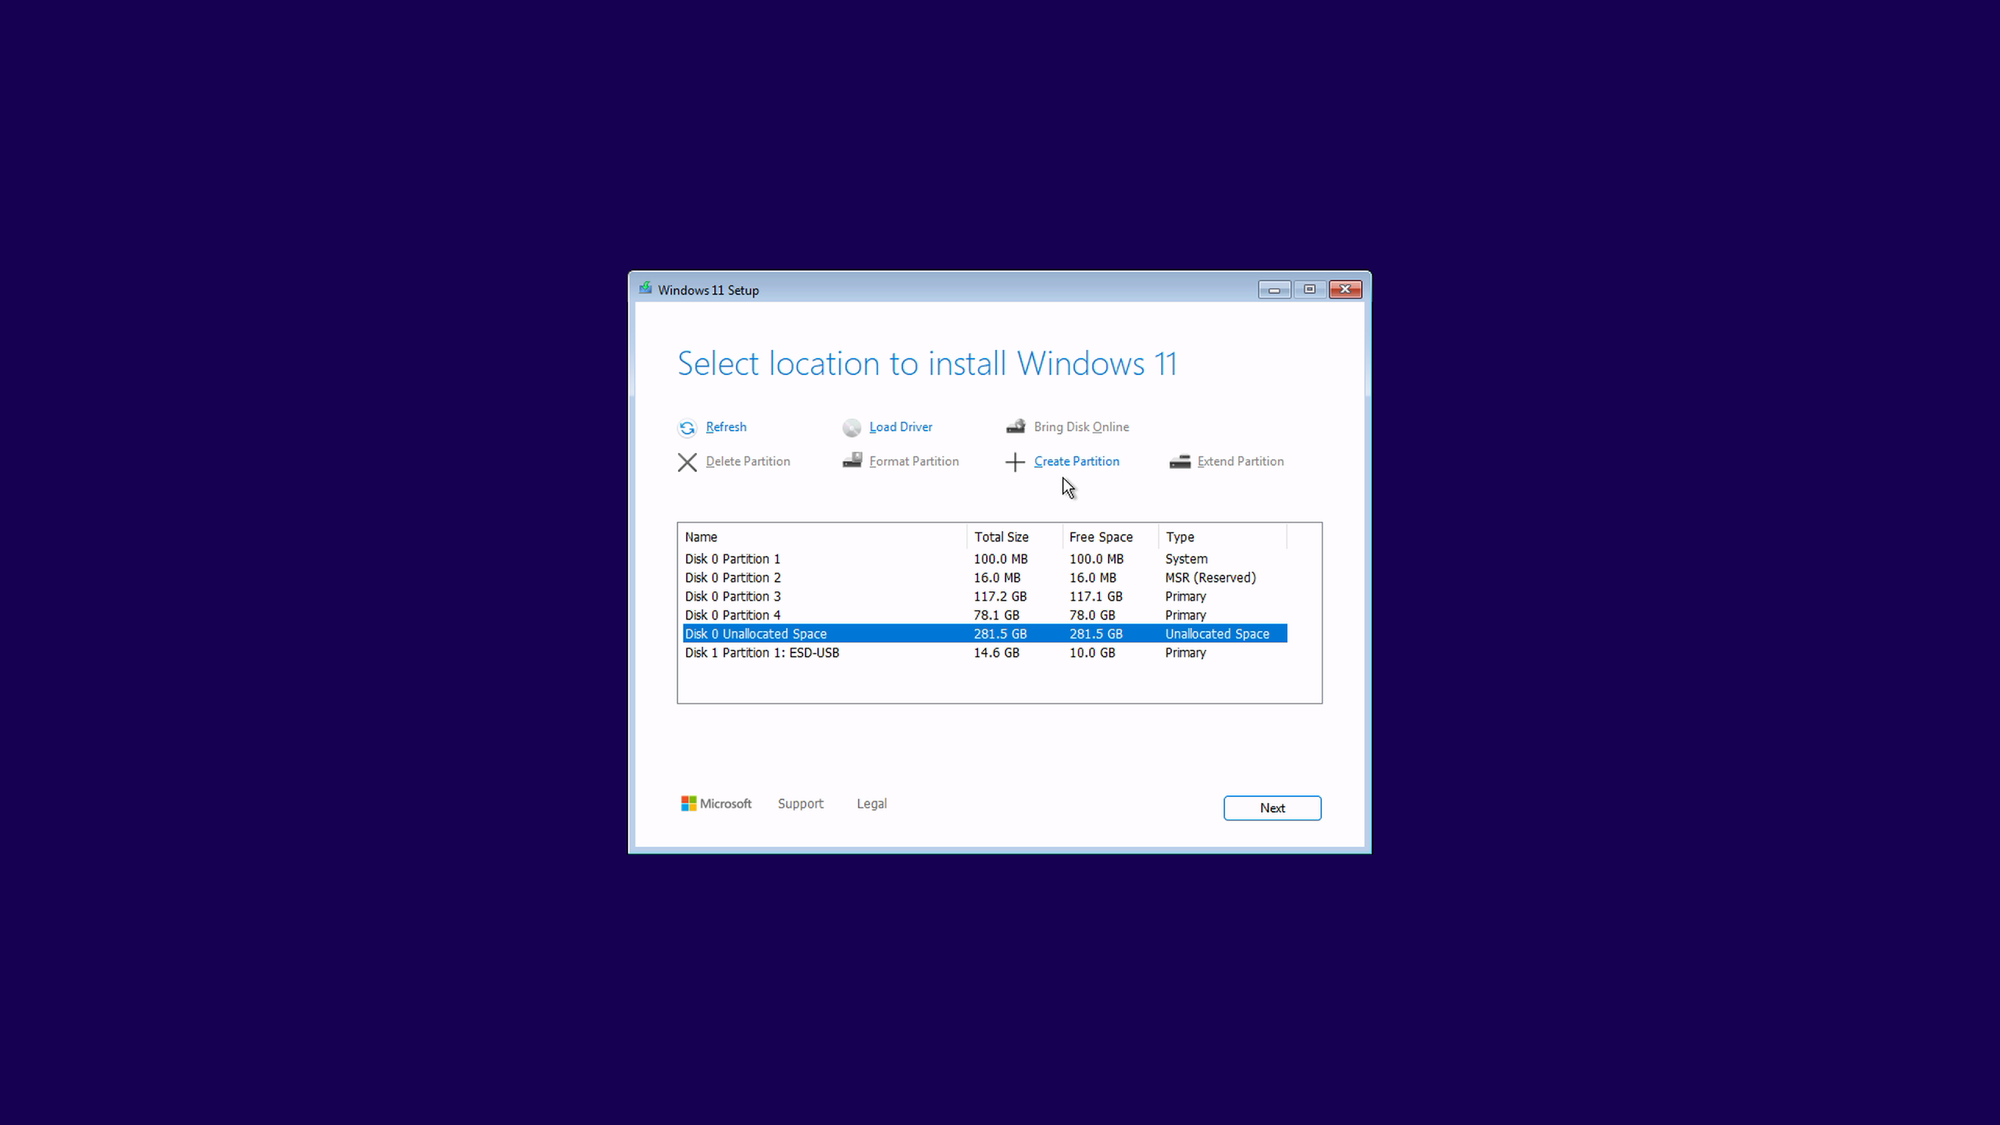
You should now have something like this (the Windows installer will create some additional partitions, like ESP and Recovery):
Keep the unallocated space selected and create our first shared partition (NTFS):

Do the same for the second shared partition (FAT32):
We will format this partition later on to FAT32. For now you should have the following partition setup (ignore the fact that "Unallocated Space" now shows up as "Primary" – I think I may have re-ran the installer before taking the screenshot below):
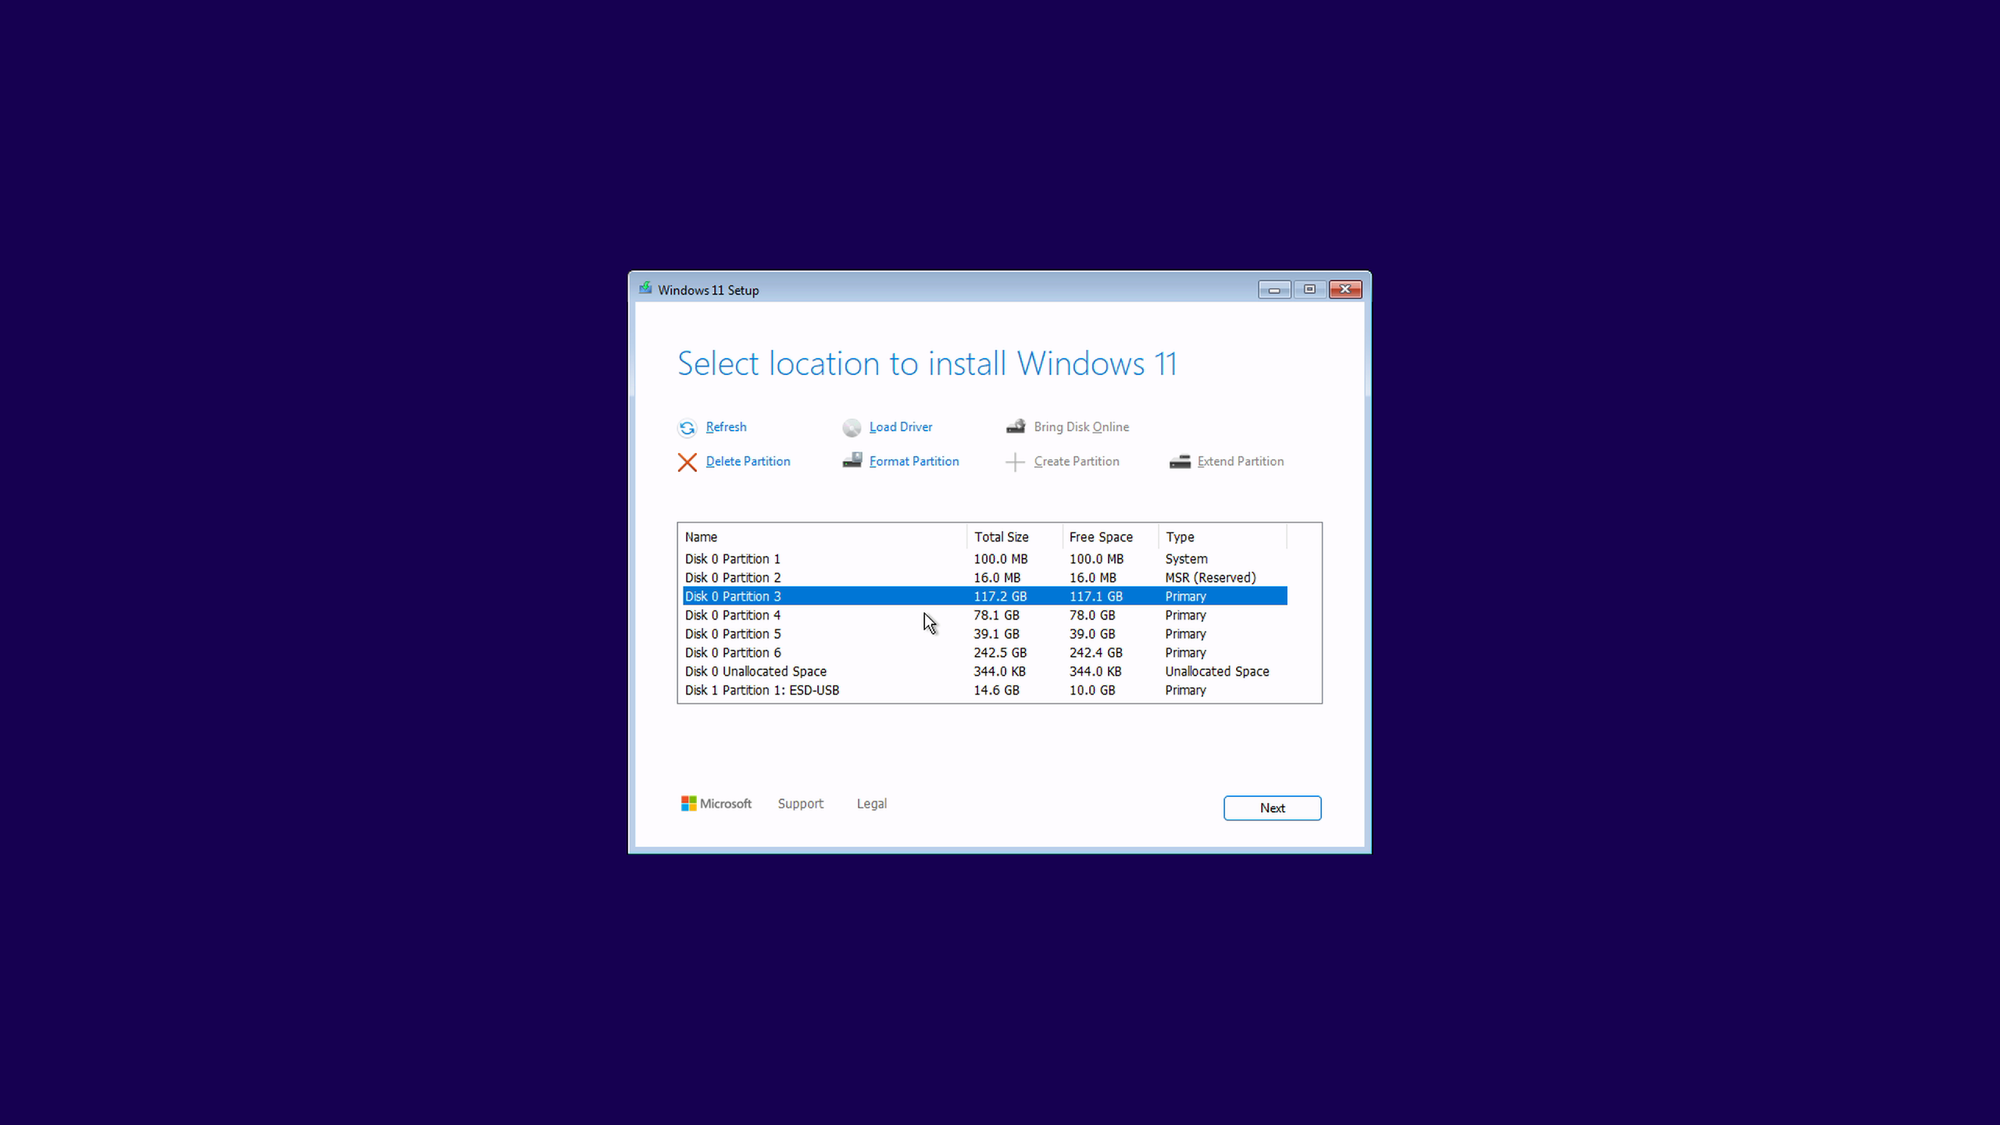
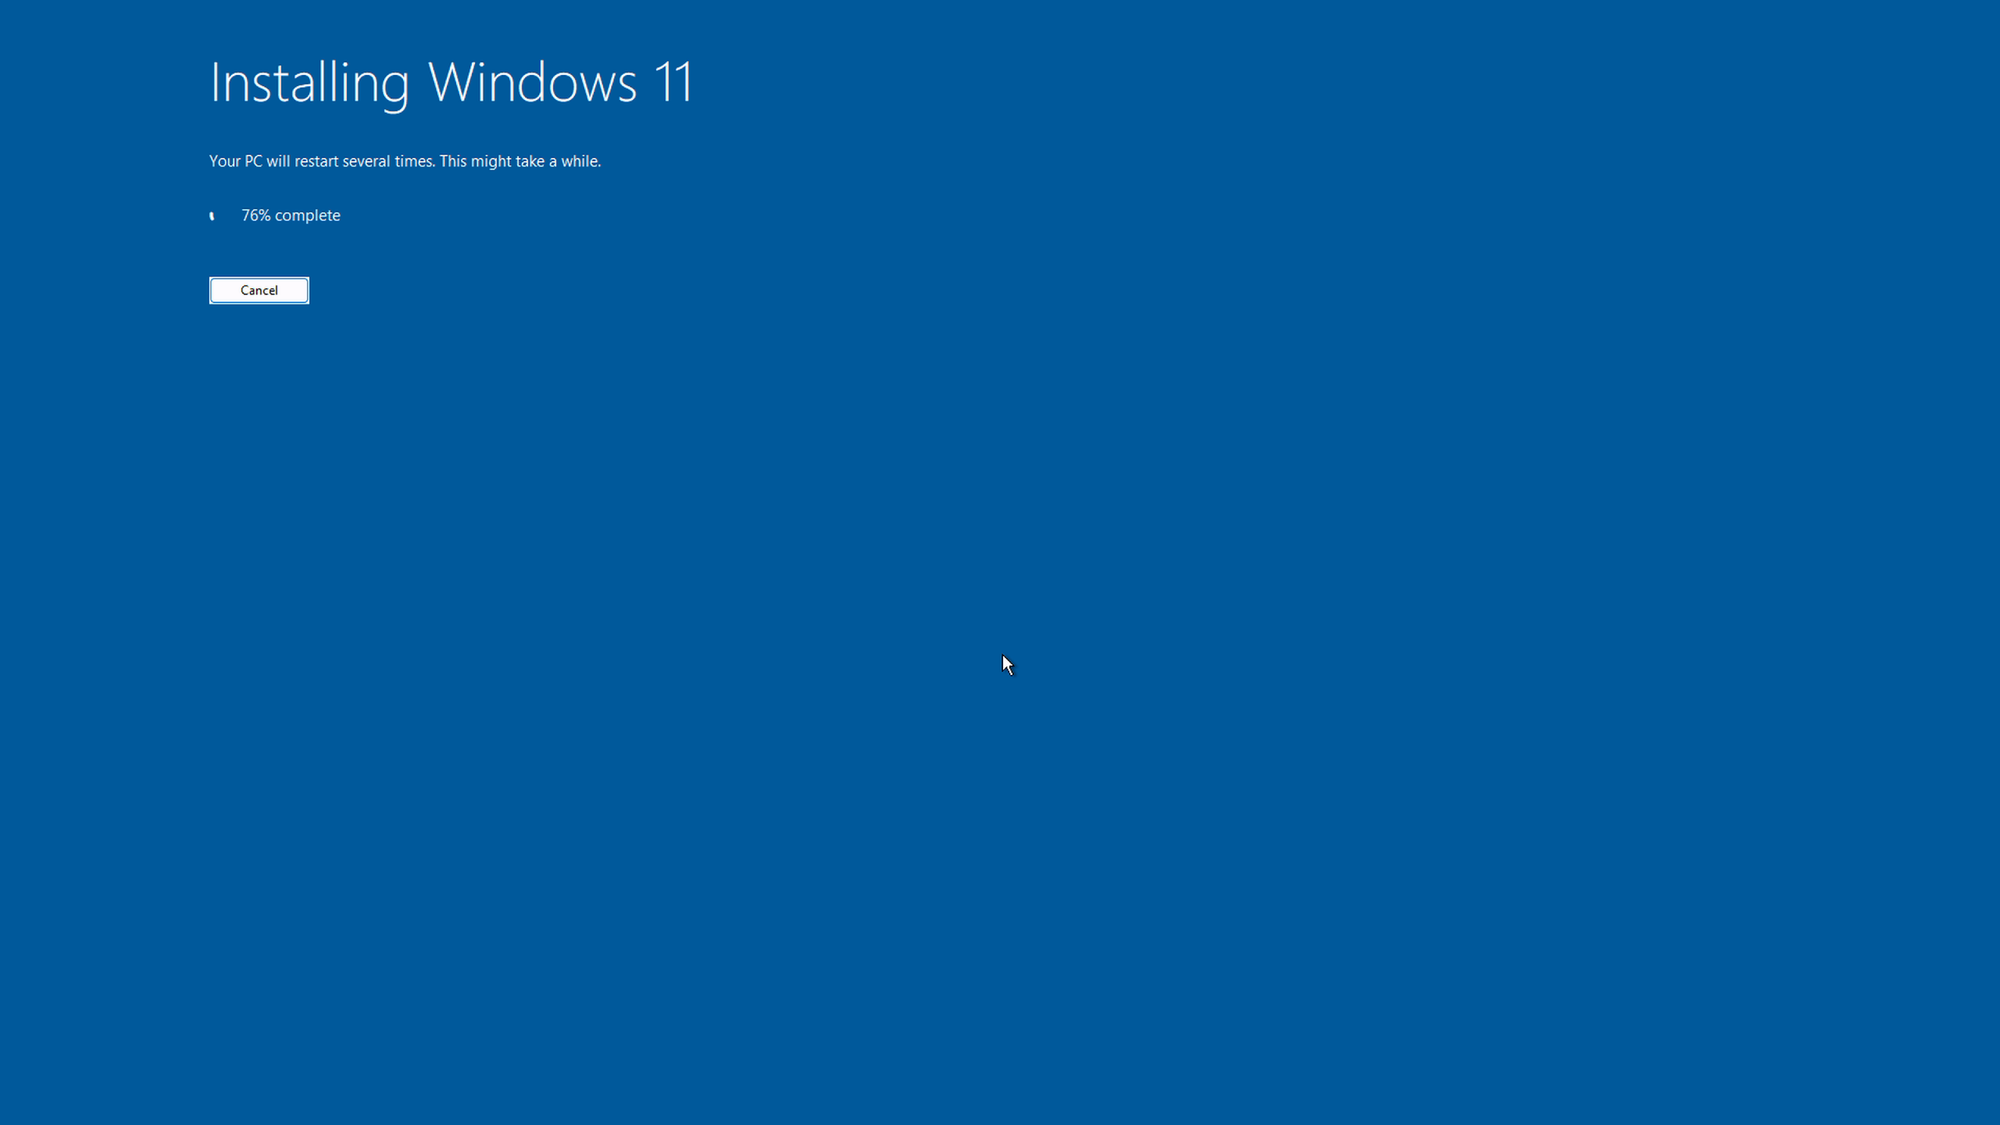
Highlight the first primary partition we created and click "Next". Windows should begin installing at this point. It may also reboot one or more times during the installation:
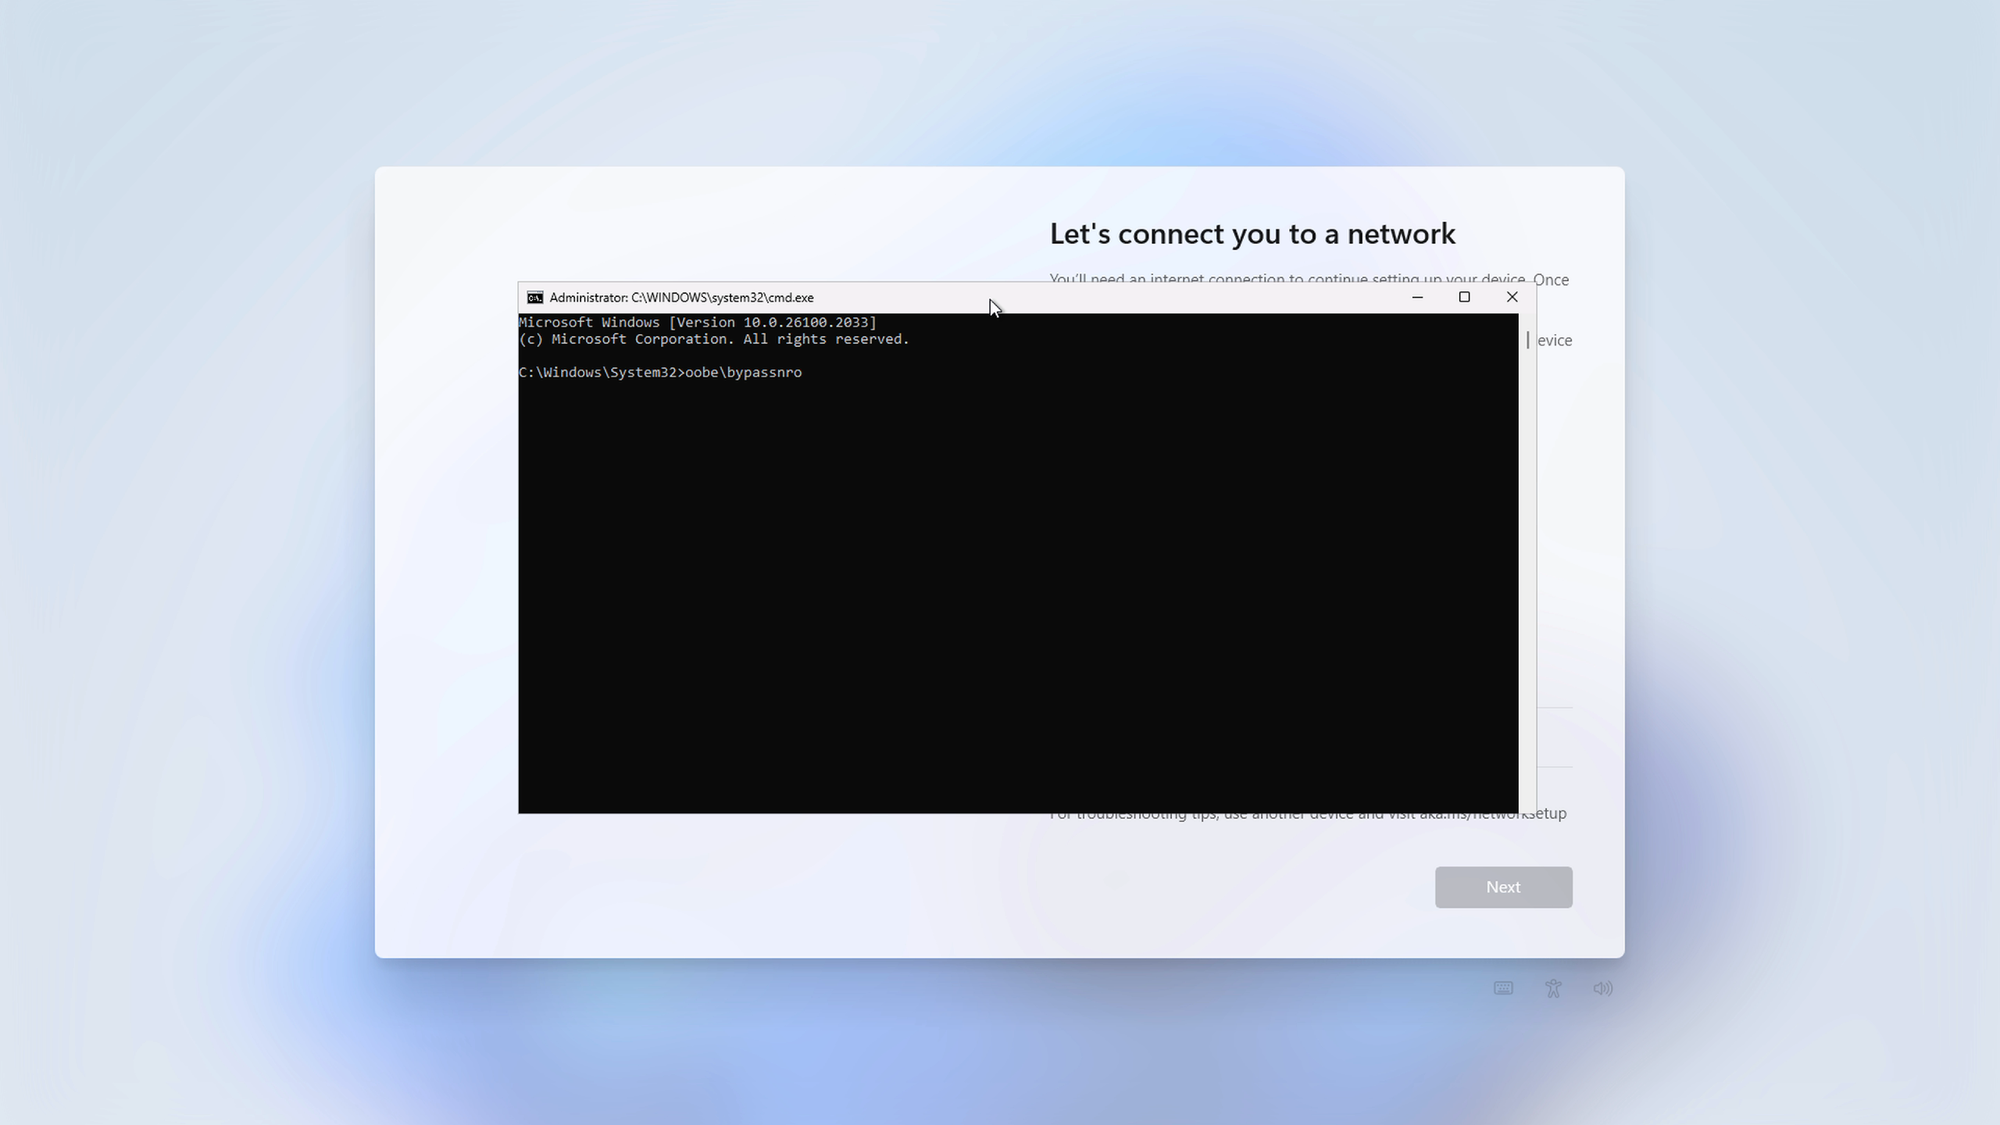
Select your keyboard layout and any other options presented to you till you get to the "Let's connect you to a network" screen. This is required for signing you into a Microsoft account. If you're like me and prefer to use local accounts instead, open the command prompt by hitting Shift(+Fn)+F10 then type in "oobe\bypassnro":
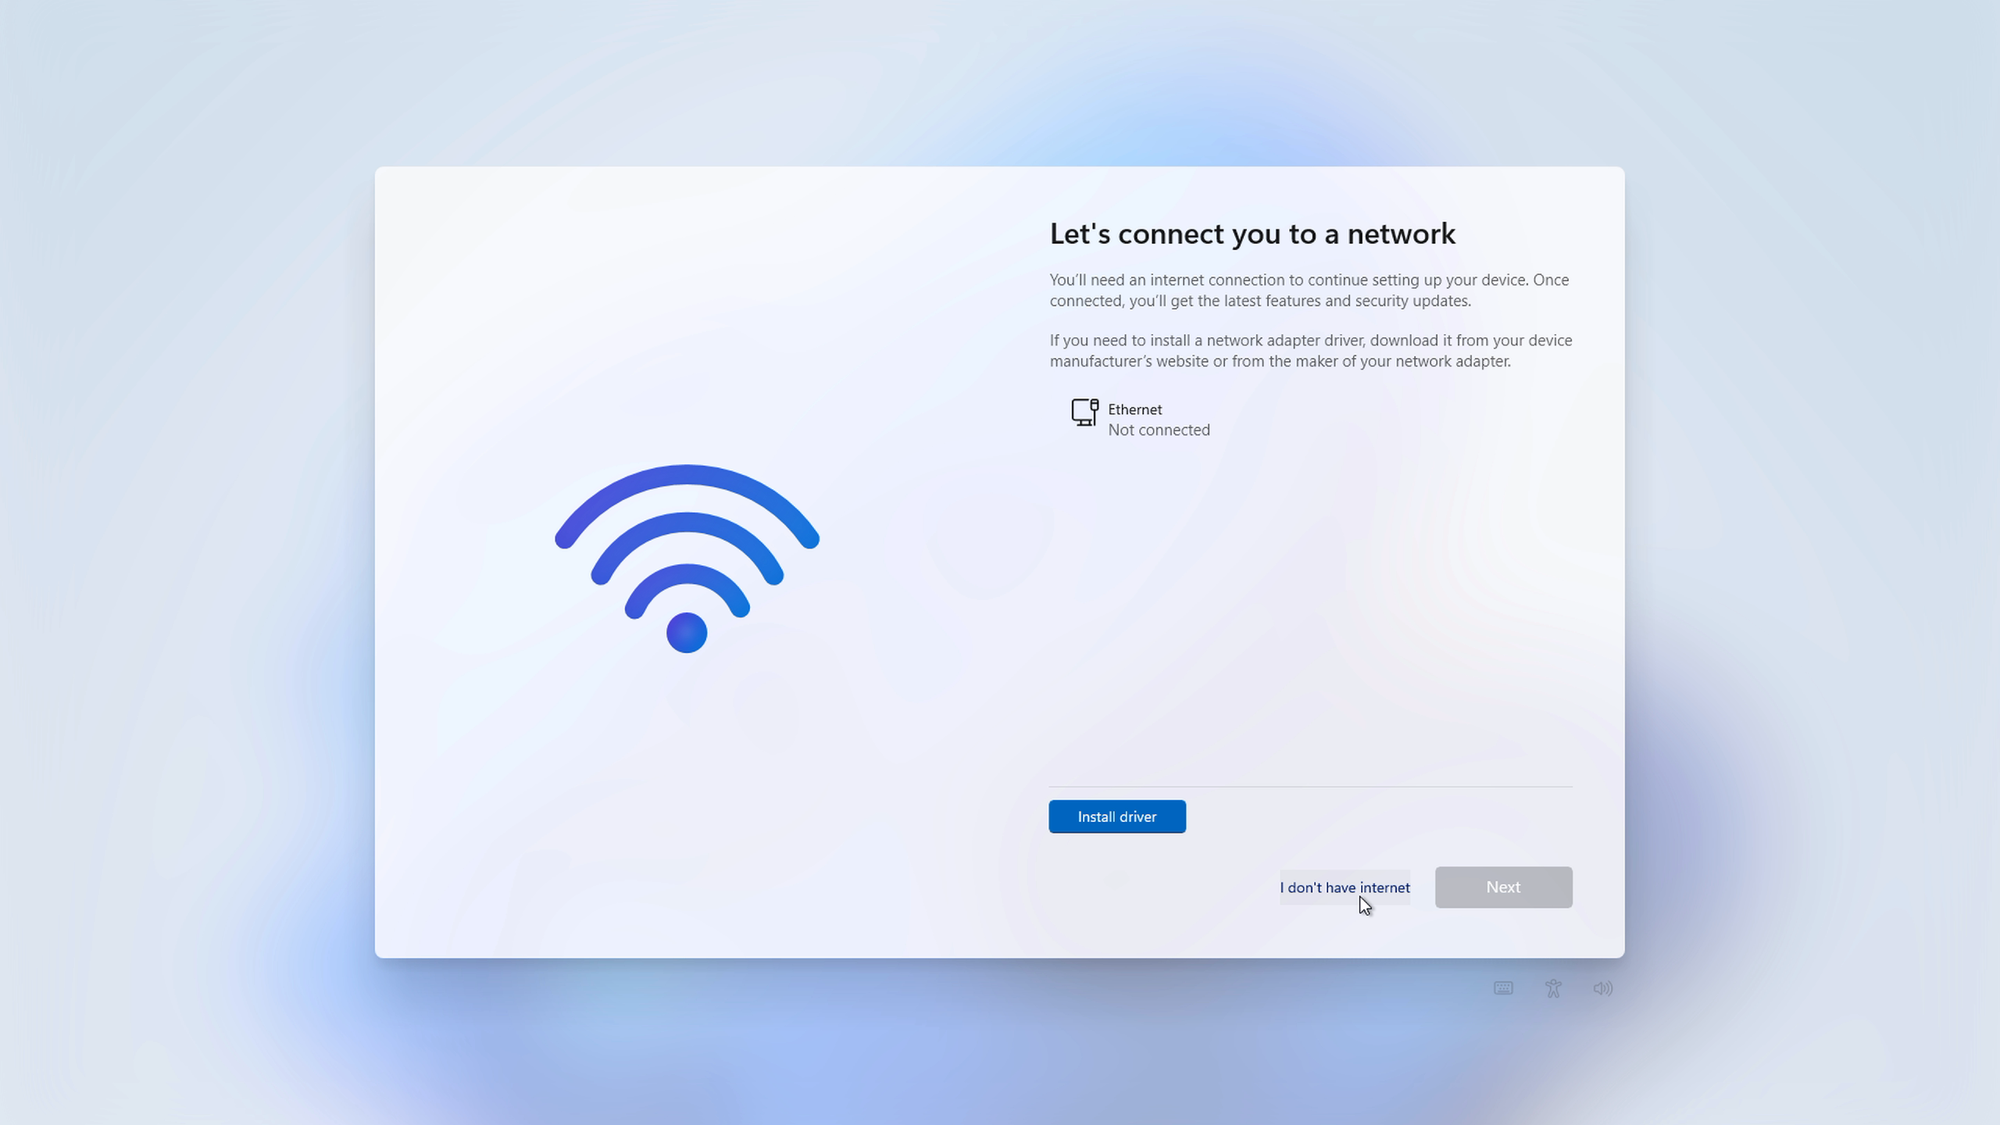
The installer will restart and may repeat some of the previous steps. Once you reach the "Let's connect you to a network" screen again, you should be able to bypass network setup by clicking "I don't have internet":
Continue with the remaining steps (privacy settings and whatnot) and that should be it! If you reboot, your machine will boot directly into Windows.
Installing Linux
Let's head back to the helper FreeBSD machine and download everyone's favorite Linux distro, right?

Point your browser to the Arch Linux download page and get the latest amd64 iso. Once downloaded, dd the image to the installer drive:
# dd if=PATH/TO/LINUX_ISO_FILE.iso of=/dev/daX bs=1mAgain, make sure to use the correct paths, particularly the flash drive's dev node. When finished writing the image, boot the target machine into your newly created drive.
Note: you will need to disable Secure Boot from your BIOS/firmware configuration utility in order to be able to boot Linux (and FreeBSD later on).
The following steps only apply if you indeed chose Arch Linux as your desired distro. If you decided to use something else, you can skip the remaining steps in this section, but pay attention to the partitioning scheme I will describe below.
This is by no means a comprehensive guide on how to install Arch Linux, but I will try to cover every step needed to complete the installation, albeit in a concise manner.
At the initial root prompt, connect to a wireless networking by issuing the following commands:
# iwctl
[iwd]# device list
This should list your wireless interface. I will assume it's called wlan0. While still at the iwd prompt, run the following commands:
[iwd]# station wlan0 scan
[iwd]# station wlan0 get-networks
[iwd]# station wlan0 connect "NAME_OF_YOUR_WIFI_AP"
Enter your WiFi password then type exit to return to the root prompt. You should now be connected.
Now synchronize the system clock by running:
# timedatectlNext comes the most important bit: partitioning.
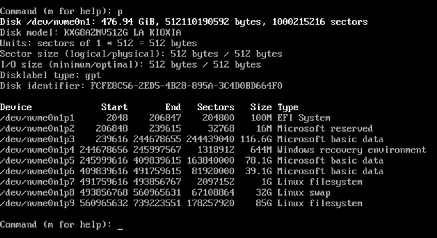
Type fdisk -l to see a list of storage device connected to your system. Mark the name of your primary storage. In my case, it's nvme0n1 (with partitions presented as nvme0n1pX, where X is the partition number). It should be laid out similar to how we partitioned it in Windows, e.g. an EFI system partition, possibly followed by some padding, then our primary (~120GB) Windows partition, etc.
Now let's configure our new Linux partitions:
# fdisk /dev/nvme0n1This will drop you into the fdisk prompt. Type p (followed by Enter) to list the current layout of the disk (for extra confirmation).
Now type n to create a new partition, proceed with the default values for partition number and first sector, then enter +1G for the last sector. This will create a 1GB partition for /boot. Type p to confirm the new partition was created.
Next, create the swap partition by running the following series of commands inside the fdisk prompt: n, use the default values for partition number and first sector, then enter +32G for the last sector. Change the partition type to "Linux swap" by typing t, entering the number of the partition we just created, then typing 19. Type p to confirm.
Finally, let's create our root Linux partition: type n, leave the defaults for partition number and first sector, then enter +85G. Once again, type p to confirm. You should have something like this (sorry for the low resolution):
Type w to write the changes to disk and exit fdisk.
Next, we create the filesystems for our new partitions. Make sure you use the correct partition numbers. In the example above, /boot is /dev/nvme0n1p7, swap is /dev/nvme0n1p8, and / is /dev/nvme0n1p9:
# mkfs.ext2 /dev/nvme0n1p7
# mkswap /dev/nvme0n1p8
# mkfs.ext4 /dev/nvme0n1p9
Now mount these partitions and activate swap (again, pay attention to the partition numbers – they may be different on your system):
# mount /dev/nvme0n1p9 /mnt
# mkdir /mnt/boot
# mount /dev/nvme0n1p7 /mnt/boot
# swapon /dev/nvme0n1p8
Run pacstrap:
# pacstrap -K /mnt base linux-firmwareGenereate fstab:
# genfstab -U /mnt >> /mnt/etc/fstabchroot into /mnt:
# arch-chroot /mntYou may as well install iwd and dhclient at this point so you can connect to a wireless network when you boot into the installed system:
# pacman -S iwd dhclientConfigure time zone and generate /etc/adjtime with the following commands:
# ln -sf /usr/share/zoneinfo/REGION/CITY /etc/localtime
# hwclock --systohc
Edit /etc/locale.gen and uncomment en_US.UTF-8 UTF-8 or whatever locale(s) you want to use then run locale-gen.
Create /etc/locale.conf and set your hostname:
echo "LANG=en_US.UTF-8" > /etc/locale.conf
echo "YOUR_HOST_NAME" > /etc/hostname
Set the root password:
# passwdInstall and configure grub:
# pacman -S grub efibootmgr
# mkdir /boot/EFI
# mount /dev/nvme0n1p1 /boot/EFI
# grub-install --target=x86_64-efi --bootloader-id=grub_uefi --recheck
# grub-mkconfig -o /boot/grub/grub.cfg
"grub_uefi" here will be the name of the UEFI boot entry. We could have named it "Linux", but we will keep it like this for now and change it later with efibootmgr.
Now exit chroot, unmount all partitions, and reboot:
# exit
# umount -a
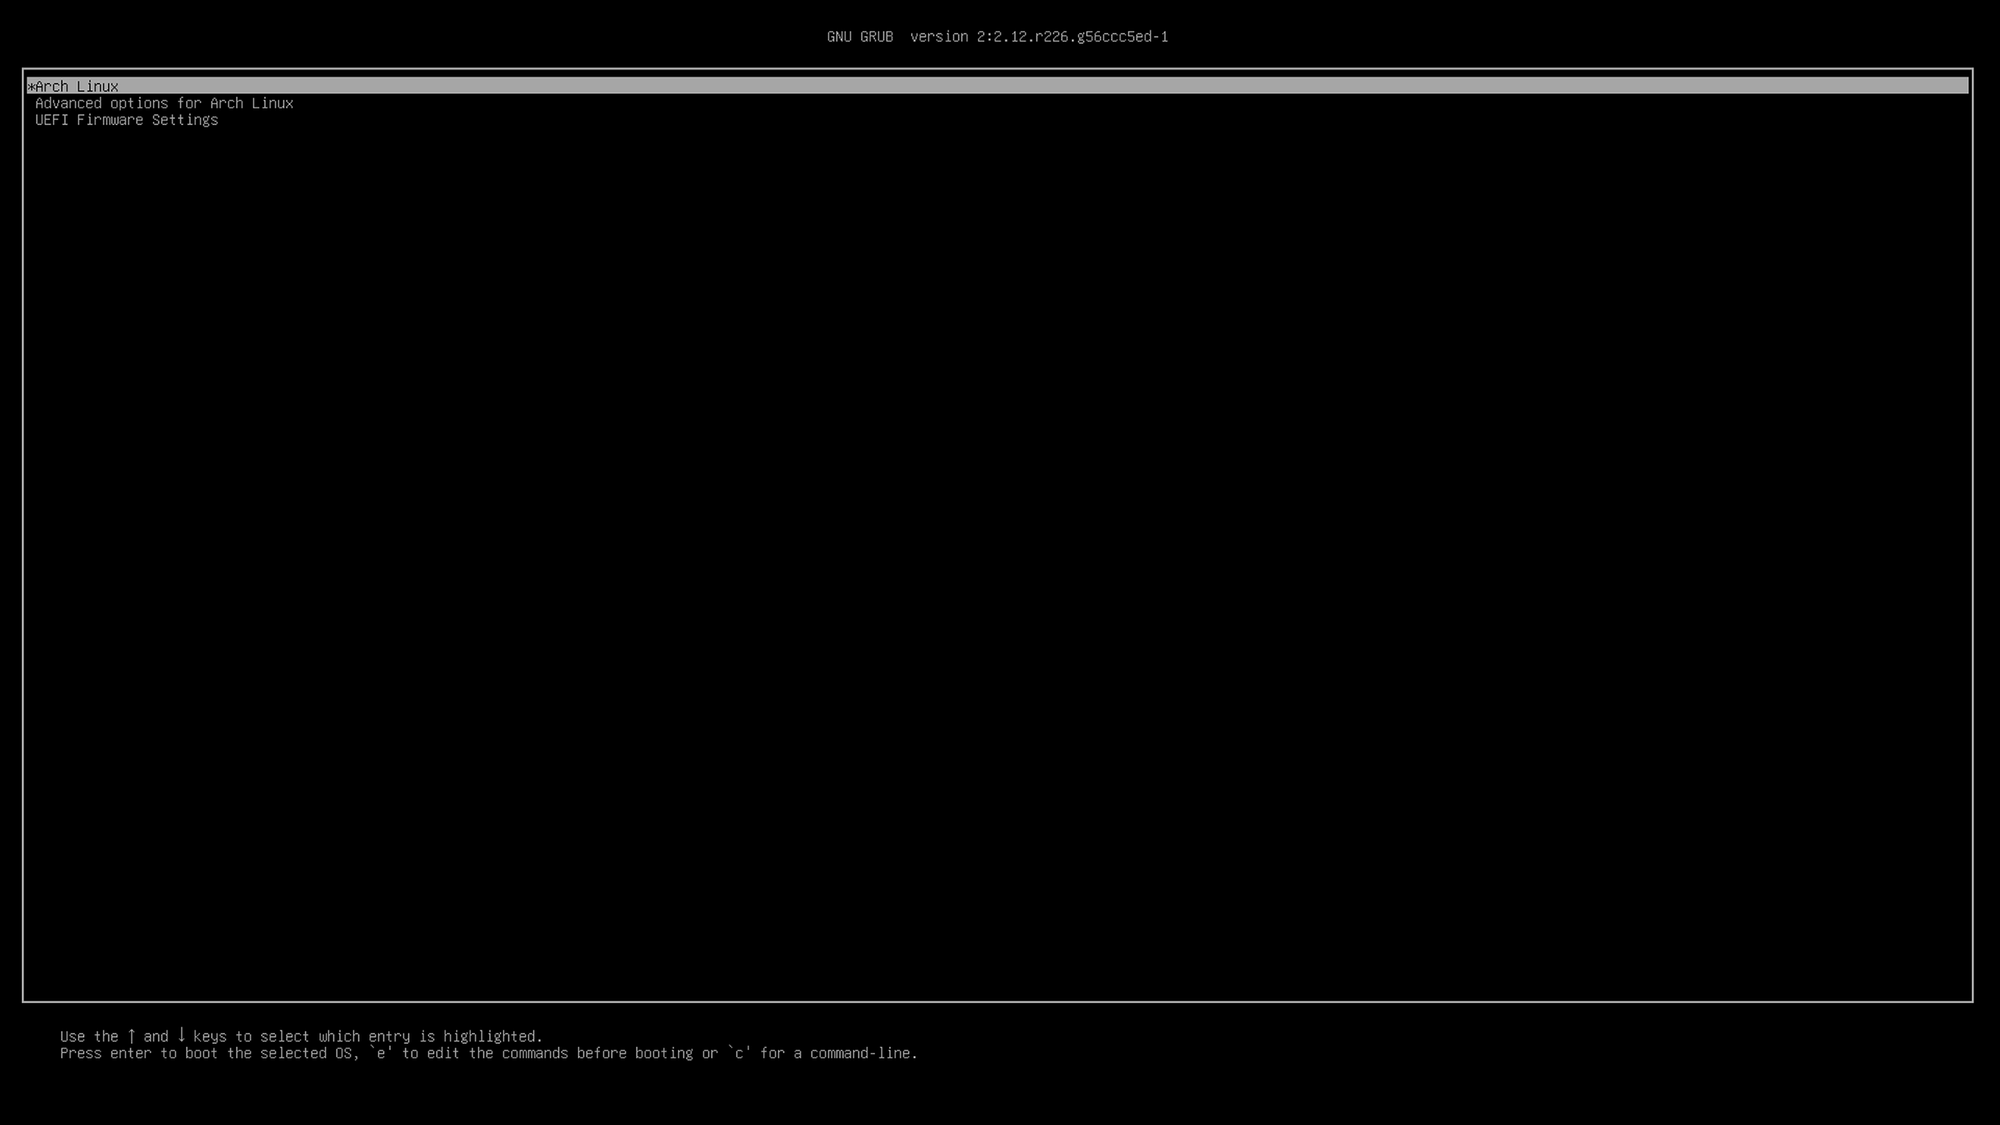
# rebootAnd voila! Your system should now boot into Linux:
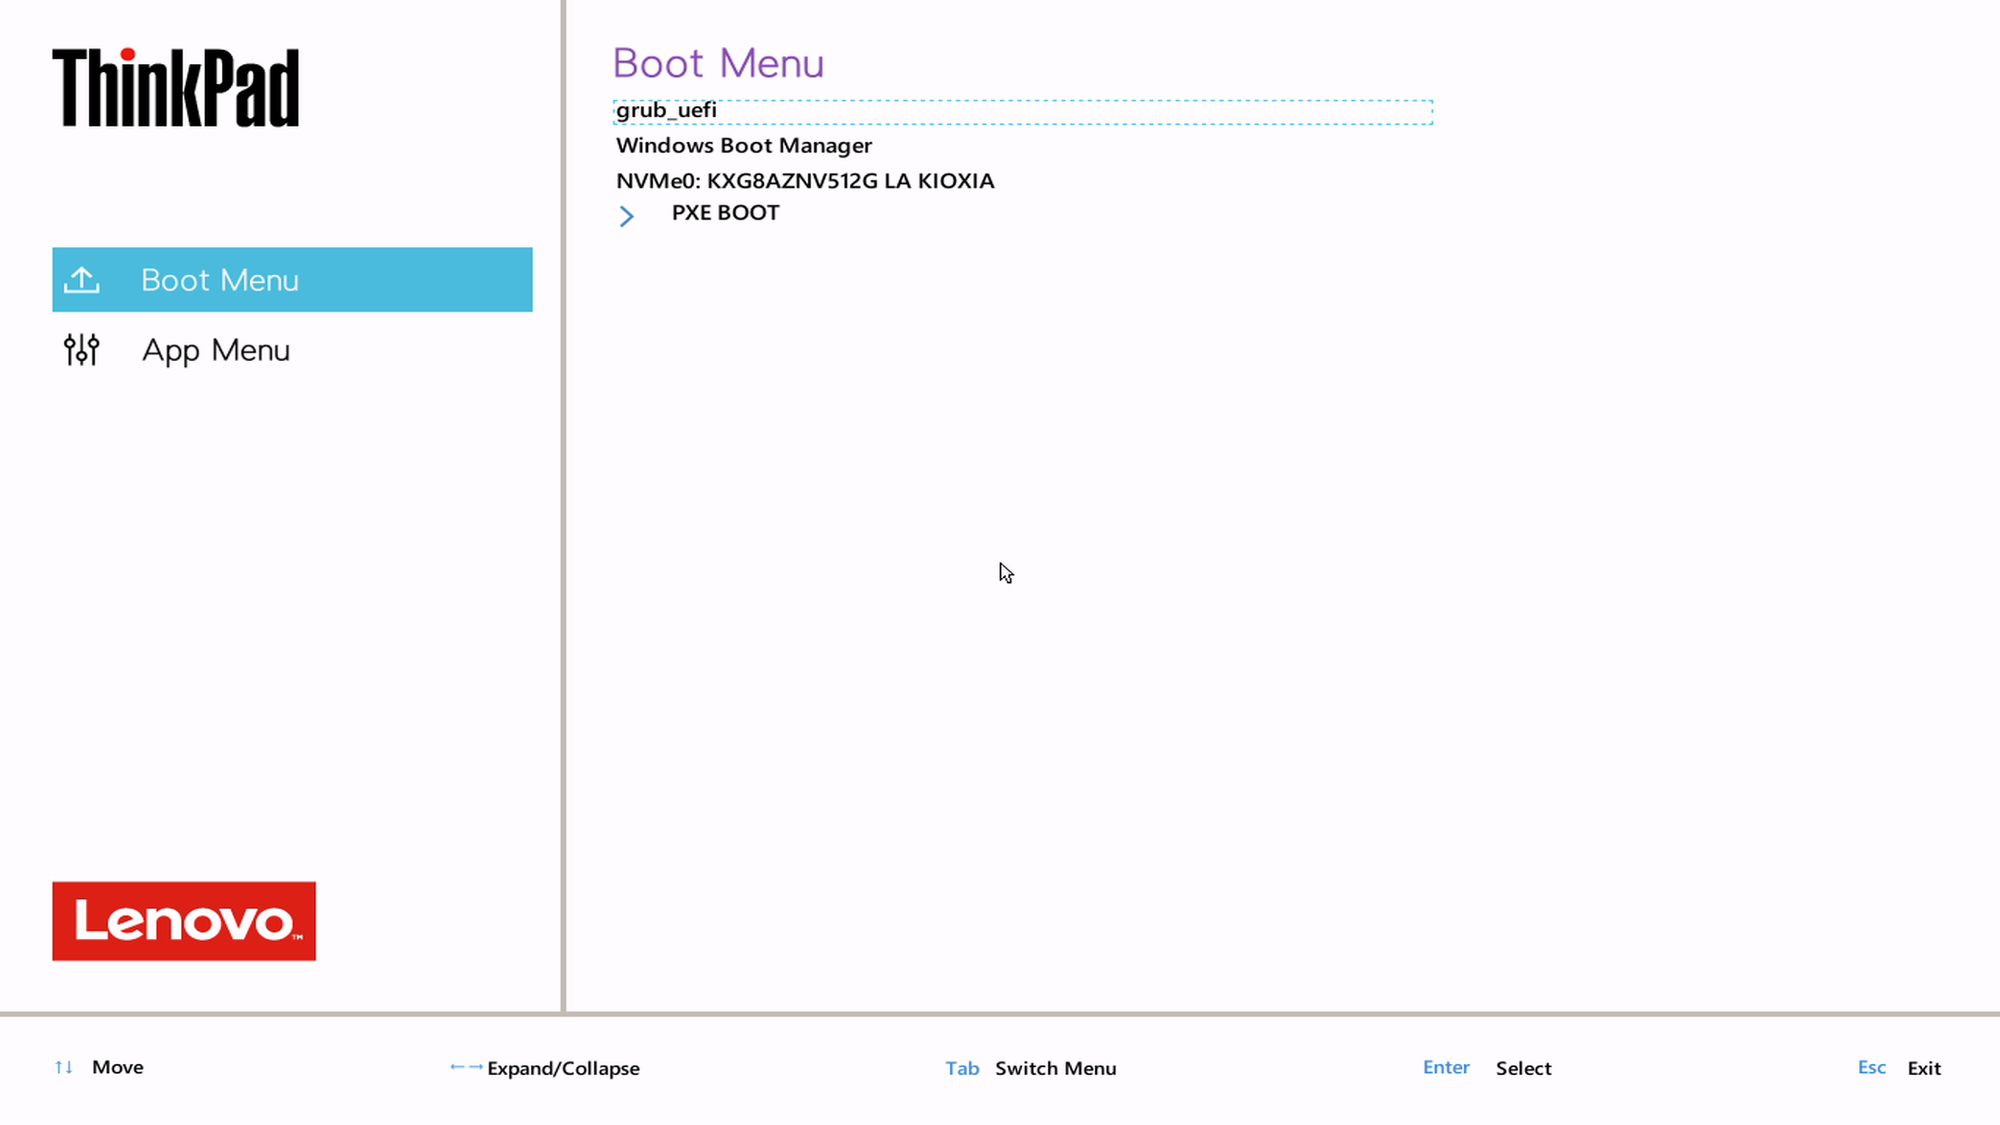
If you bring up the boot menu on your machine, you should see two entries: one for Linux (grub_uefi), and one for Windows:
So far, so good.
Installing FreeBSD
Hop once again to the helper machine, head to freebsd.org, and download the latest amd64 RELEASE image. Repeat the same process we used with Windows and Linux for writing that image to the installer drive, i.e. dd the image to the drive. Boot the installer drive on the target machine.
Follow the bsdinstall instructions till you get to the partitioning screen:
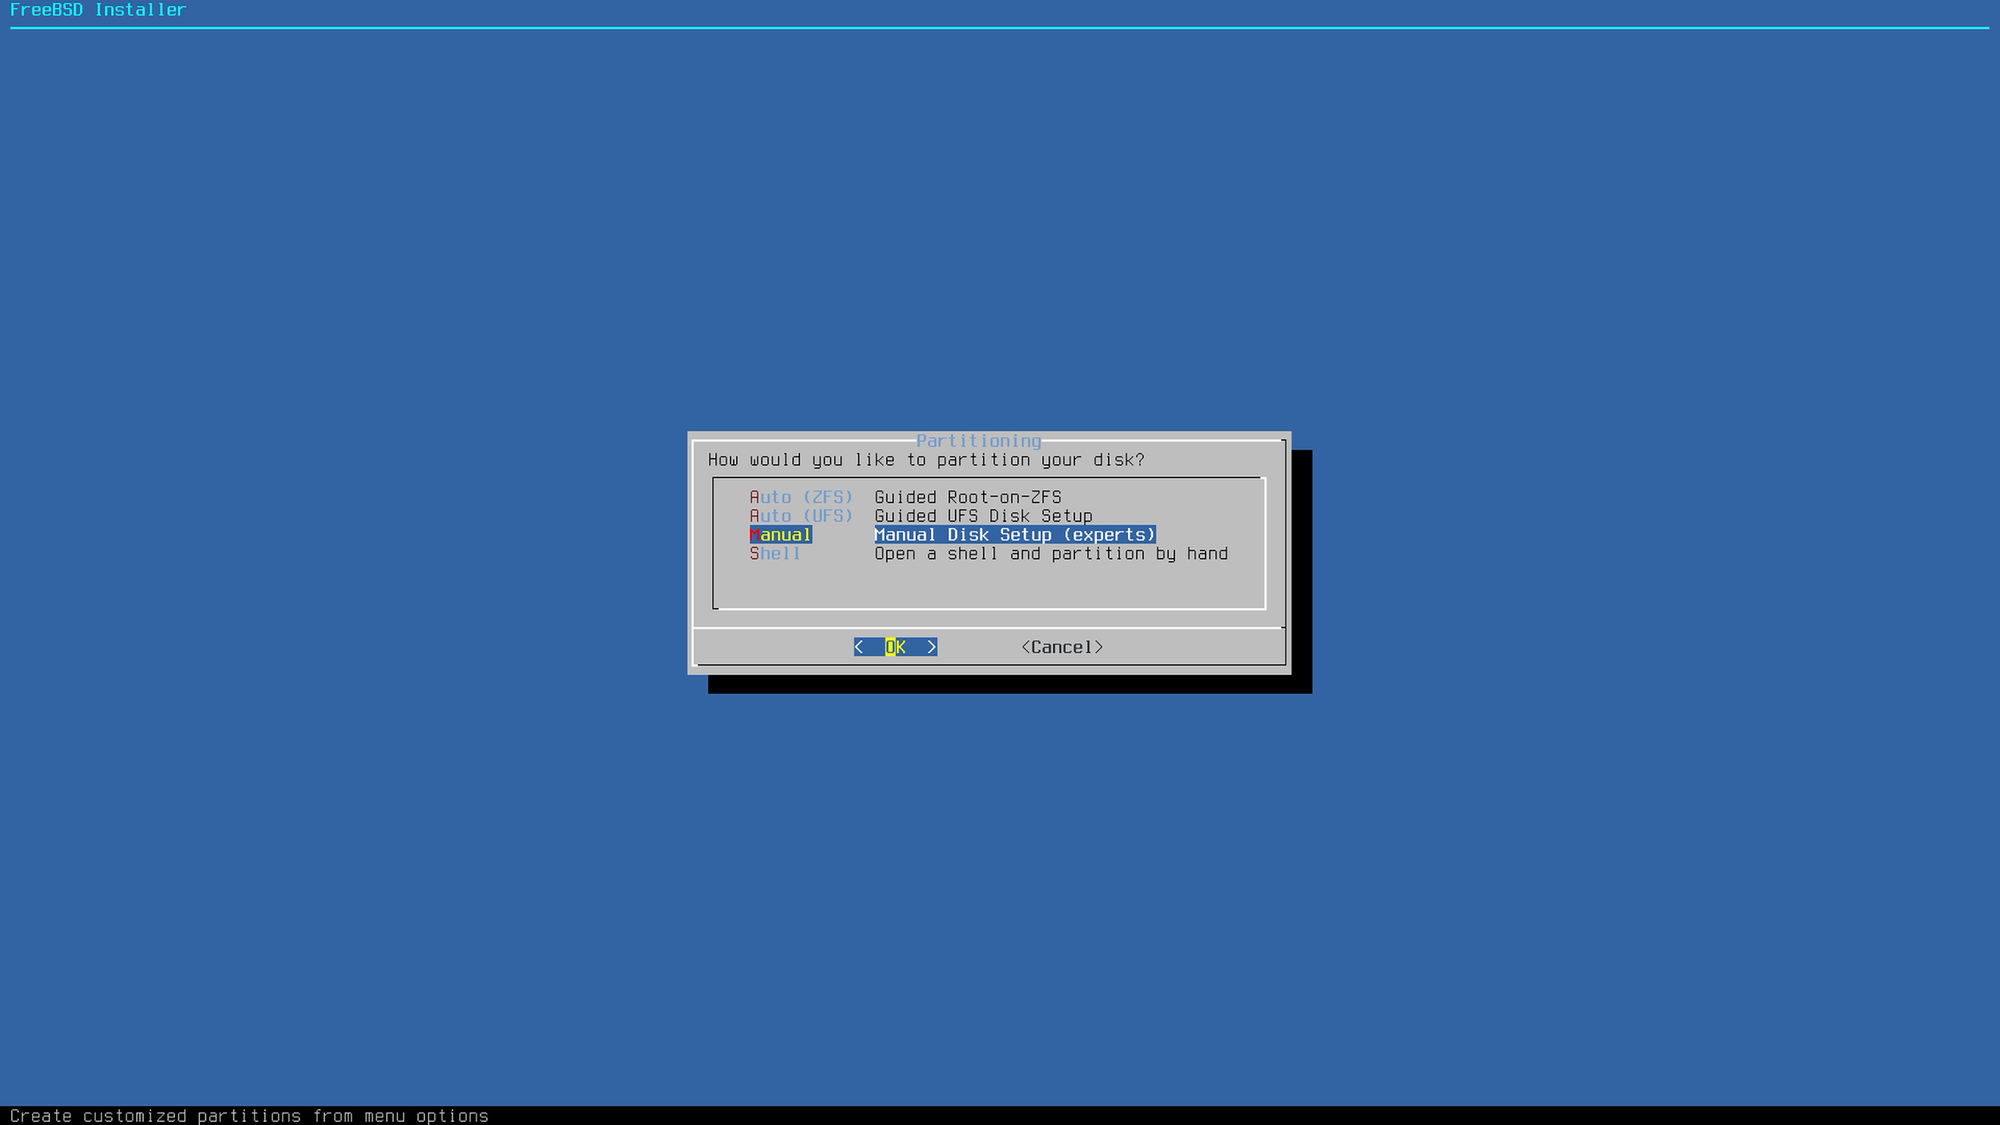
Select "Manual" and proceed:
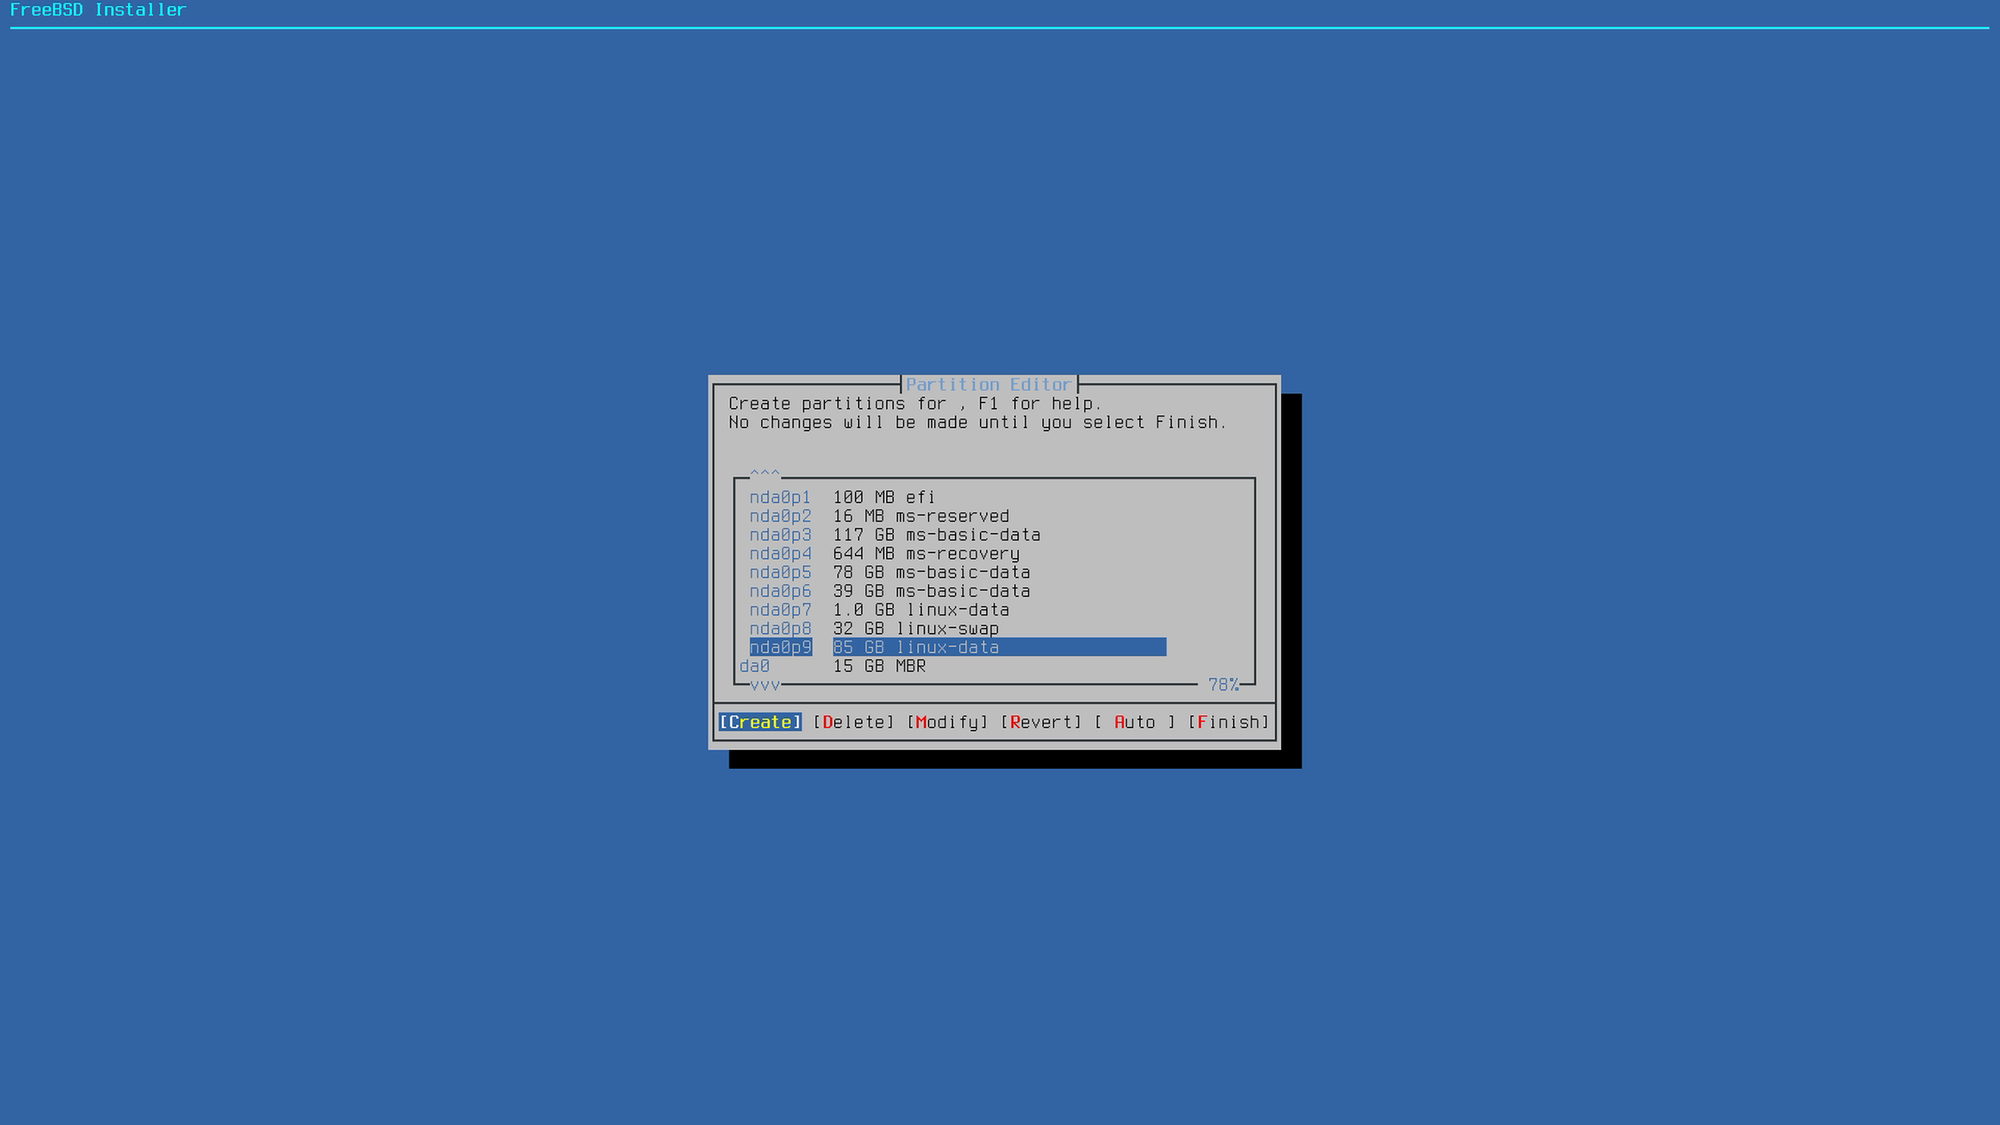
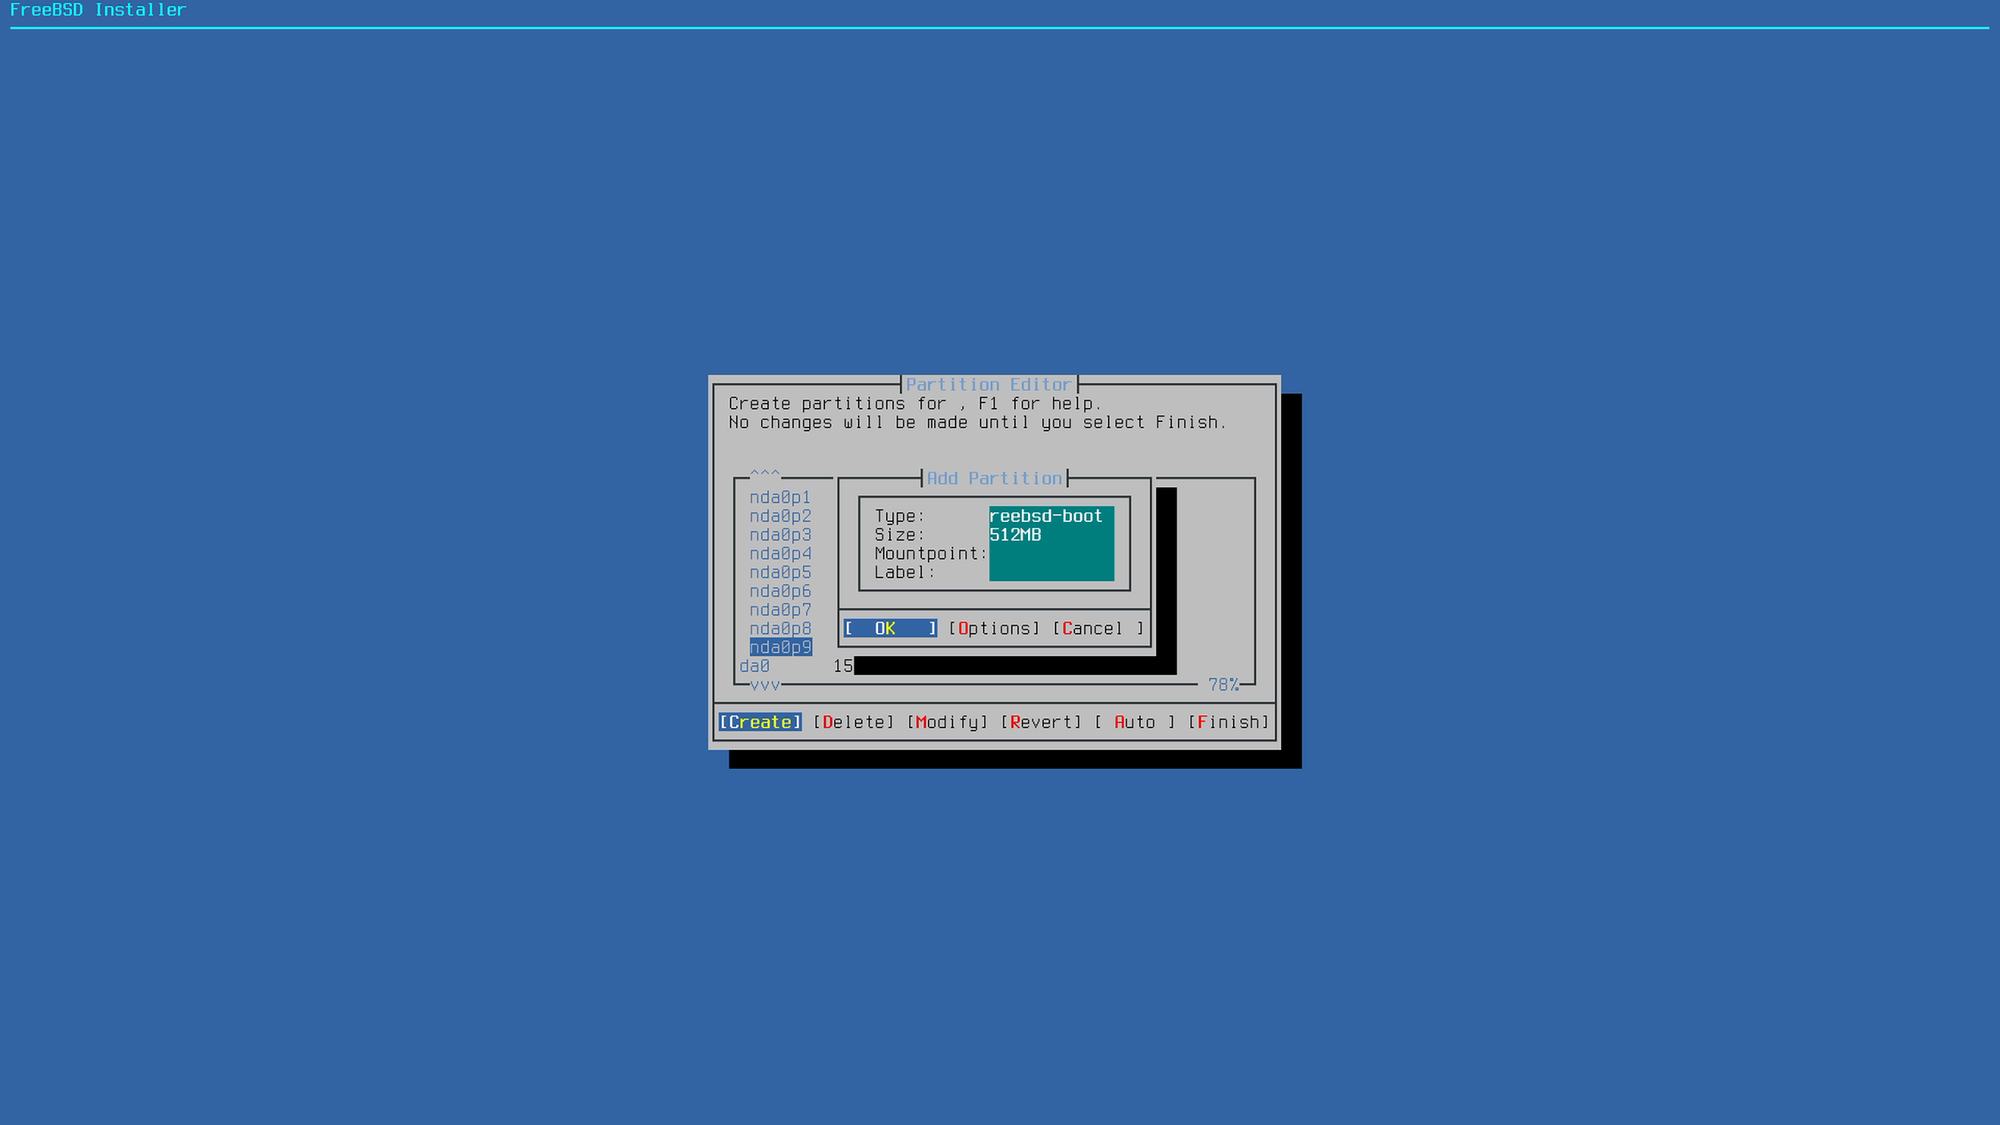
Highlight the last entry on your primary disk (the linux partition) and choose "Create". Set the type to freebsd-boot and the size to 512MB and click OK.
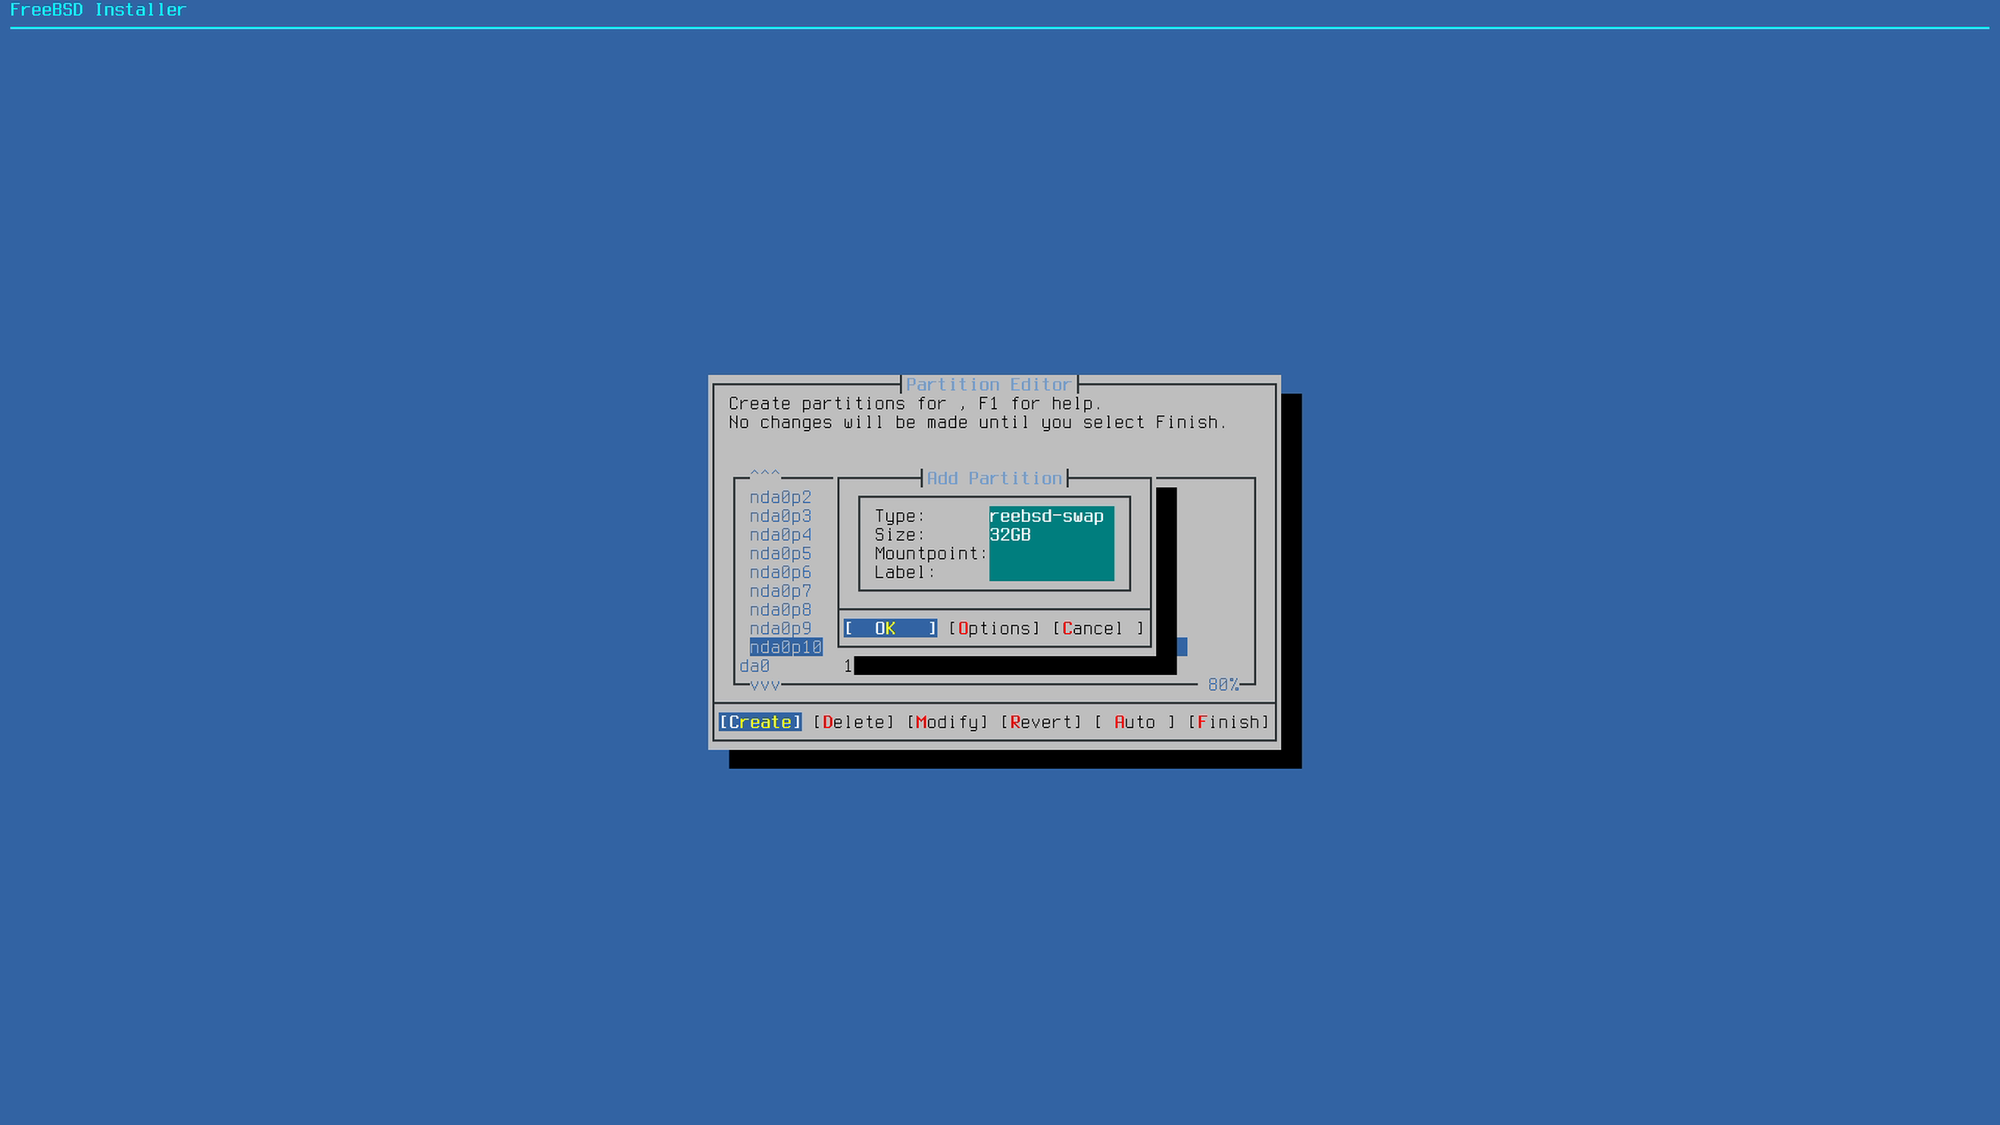
Keep the newly created boot partition highlighted and select "Create" again. Set the type to freebsd-swap and the size to 32GB and click OK.


Once again, keep the newly created partition highlighted and click "Create". Set the type to freebsd-ufs, keep the default size (remaining disk space), set the mountpoint to / (slash) and click OK.
Then click "Finish" on the main partition editor screen and proceed with the remaining bsdinstall steps (setting the root password, user creation, etc).
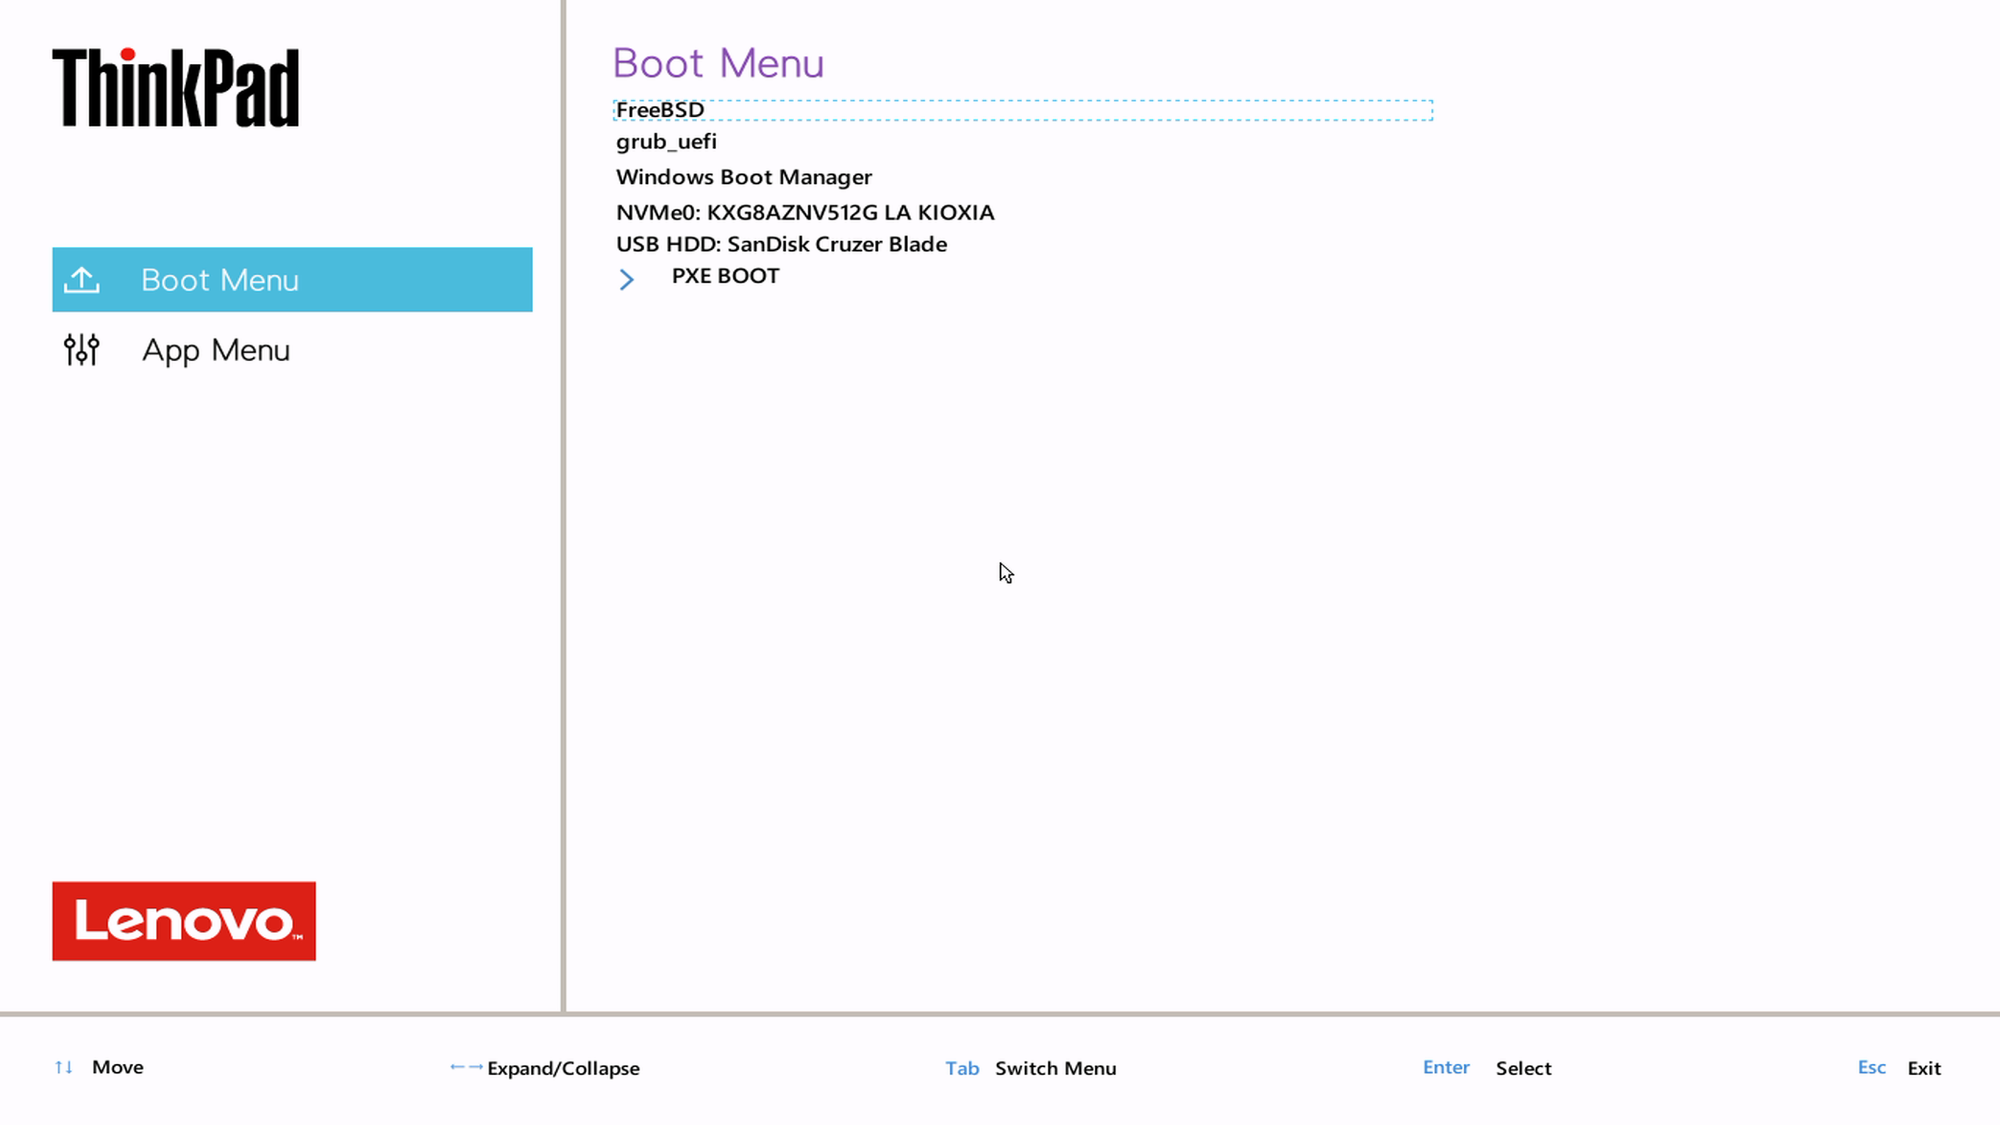
When the machine reboots, it should boot into your new FreeBSD system. If you bring up the boot menu, you should now have three entries in the following order: FreeBSD, grub_uefi (Linux), and Windows Boot Manager.
You can now boot into each OS individually and continue configuring your environment(s) to your liking (networking, software packages, etc).
However, there are two more things we can do before we conclude this guide: configuring shared partitions and changing/reordering UEFI entries.
Configuring shared partitions on Windows
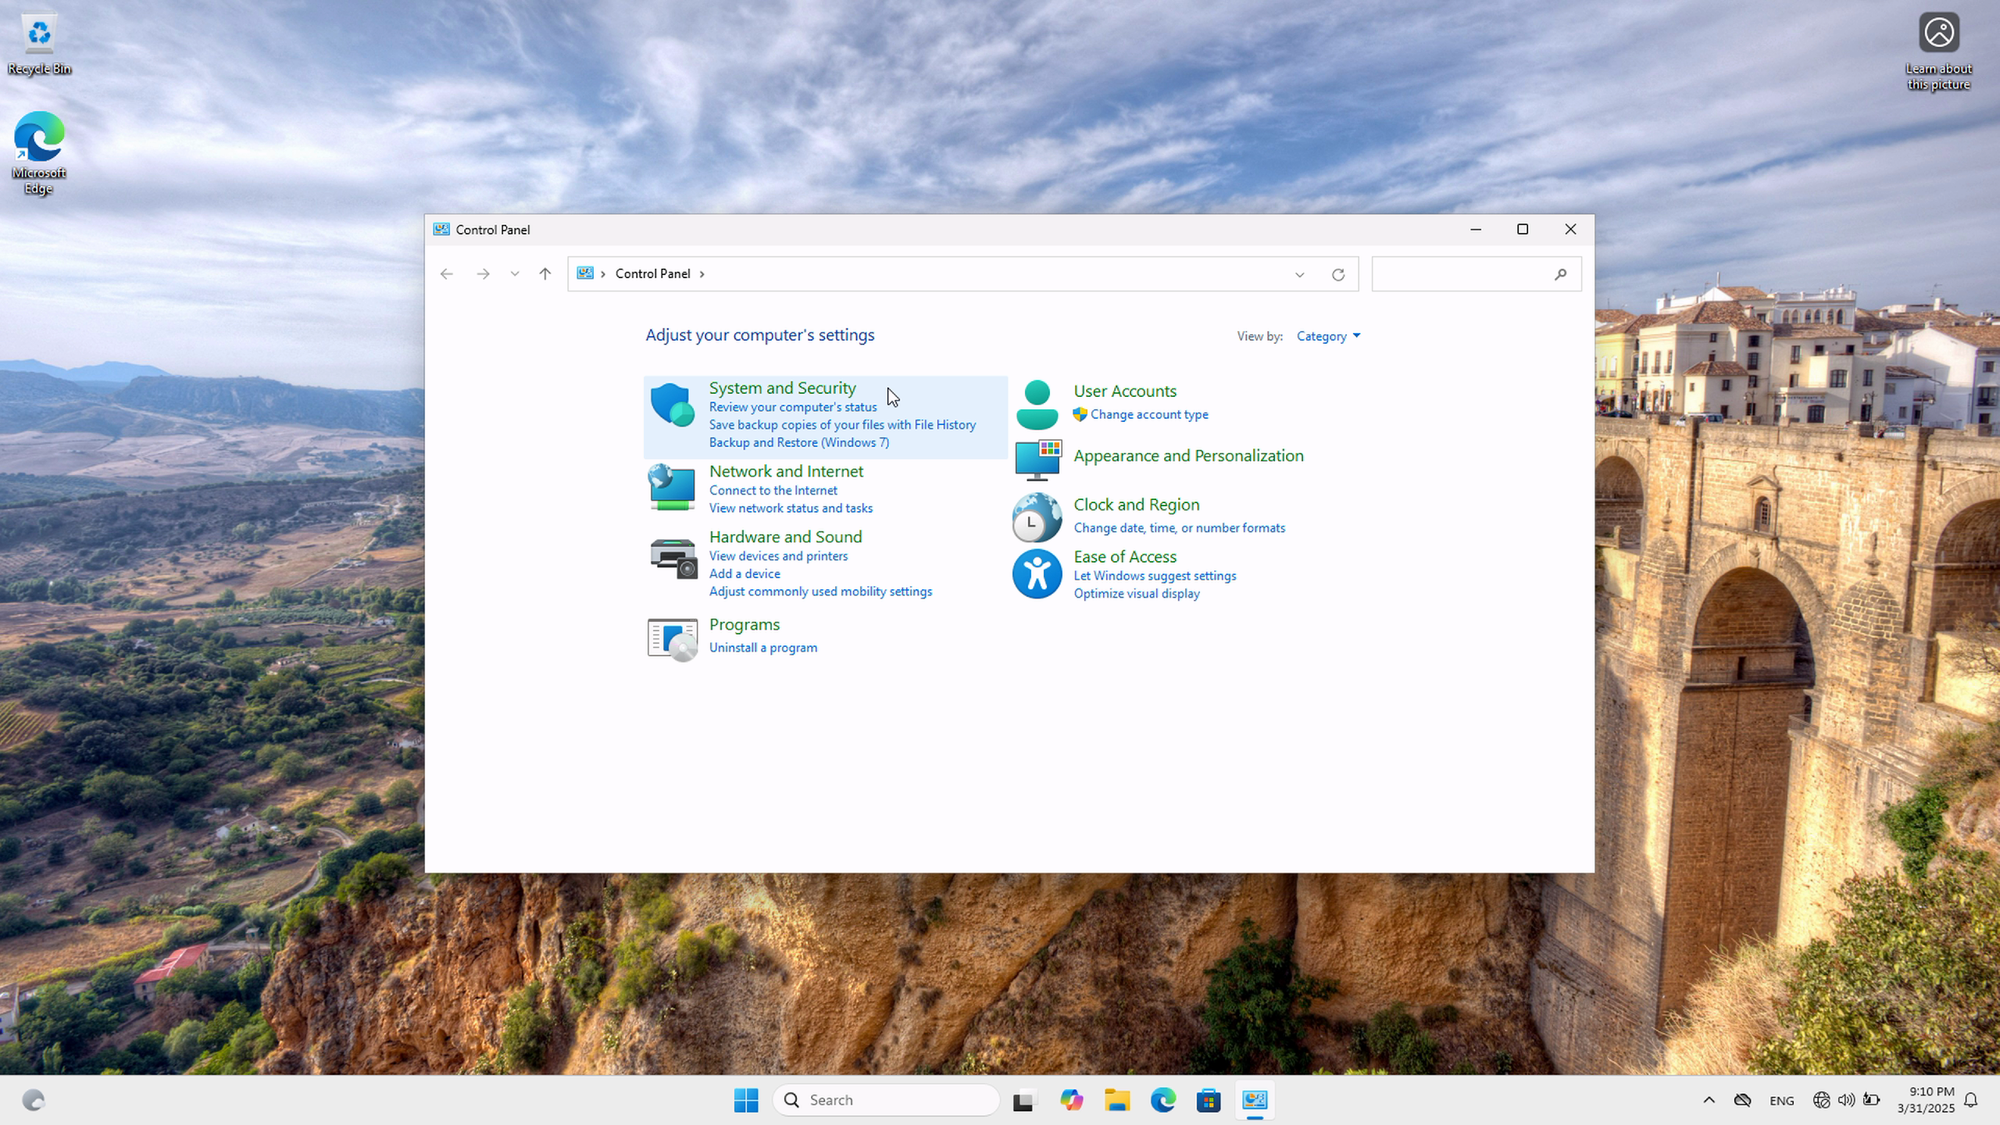
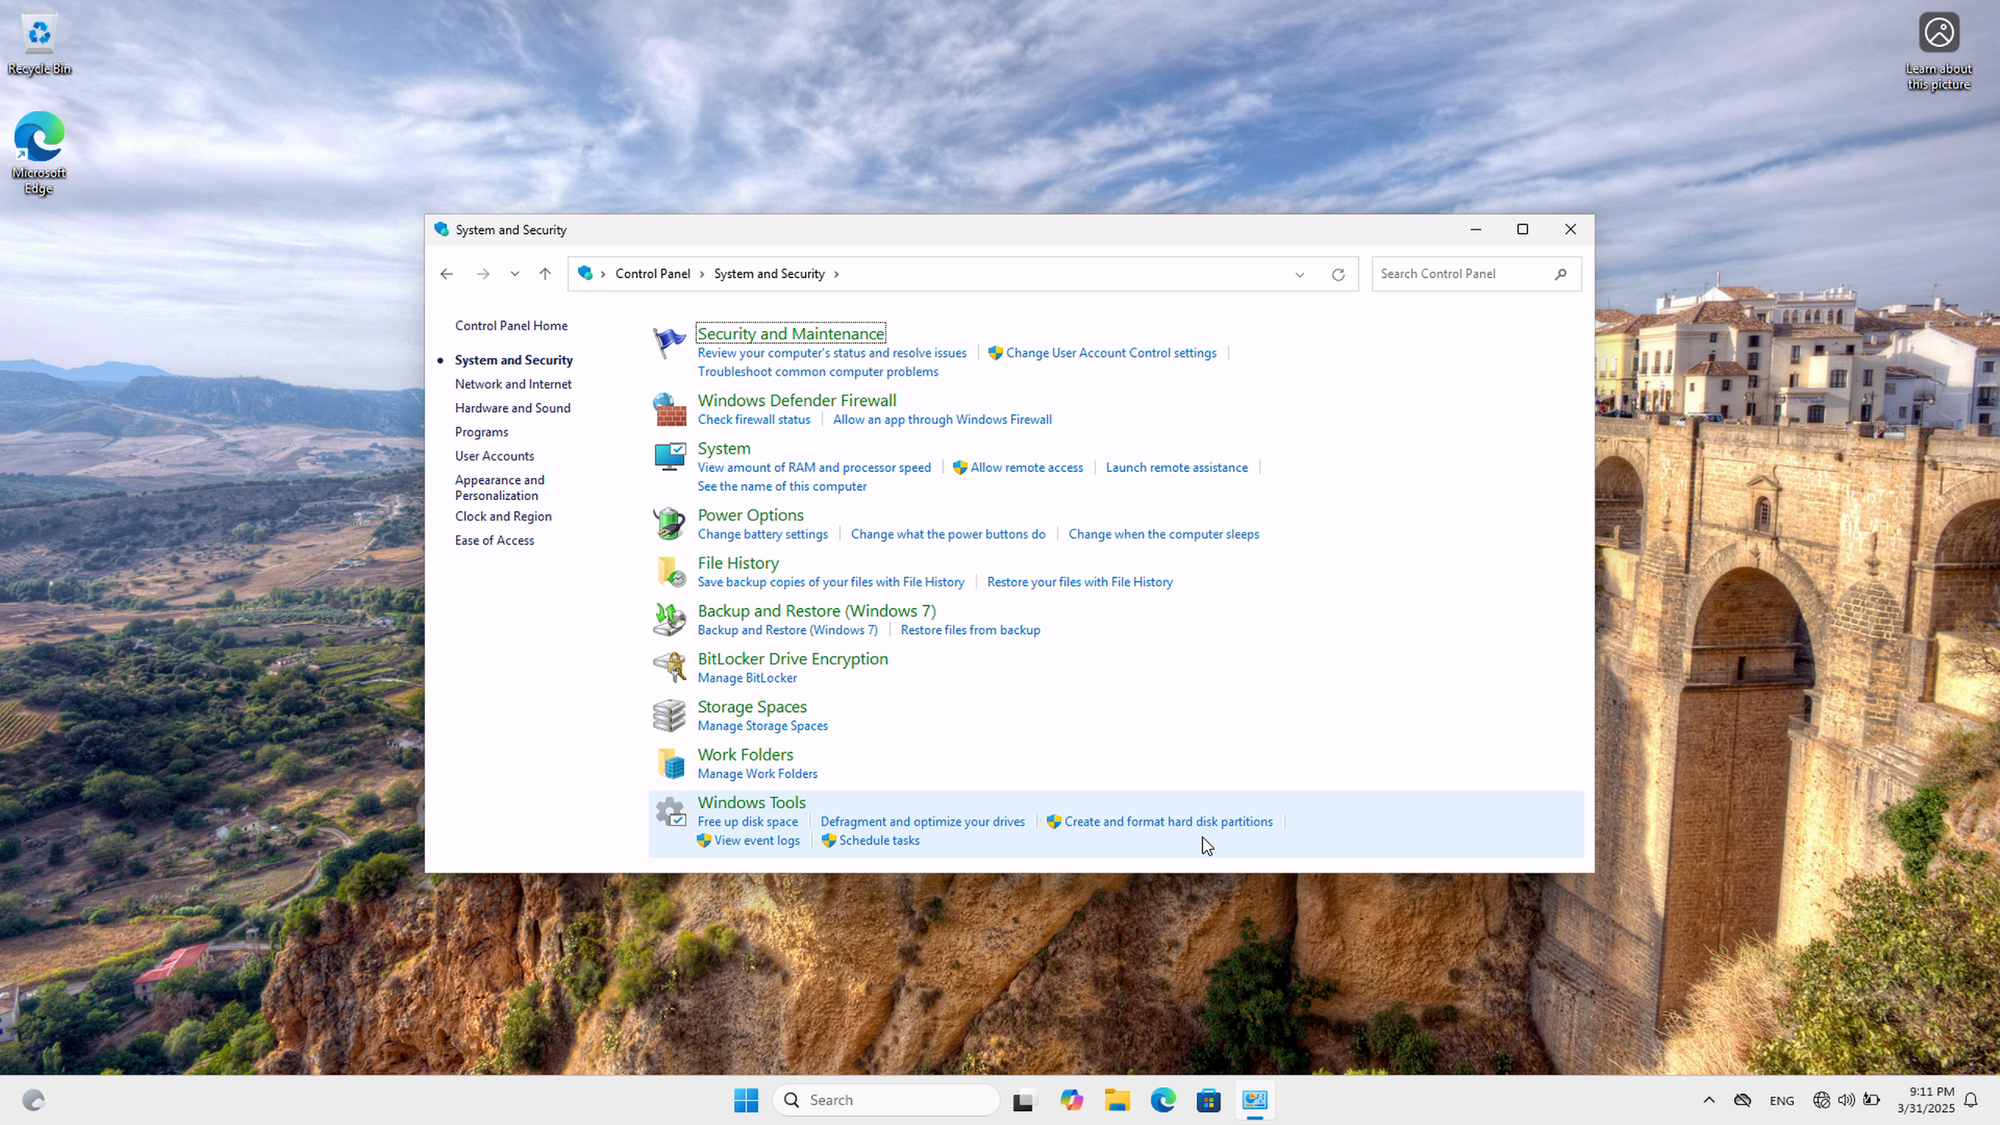
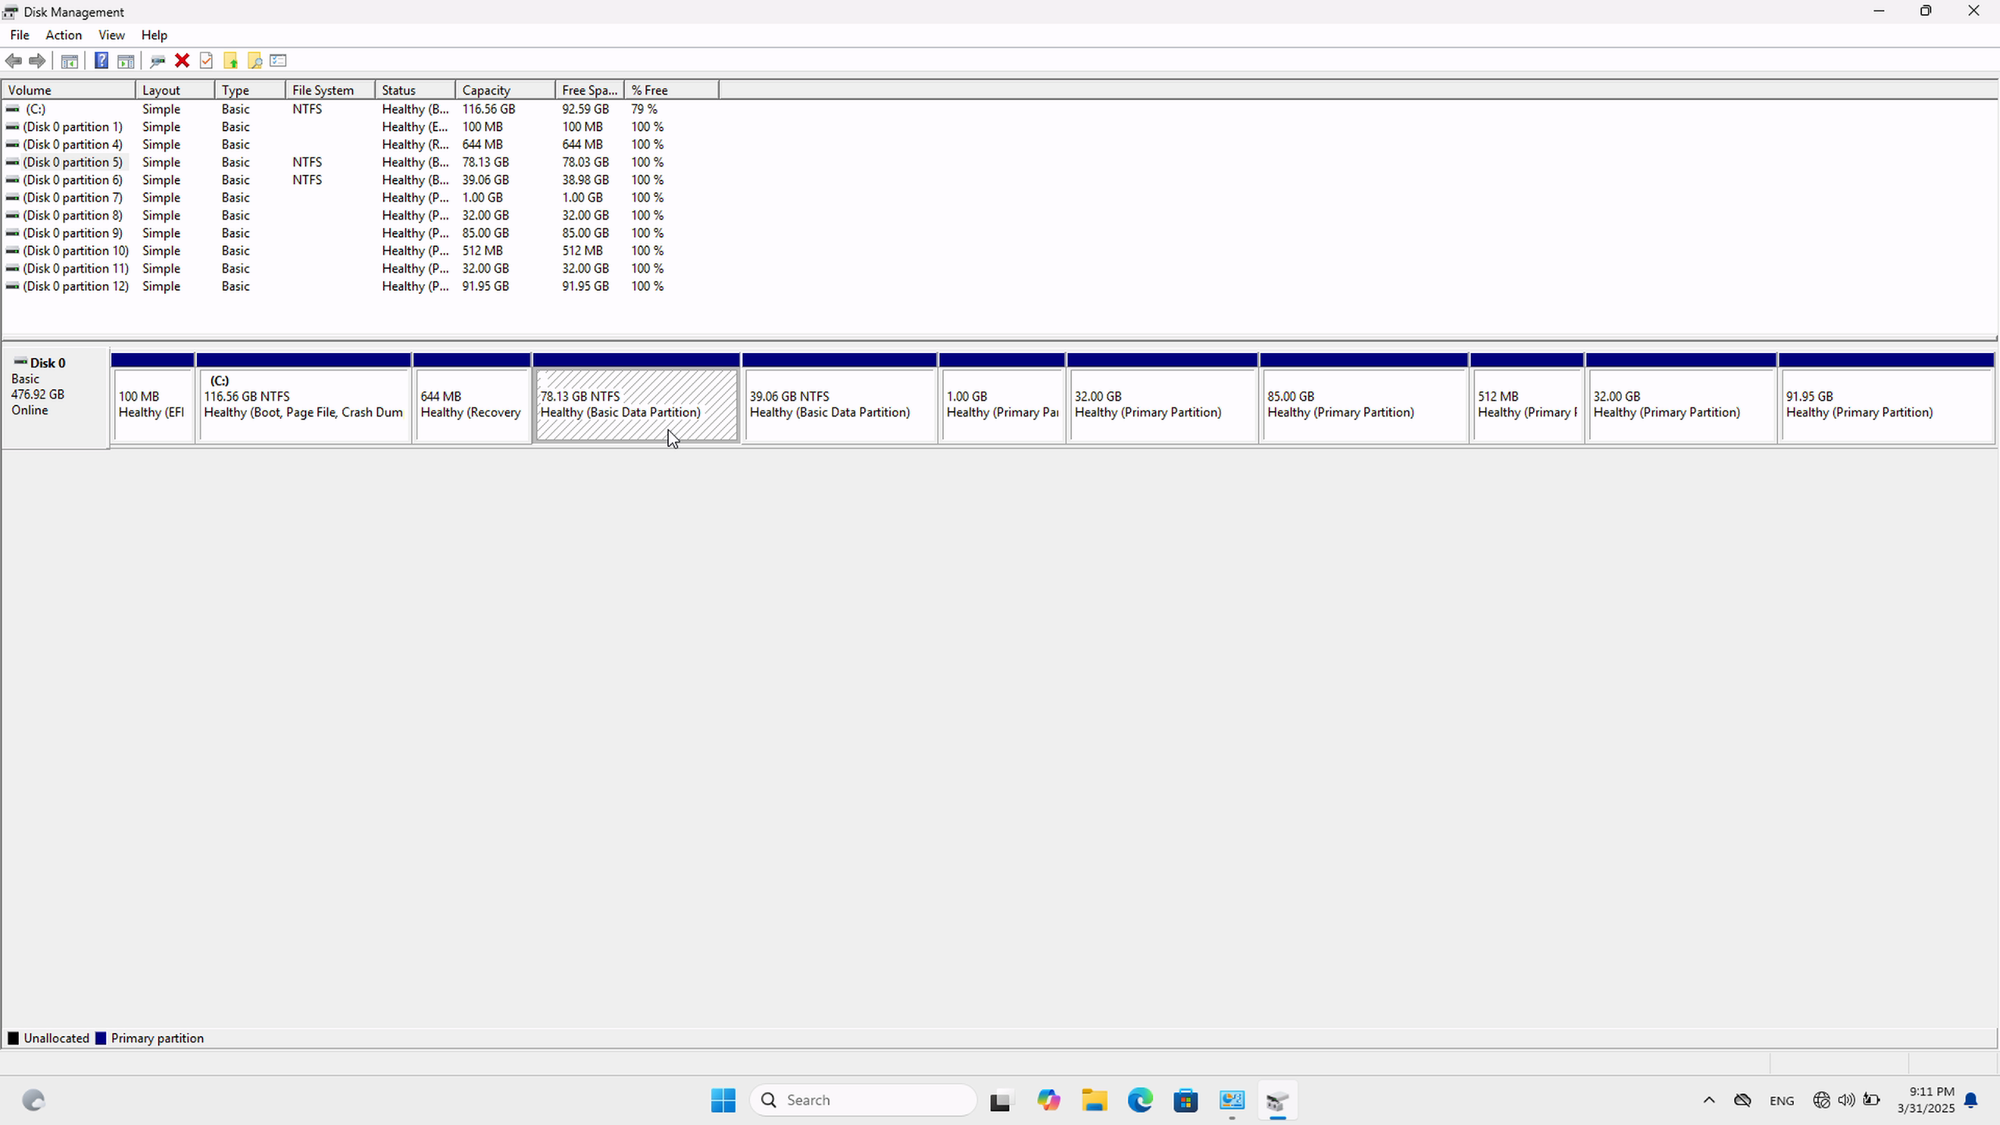
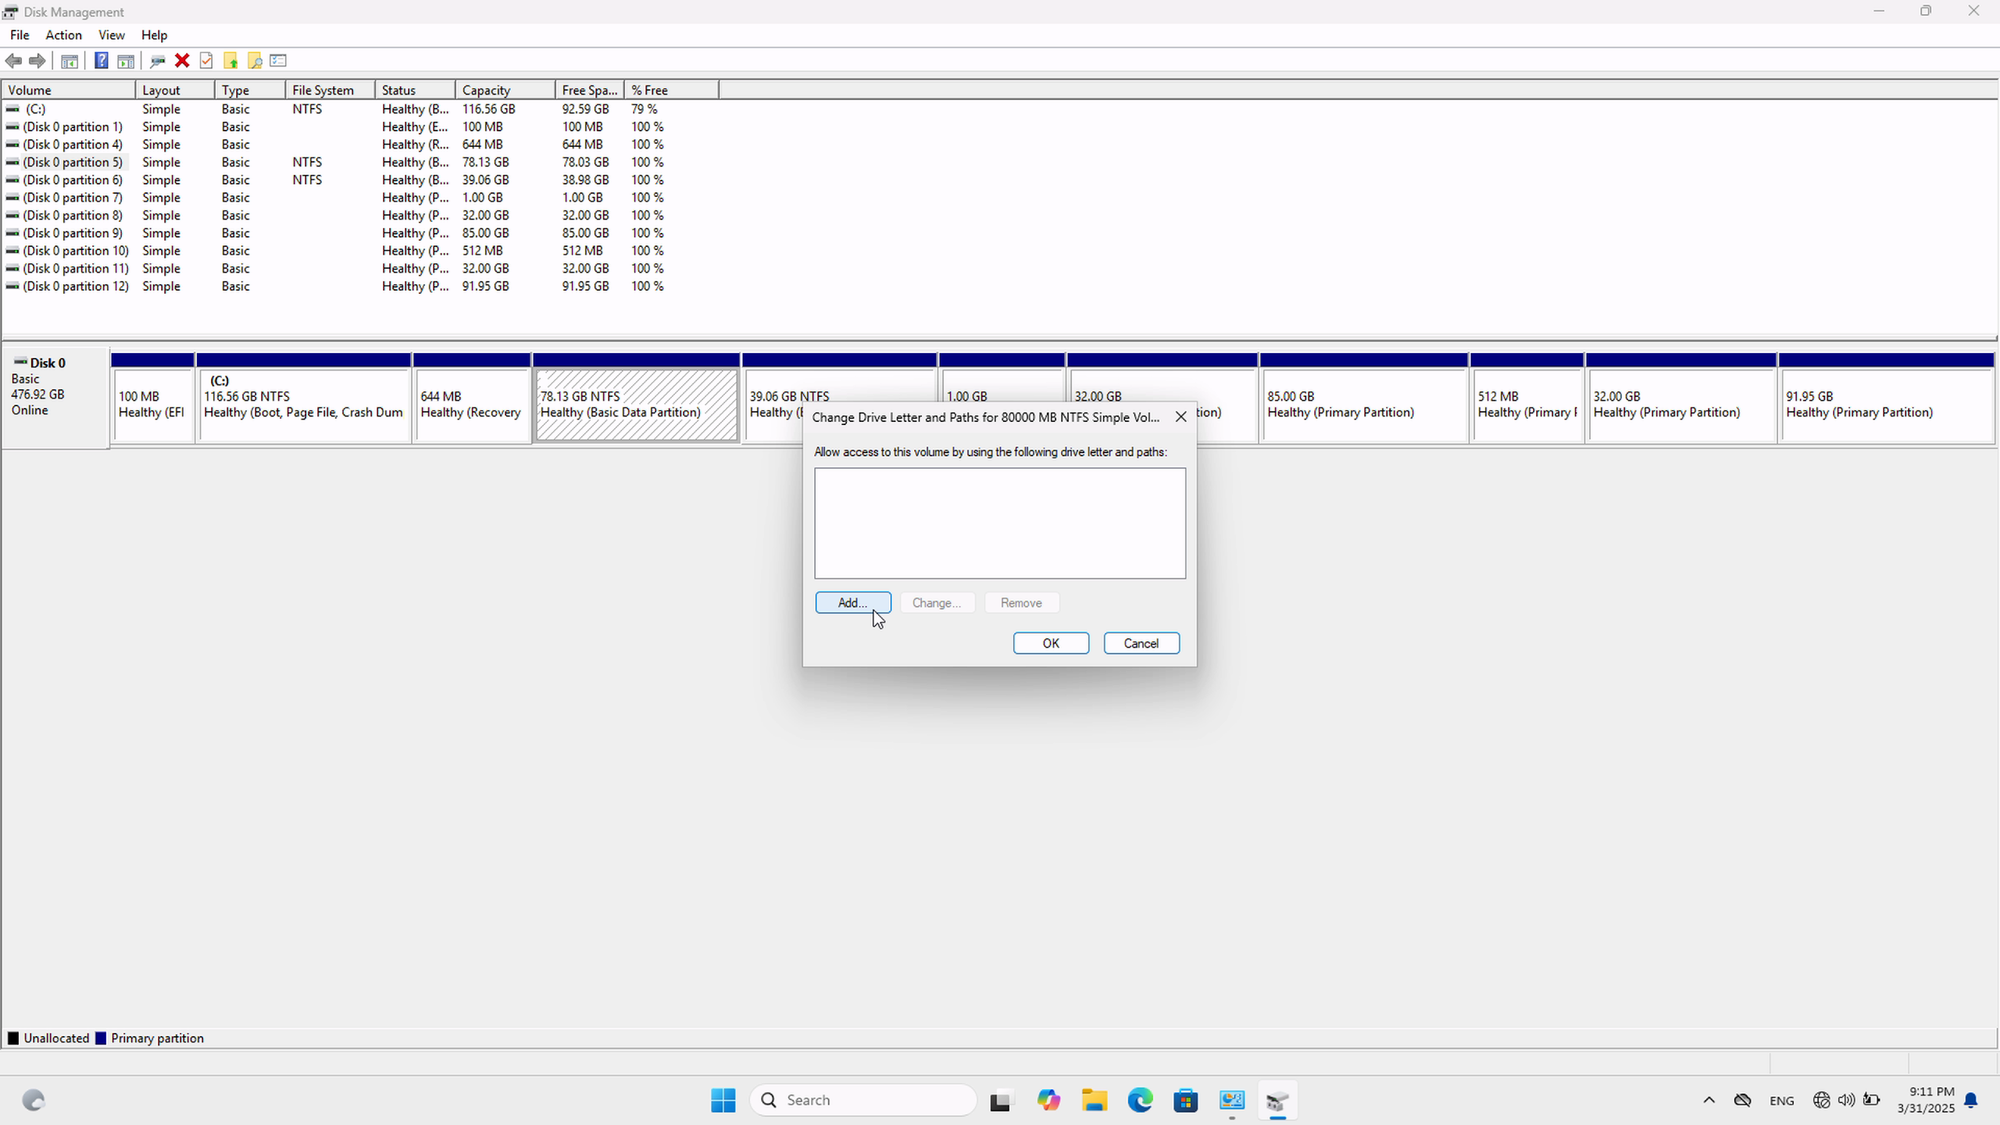
Reboot the target machine into Windows. Open the Control Panel and click on System and Security. Under Windows Tools, click "Create and format hard disk partitions". In the editor, you should see our partition layout with only three partitions marked as NTFS: the main Windows (C:) partition, and two other NTFS partitions with no drive letter assigned.
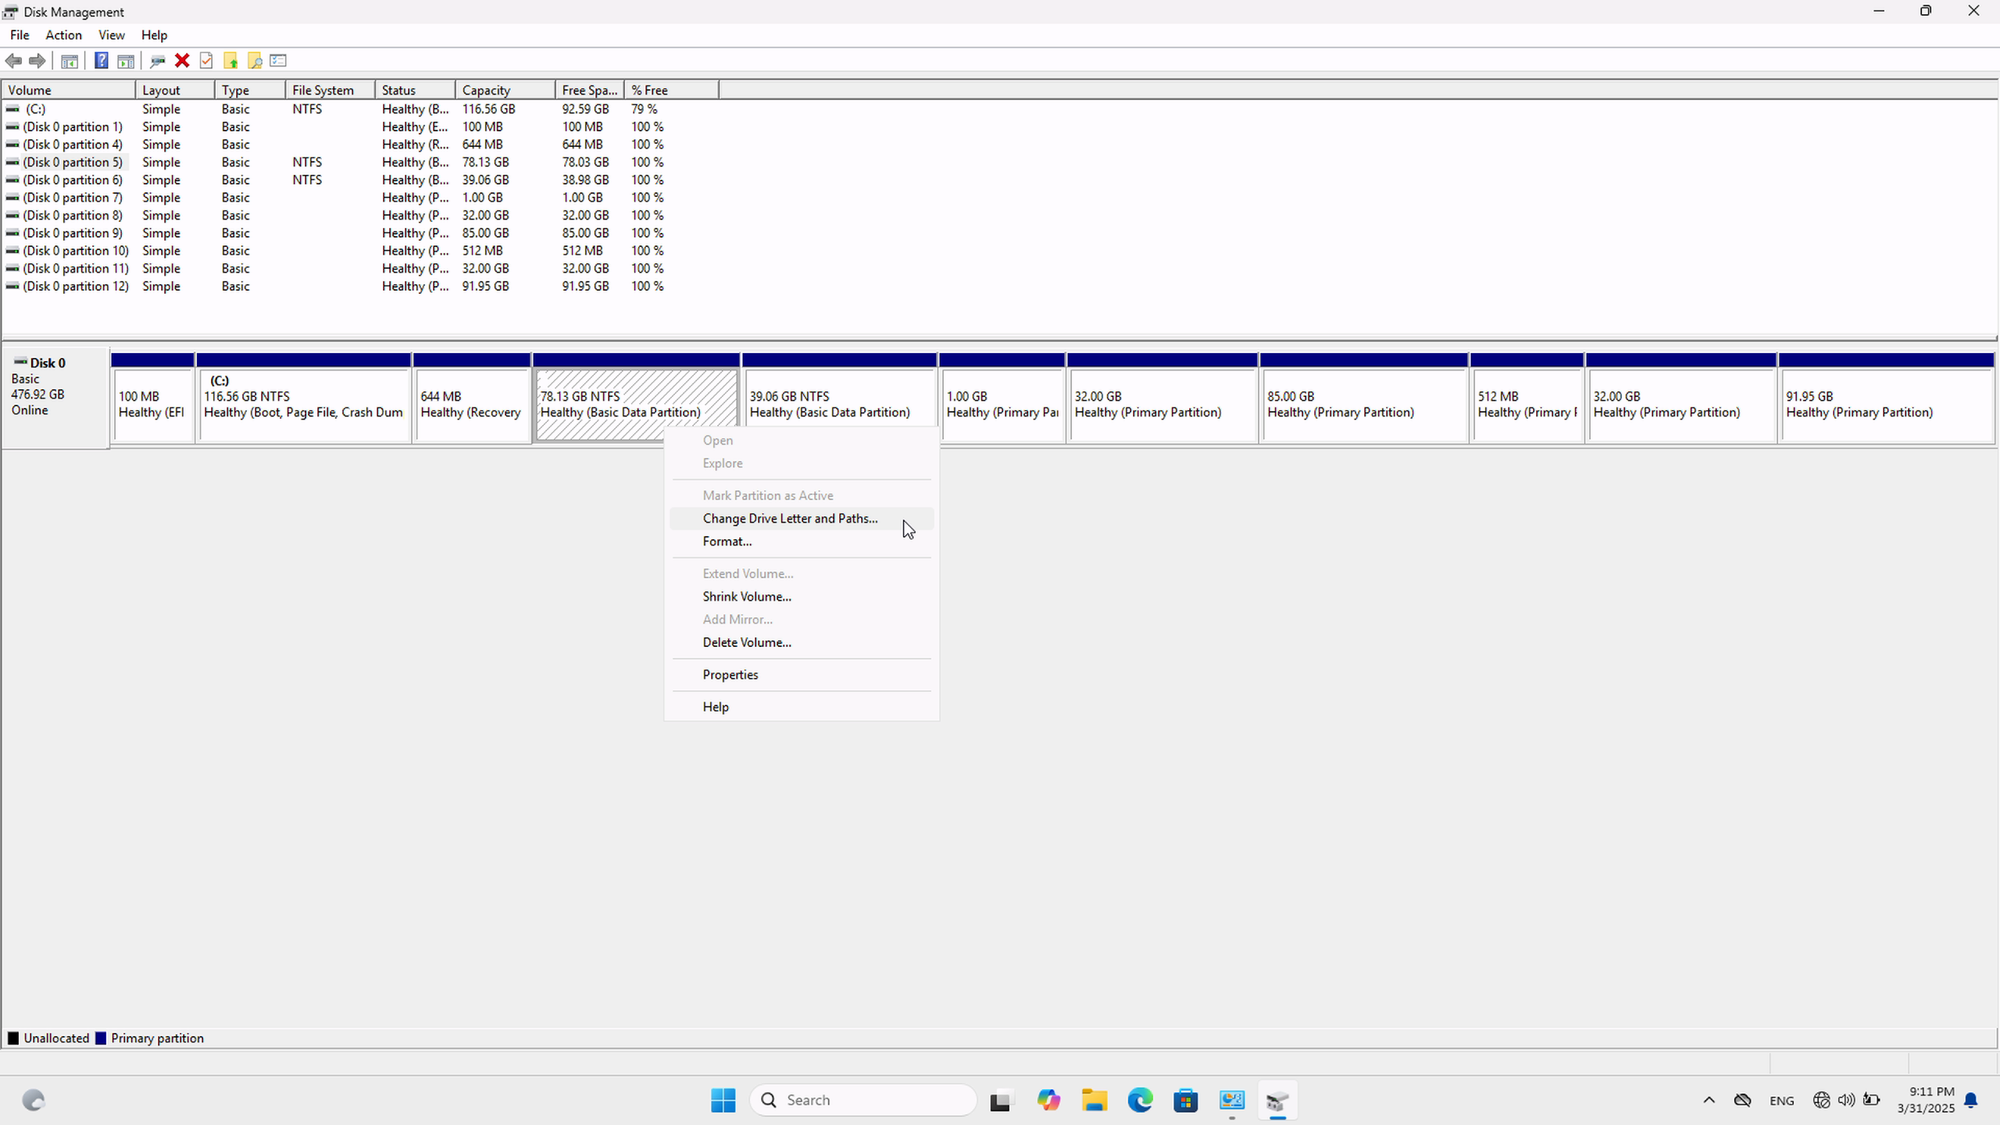
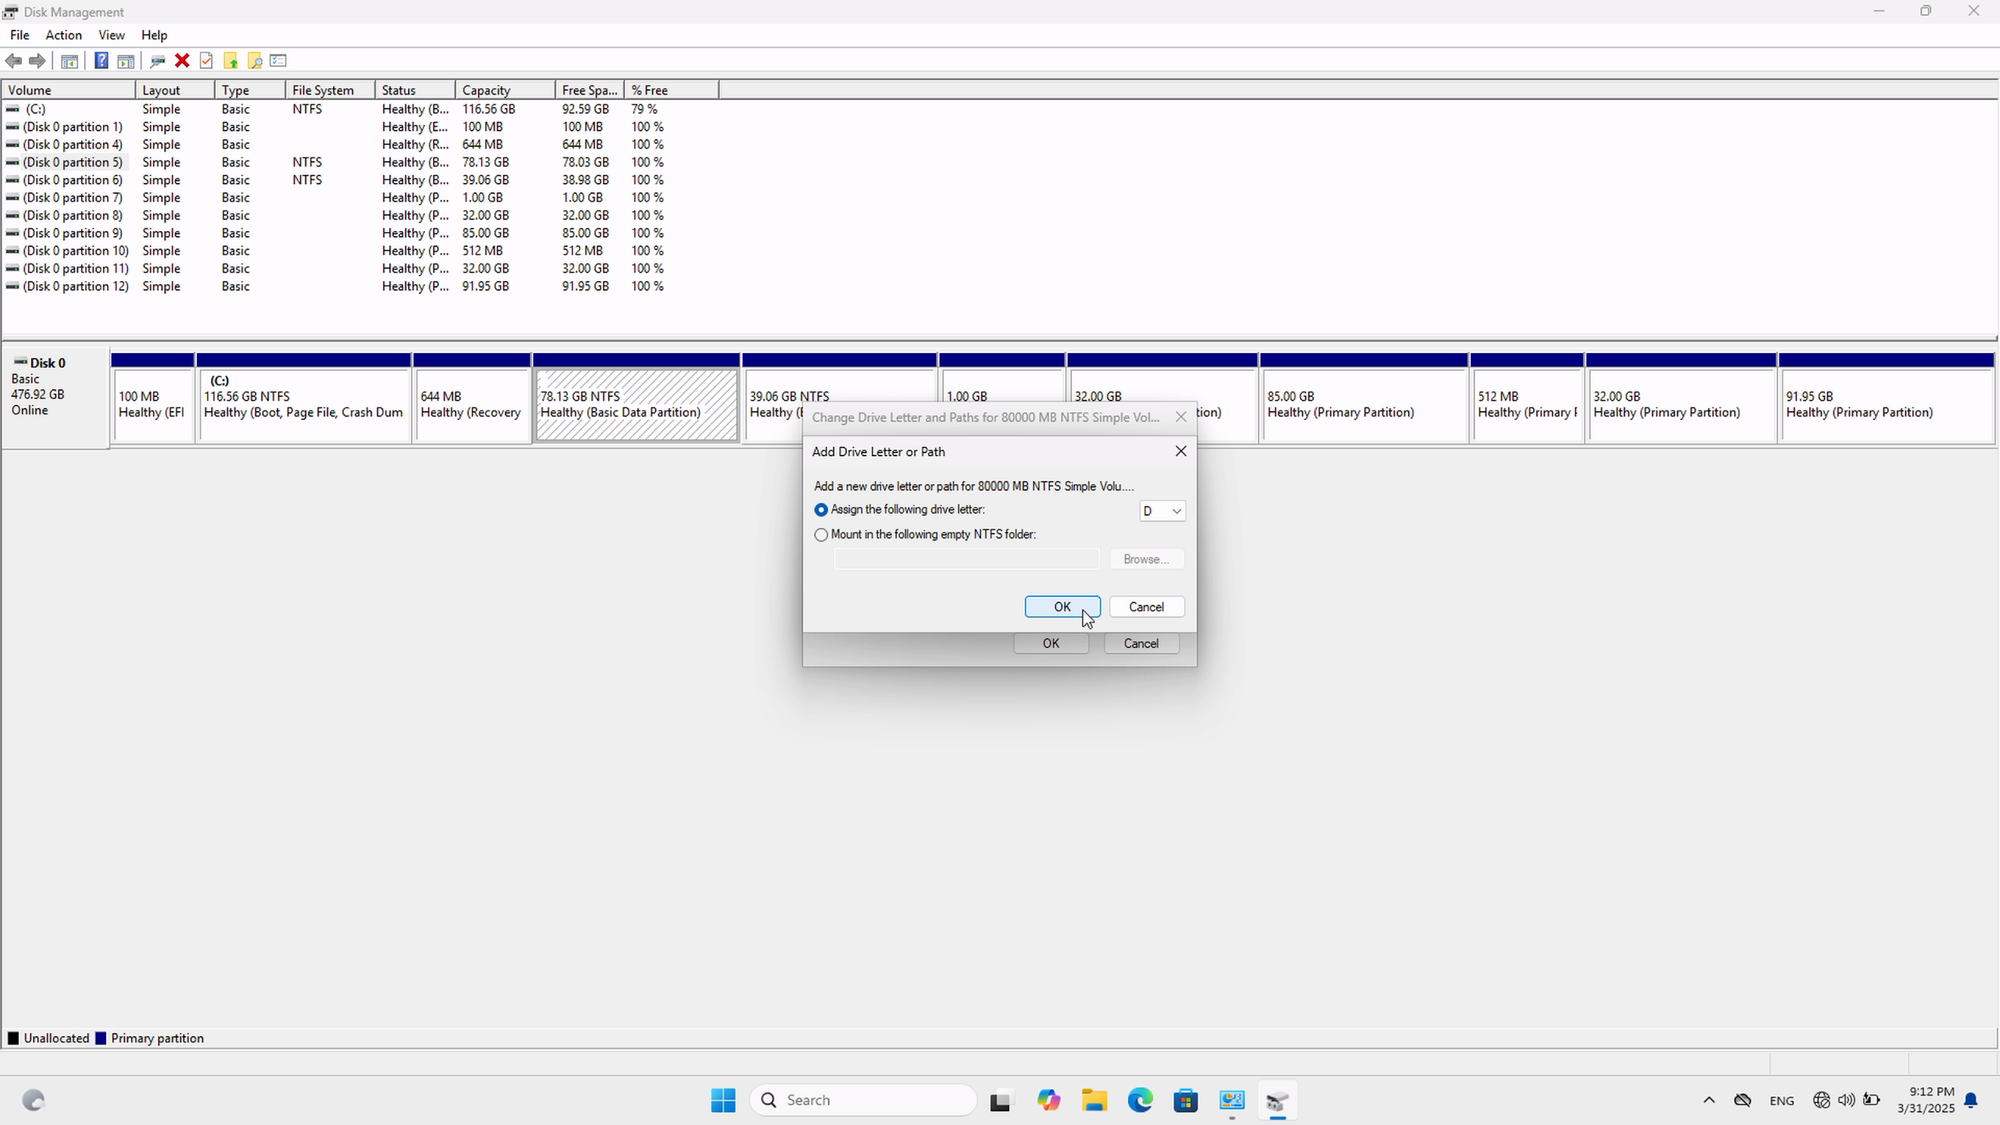
Right click on the first (~80GB) partition and click "Change drive letters and paths". Click "Add" on the dialog window, keep the default letter in the drop-down ("D") and click OK.
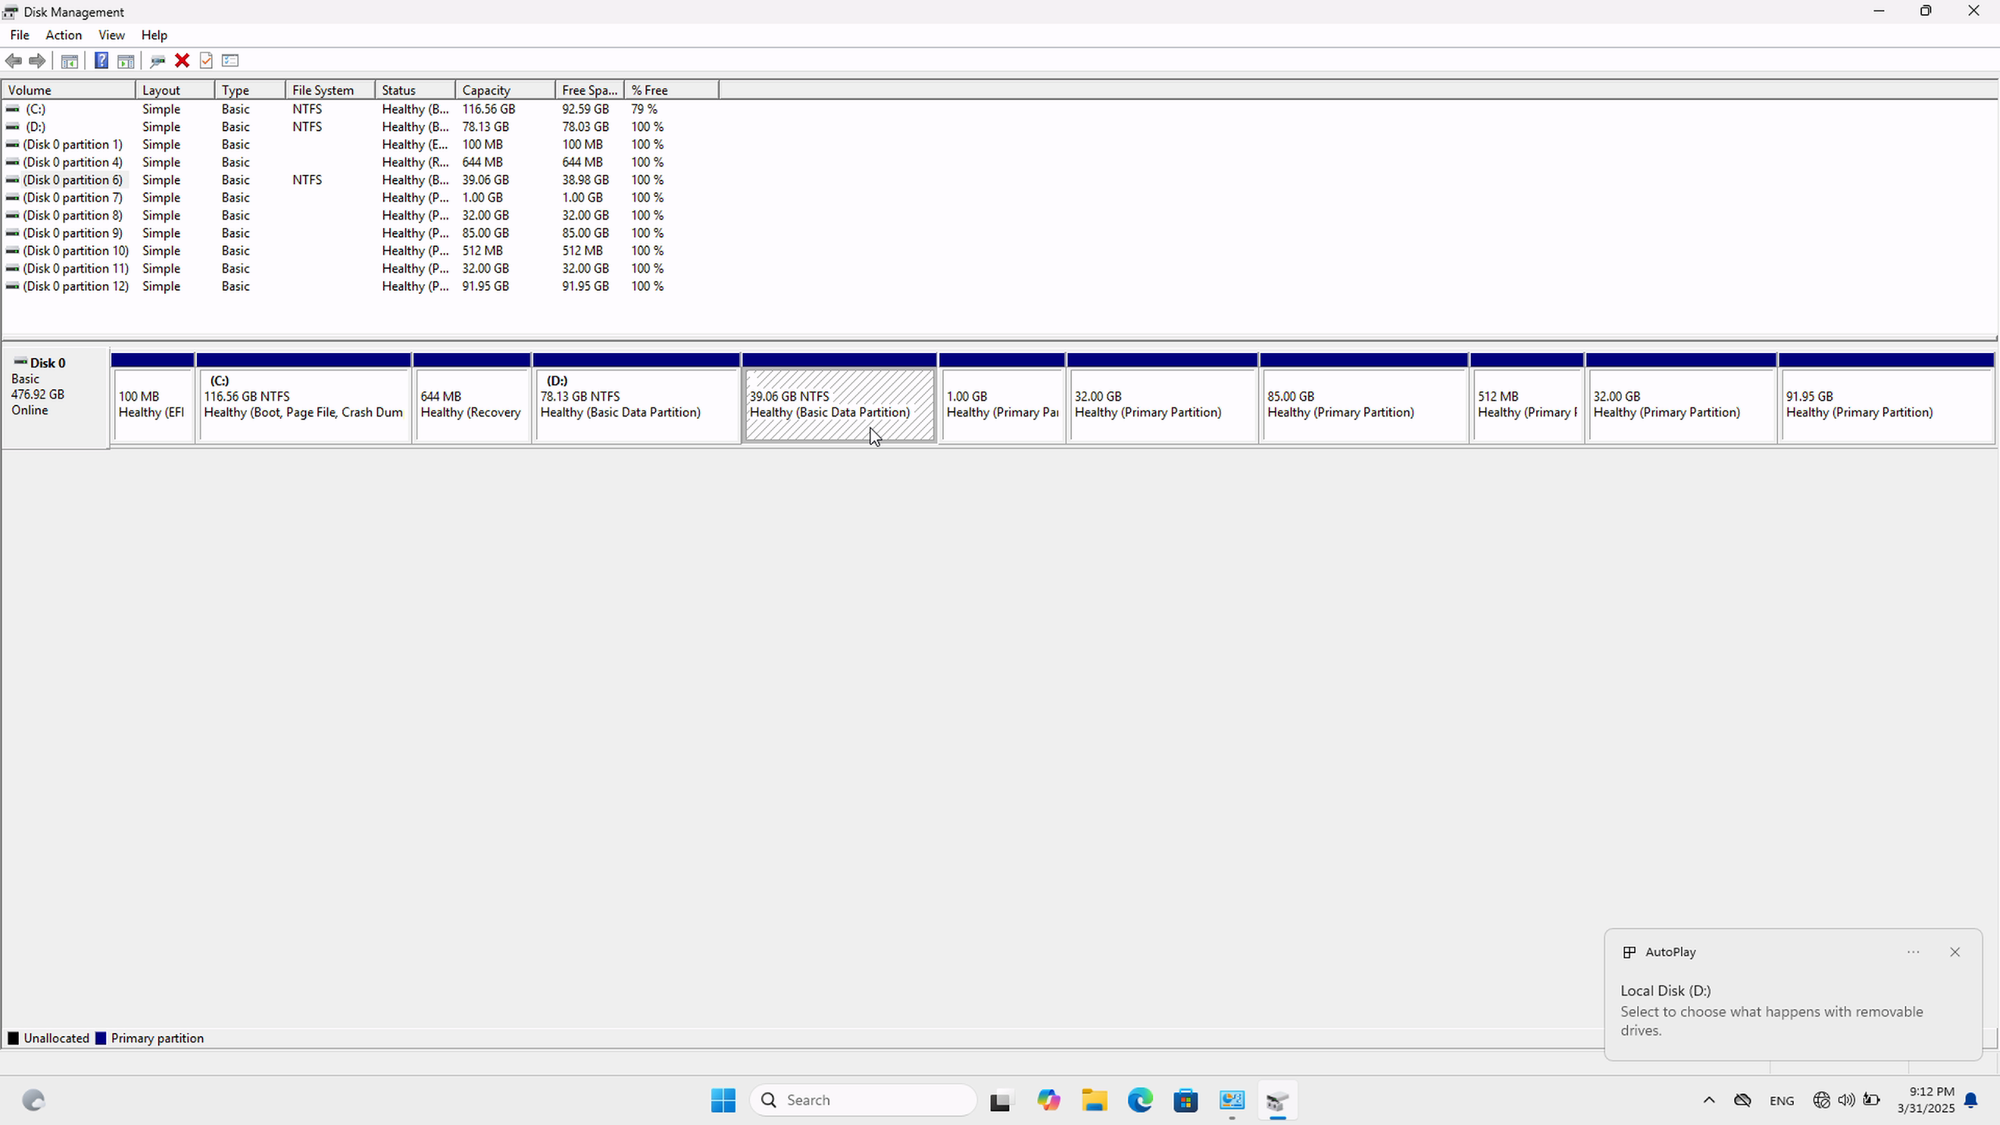
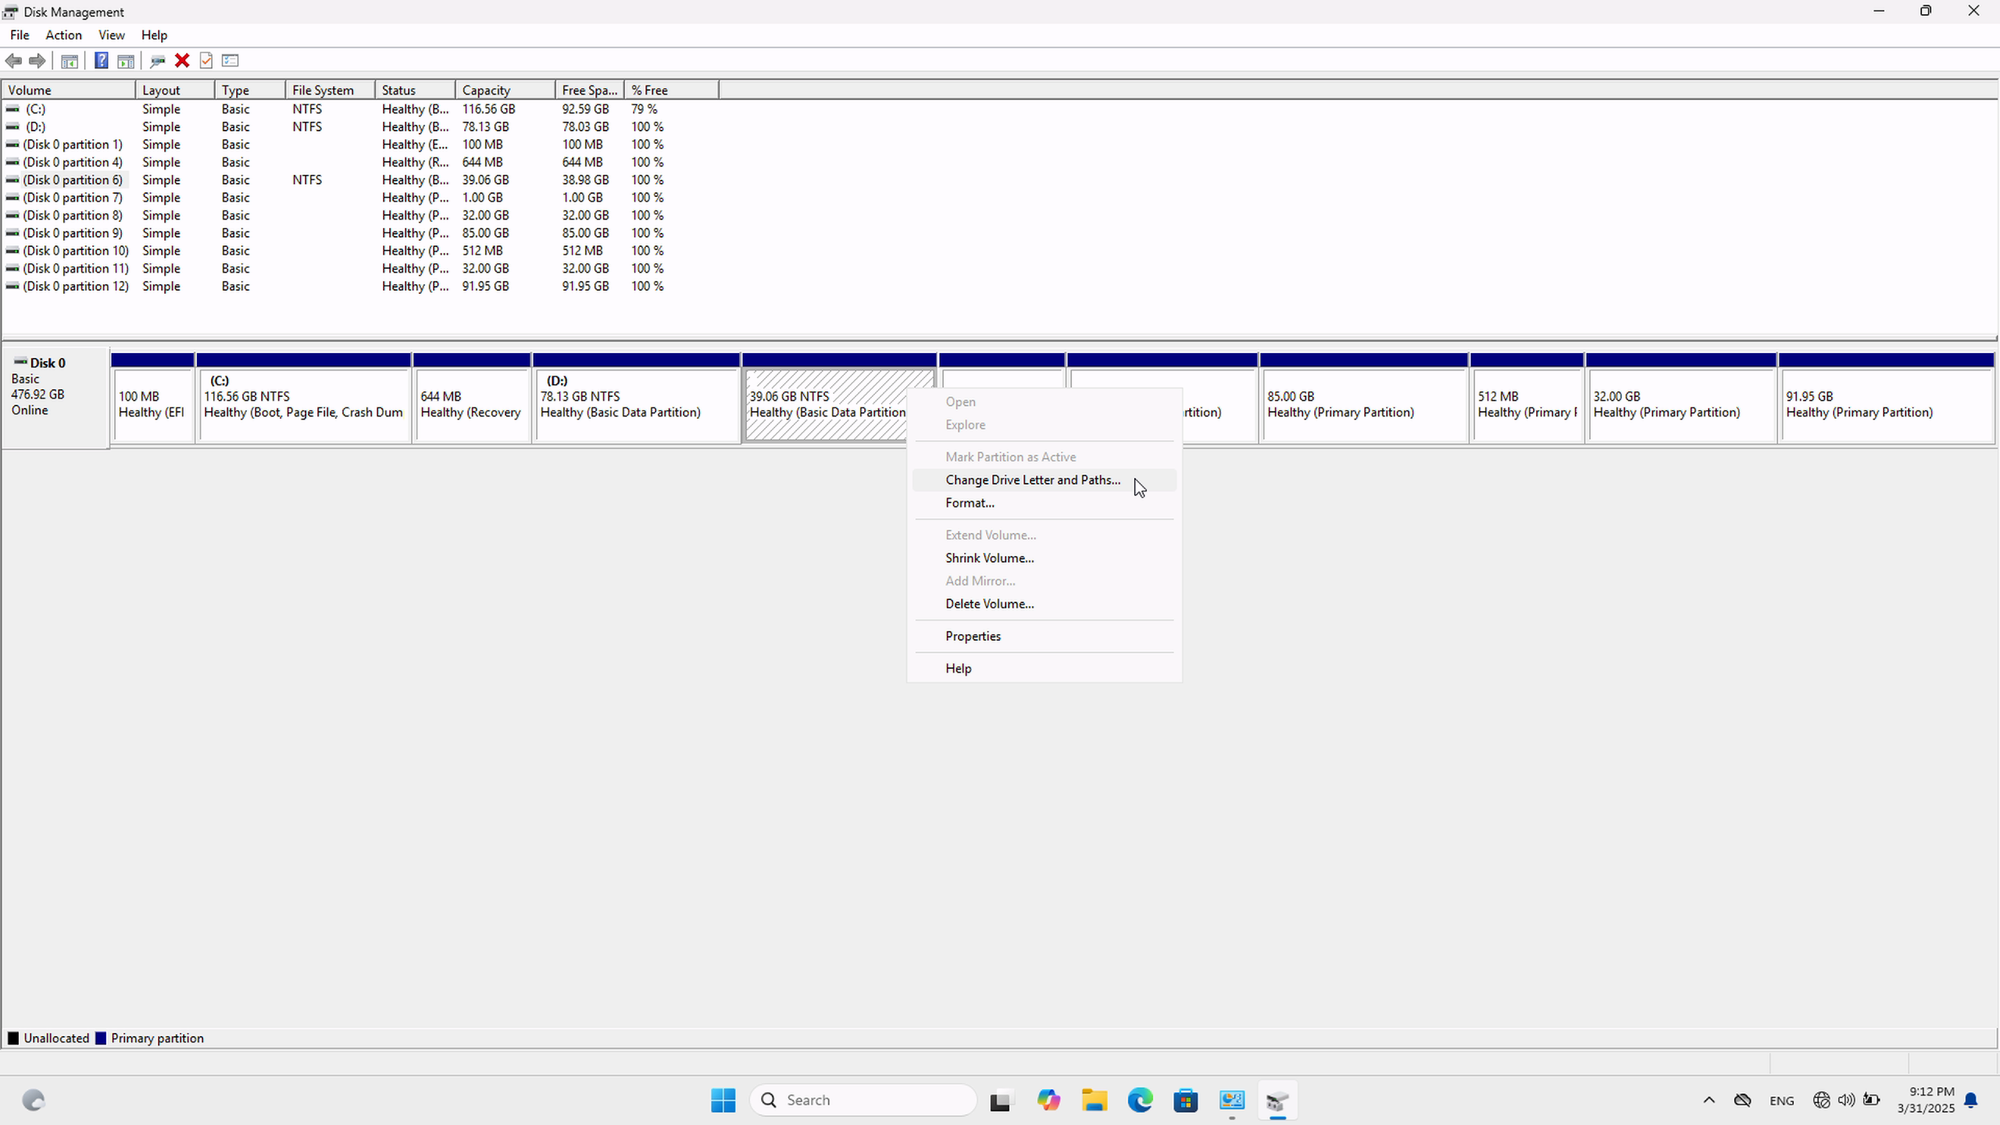
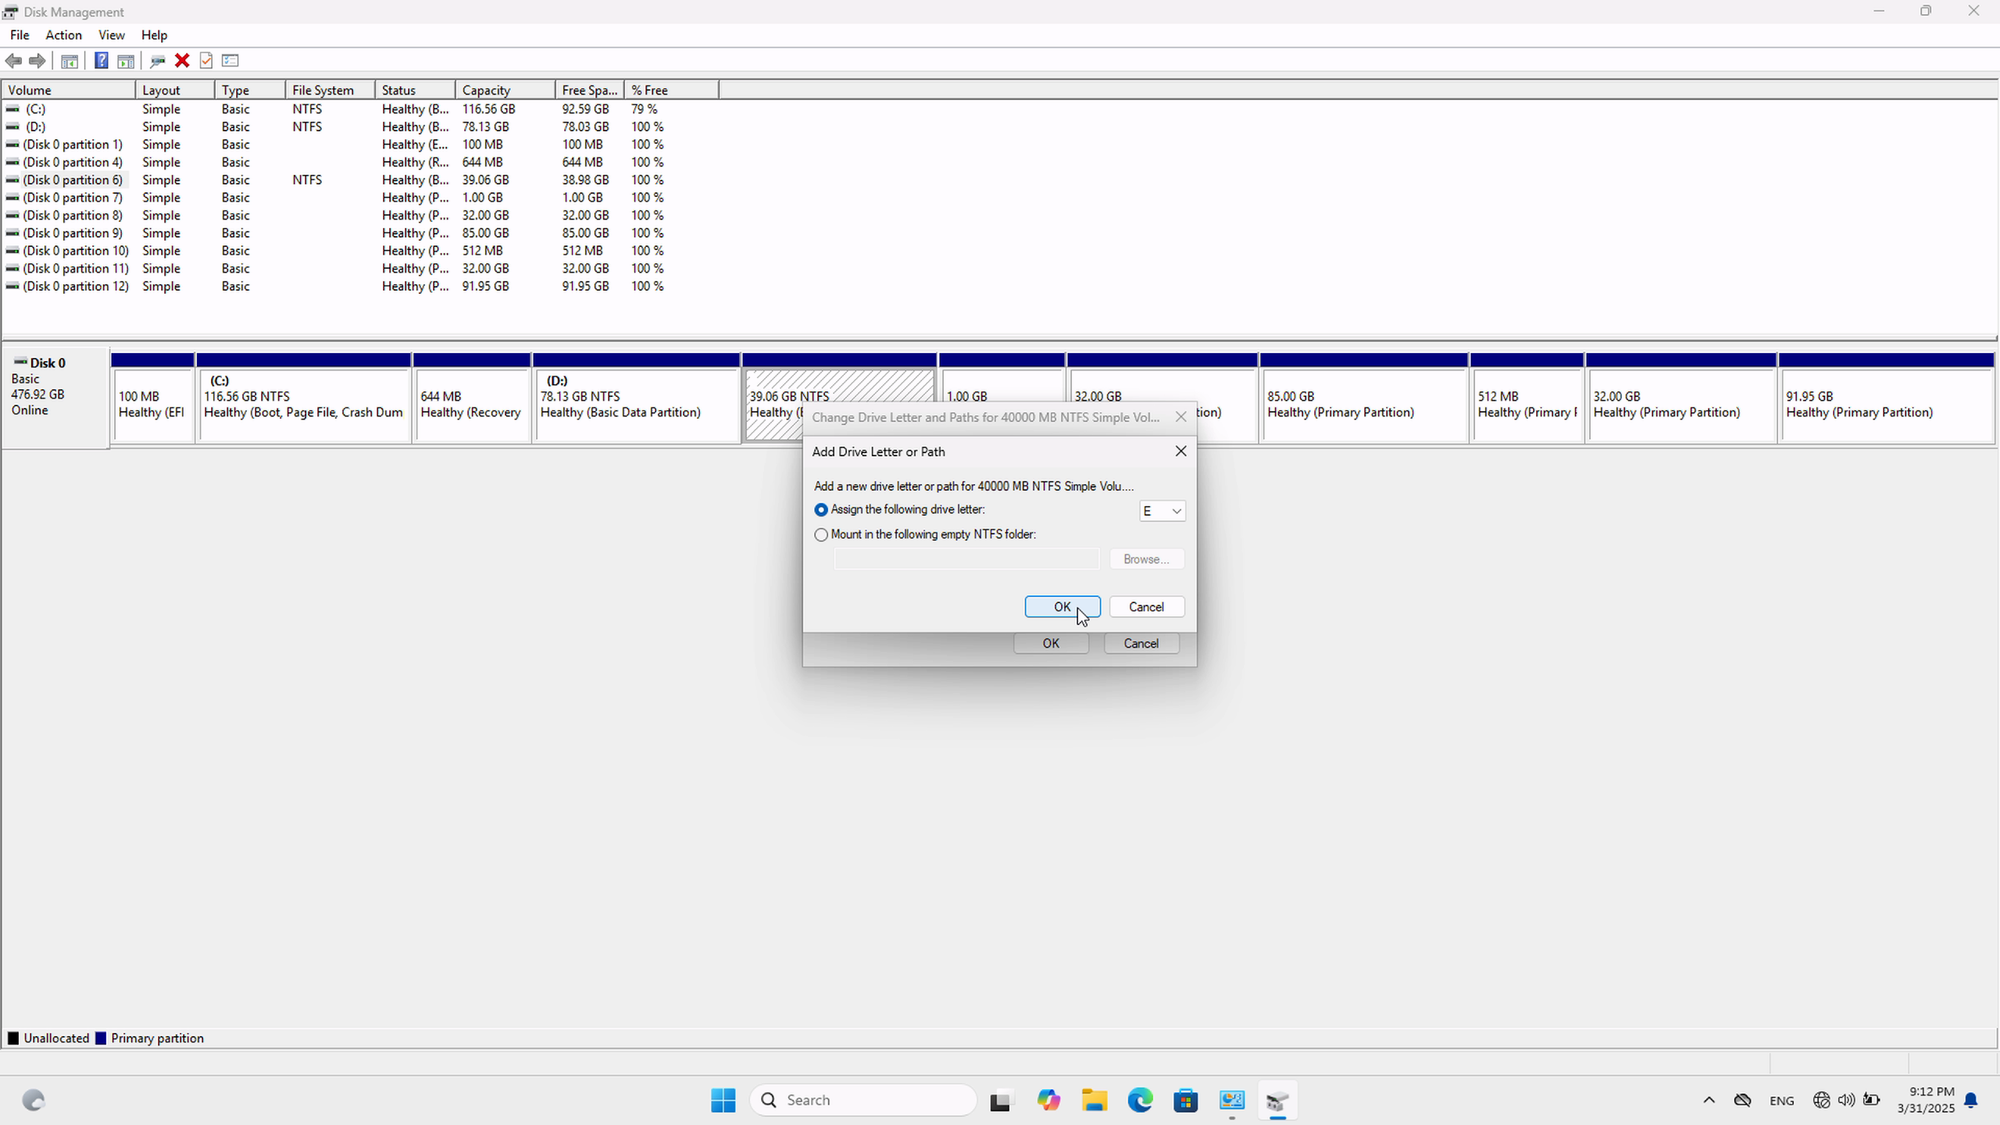
Repeat the same steps for the last NTFS partition, this time assigning it the letter "E":
We need a FAT32 filesystem on this partition, and although a FAT32 partition can be as large as 2TB, Windows (11) won't let you create anything larger than 32GiB. Let's reboot into FreeBSD and prepare the partition there.
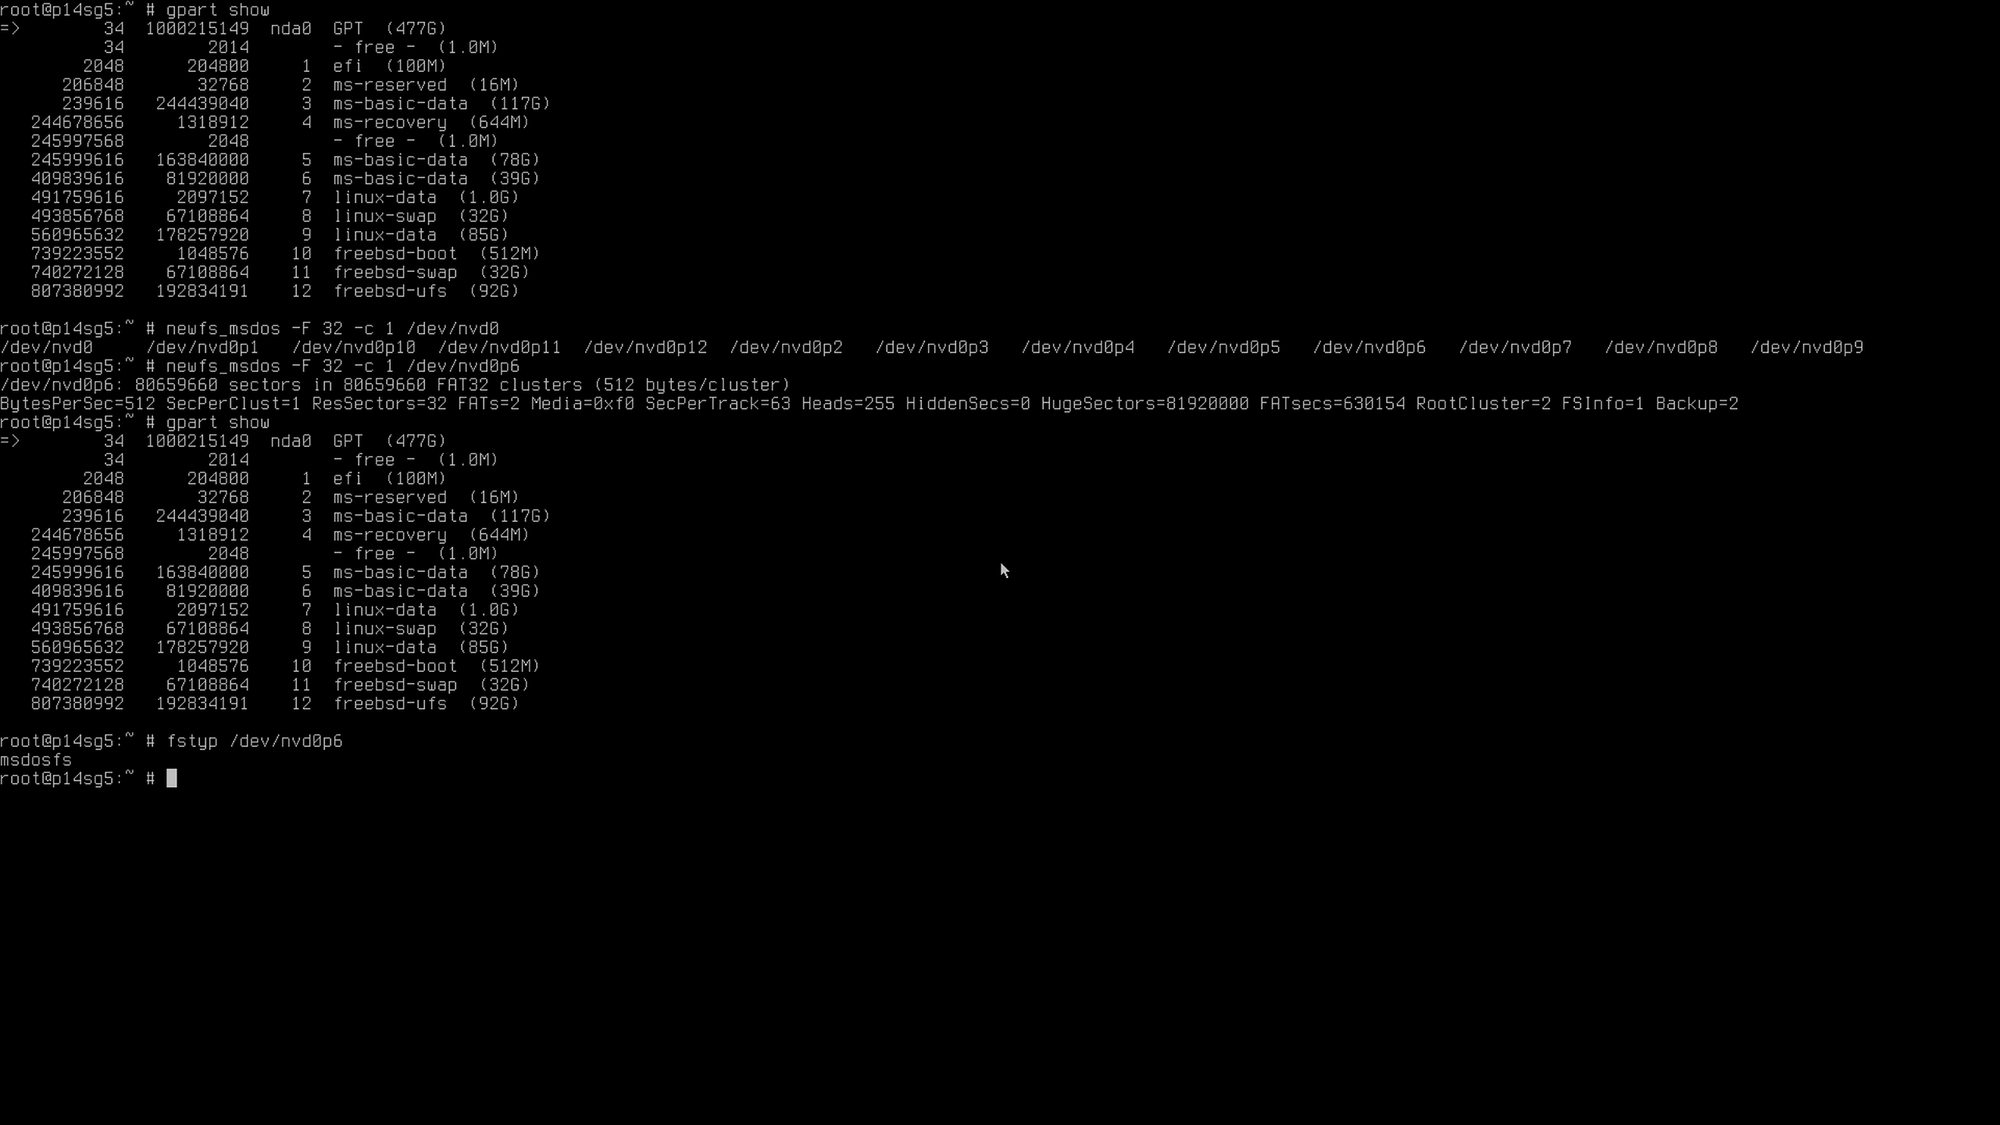
Login as root on FreeBSD and use gpart show to check the dev node for our ~40GB partition. In the screenshot below, it's /dev/nda0p6. Run newfs_msdos to prepare the filesystem:
# gpart show
[ ... ]
# newfs_msdos -F 32 -c 1 /dev/nvd0p6
NOTE: I think there are different NVMe drivers under FreeBSD, and although gpart listed the device as nda0p6, I (mistakenly) issued the newfs_msdos command against the nvd0p6 entry. It seems it's only a performance difference.
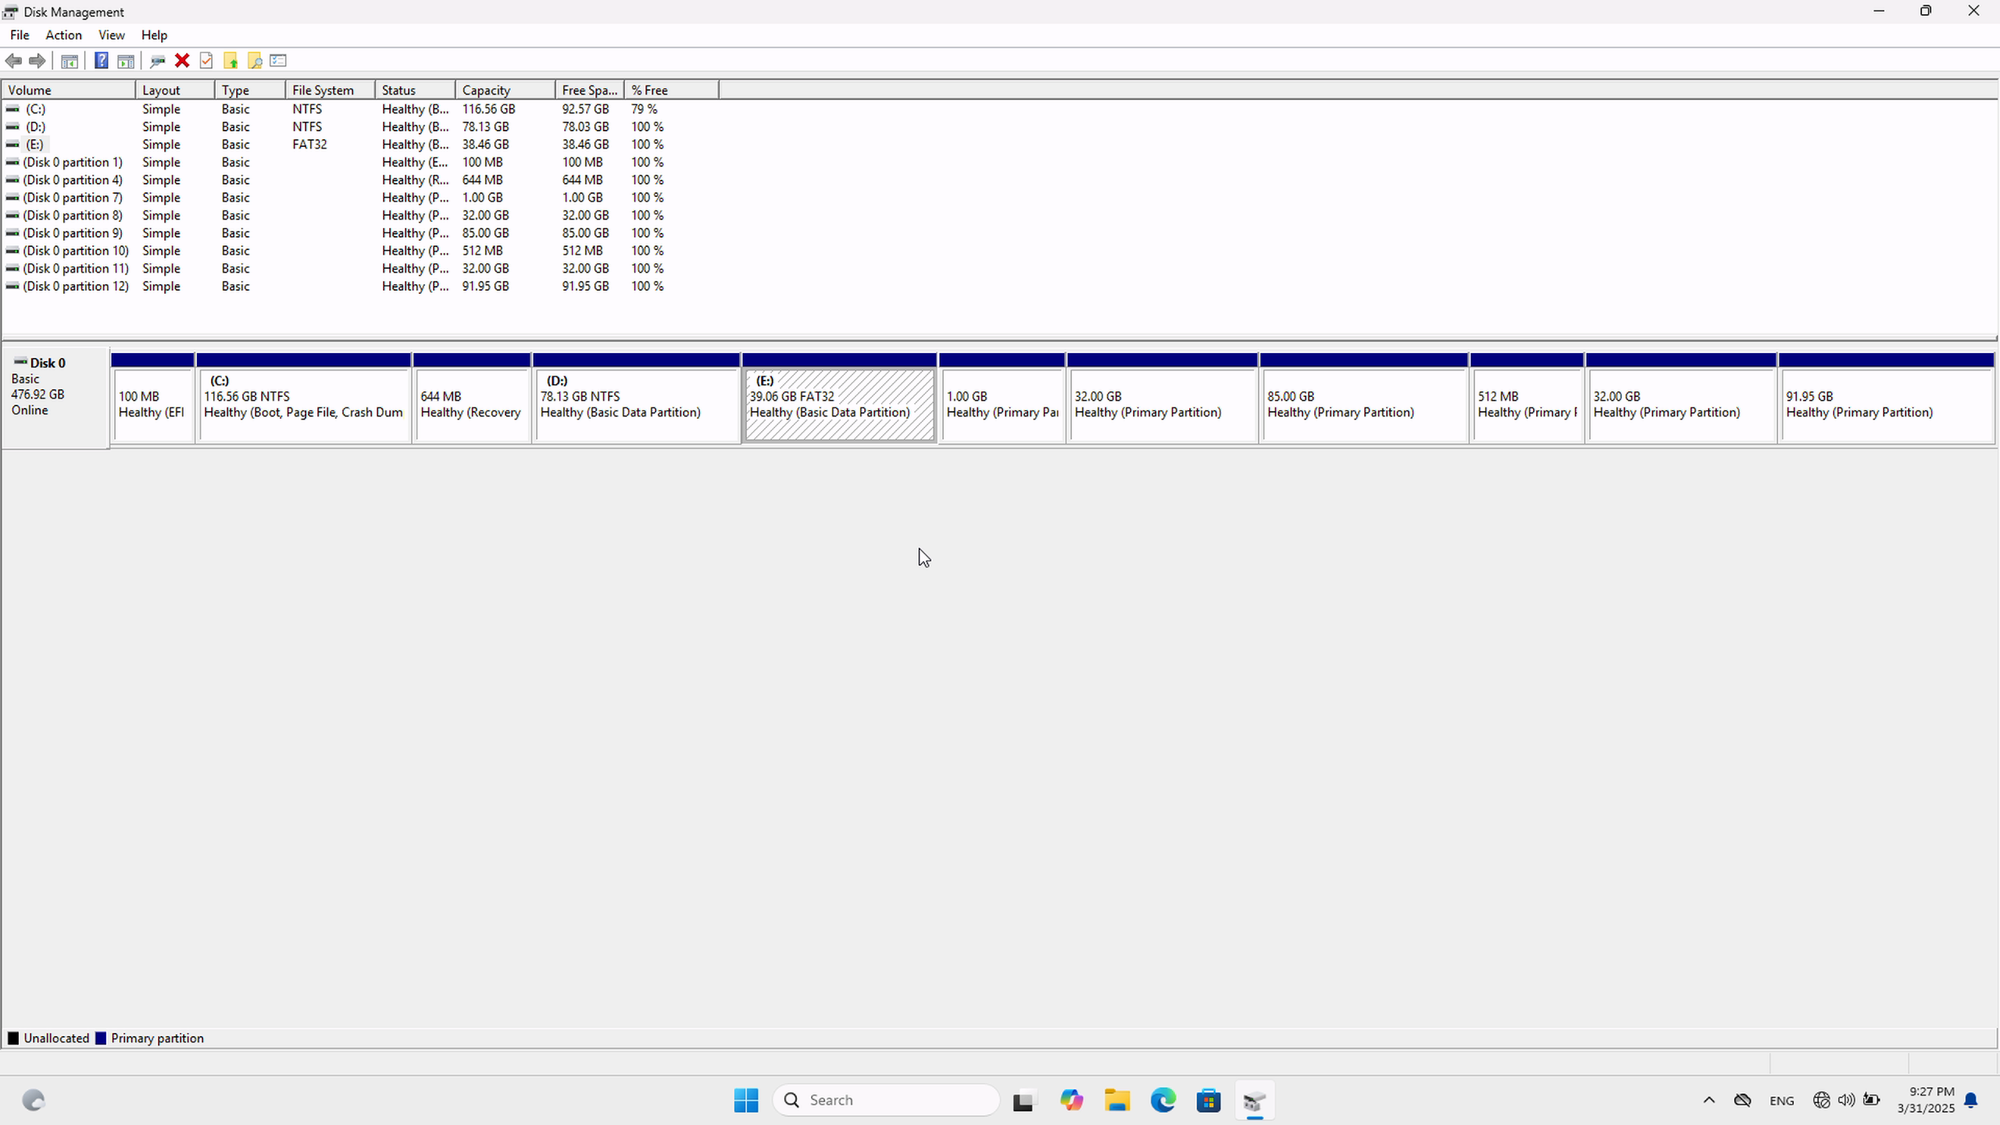
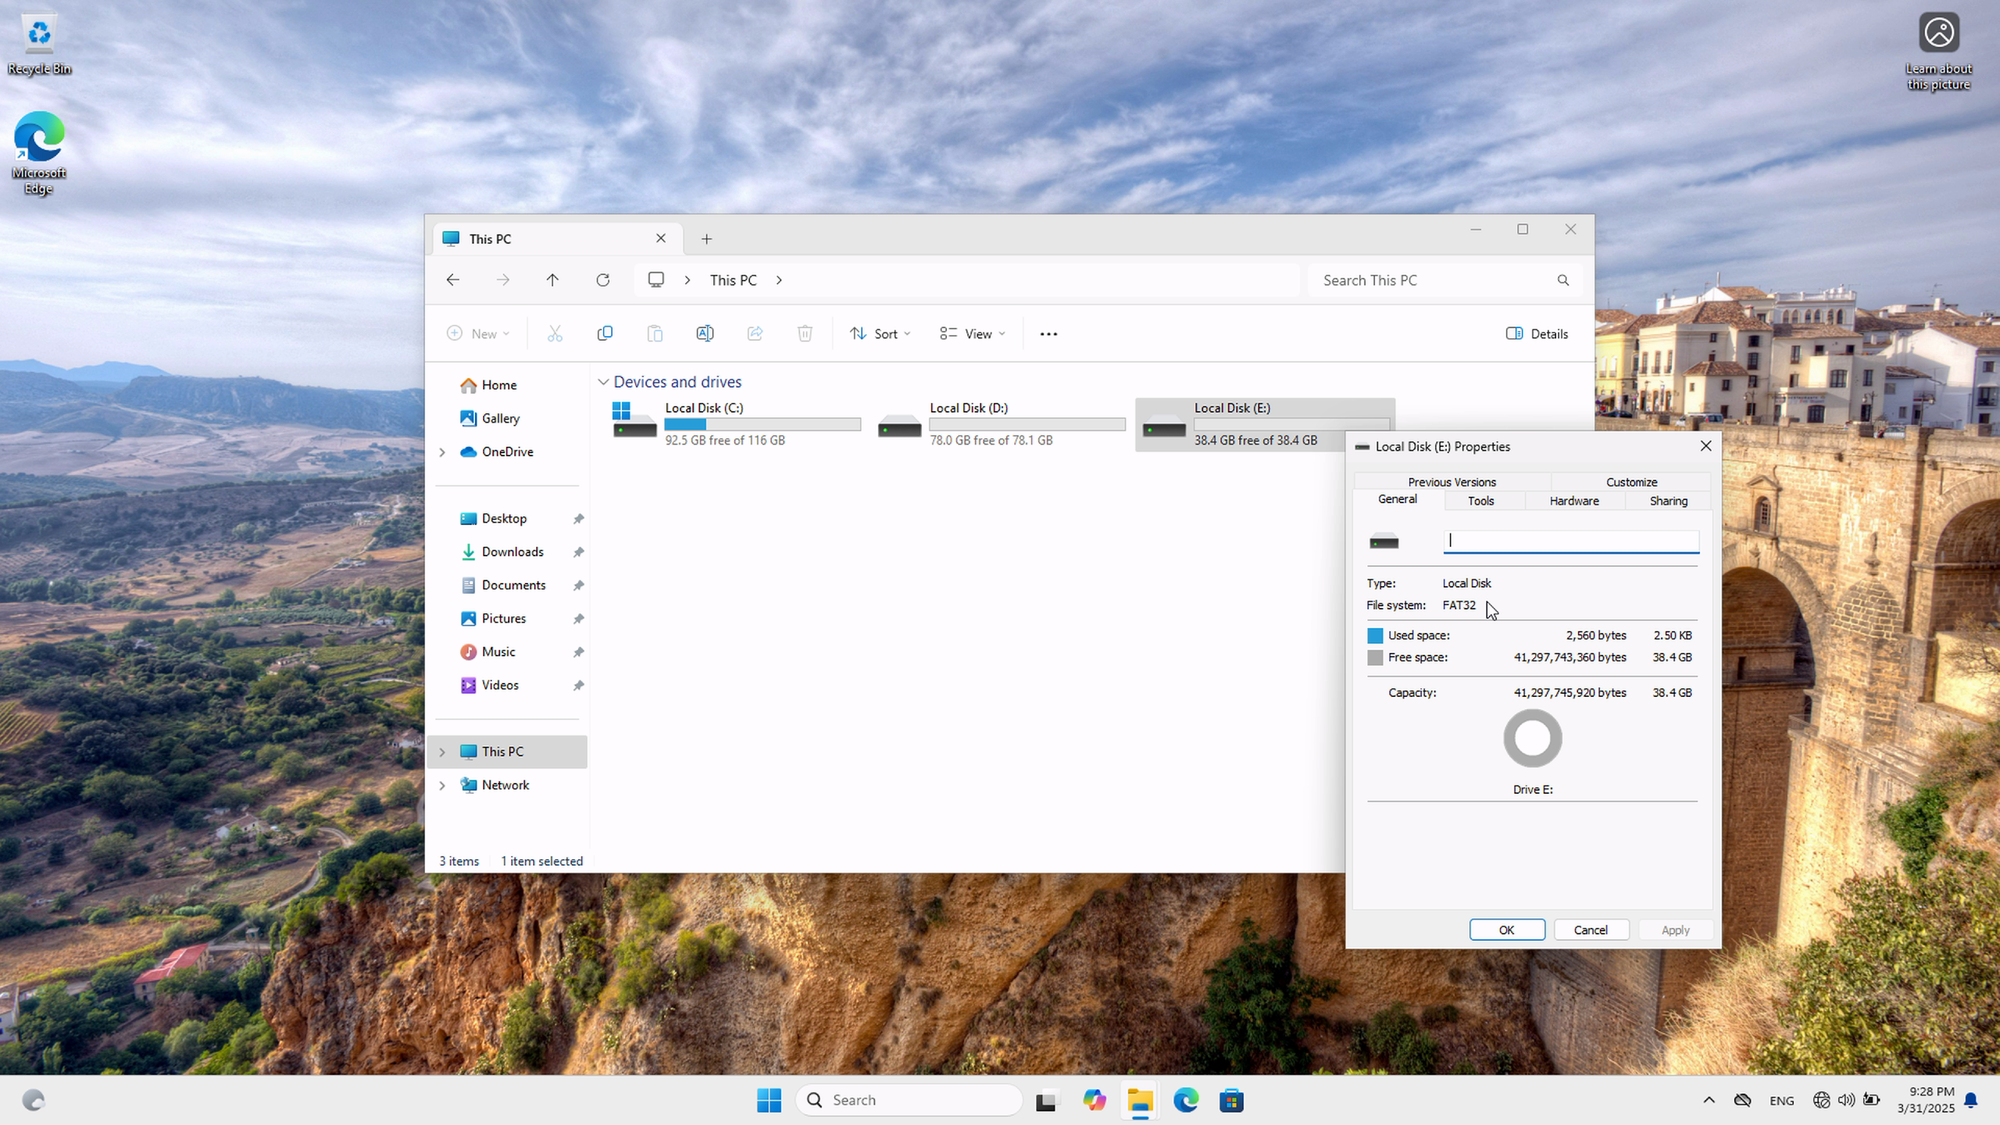
If you reboot into Windows, the partition editor should now recognize our E: drive as FAT32.


Configuring shared partitions on Linux
Reboot into Linux and login as root. We need to install the ntfs-3g package first:
# pacman -S ntfs-3gType fdisk -l and mark the dev node names for our data partitions (if you've been following everything to the letter, they should be the fifth and sixth partitions, where the former is NTFS and the latter is FAT32, something like /dev/nvme0n1p5 and /dev/nvme0n1p6).
Create the mountpoints and mount the partitions:
# mkdir -p /shared/ntfs /shared/fat32
# ntfs-3g /dev/nvme0n1p5 /shared/ntfs
# mount -t vfat /dev/nvme0n1p6 /shared/fat32
You should now be able to read/write to those directories! To automatically mount on boot, append the following lines to /etc/fstab:
/dev/nvme0n1p5    /shared/ntfs    ntfs-3g    defaults,nls=utf8,umask=000,dmask=027,fmask=137,uid=1000,gid=1000,windows_names    0    0
/dev/nvme0n1p6    /shared/fat32   vfat       defaults,dmask=000,fmask=0111,user
Make sure to change the uid and gid to the respective IDs of your unprivileged user (id -u and id -g). Create some test files if you want so you can check them out later on the other operating systems.
Configuring shared partitions on FreeBSD
Reboot your machine into FreeBSD and login as root. Install fusefs-ntfs:
# pkg install fusefs-ntfsLike on Linux, check gpart show and mark the names of our data partitions. On my system, these are /dev/nda0p5 (NTFS) and /dev/nda0p6 (FAT32).
Now load the fusefs kernel module, create directories for the mountpoints, and mount the partitions:
# kldload fusefs
# mkdir -p /shared/ntfs /shared/fat32
# ntfs-3g /dev/nda0p5 /shared/ntfs
# mount_msdosfs /dev/nda0p6 /shared/fat32
To make it persistent on every boot, append the following to /boot/loader.conf:
fusefs_load="YES"Add fusefs to your kld_list in /etc/rc.conf:
# sysrc kld_list+=fusefsNOTE: The recommended practice is to only apply one of the two steps above. The first is for if you want to load the module early in the boot process. I'm not quite sure if fstab processing is considered "early boot" or not, but configuring the module in loader.conf AND /etc/rc.conf should be harmless.
Finally, append the following to /etc/fstab:
/dev/nda0p5    /shared/ntfs    ntfs-3g    rw,mountprog=/usr/local/bin/ntfs-3g    0    0
/dev/nda0p6    /shared/fat32   msdosfs    rw    0    0
Create/modify/delete some files and confirm everything is "syncing" properly in the different operating systems. And like I mentioned earlier in this guide, your mileage with NTFS under FreeBSD may vary.
Reordering UEFI boot entries
At this point, you should have a working FreeBSD/Linux/Windows triple-boot setup with shared partitions and all that goodness. We will now use efibootmgr to re-arrange/change our boot entries.
To list current boot entries/methods, drop to a FreeBSD (or Linux) root prompt and simply run efibootmgr without any arguments:
# efibootmgrBoot entries are of the form BootXXXX, where XXXX is a set of four hexadecimal digits. Each boot entry has a unique ID (e.g. Boot0027). Entries marked with an asterisk are flagged as "active". An inactive entry won't show up in your boot menu. A '+' preceding a boot entry means this is the currently booted-into UEFI executable.
The output of efibootmgr also show an important piece of information: the order of the entries ("BootOrder"). The following screenshot is NOT taken from the target machine, but from a similar machine with FreeBSD/Windows dual-boot, for demonstration:
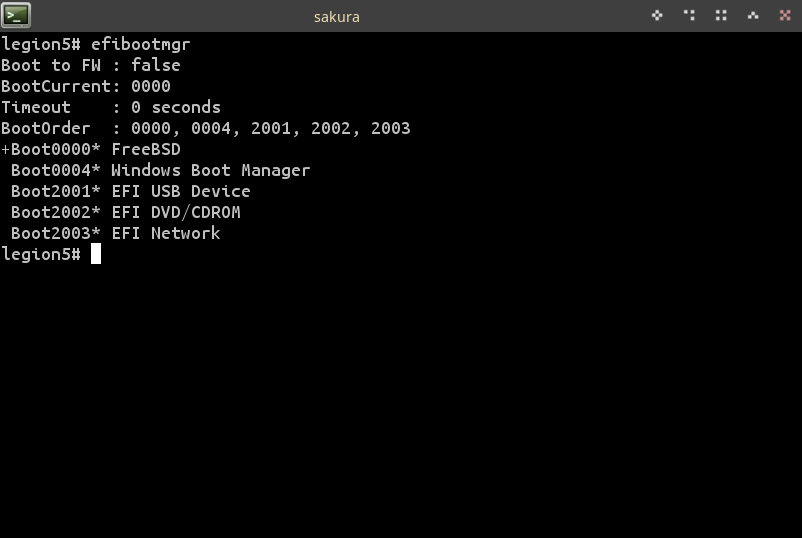
All entries are flagged as "active". "BootOrder" tells us that the first (default) entry the machine would boot into is "FreeBSD", followed by "Windows Boot Manager", then "EFI USB Device", etc. You can change the order of entries by supplying the -o flag to efibootmgr and giving it the hexadecimal IDs of the entries. For example, if we wanted to "swap" the FreeBSD and Windows Boot Manager entries, we would run the following:
# efibootmgr -o 0004,0000,2001,2002,2003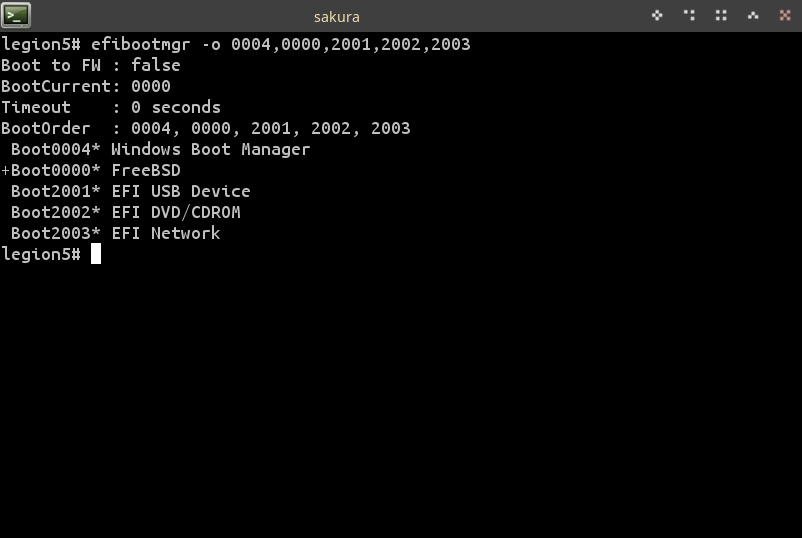
Simple enough, right?
Changing the names of these entries is a different story. There is no concept of "editing" an already existing entry, at least not in the context of the efibootmgr utility. To achieve a similar result, we would need to create a new entry with the desired name, point it to the correct UEFI executable, flag it as active, delete the old entry, and reorder the entries the way we want. Sounds like a lot, so let's take a simple example.
Say you want to change "Windows Boot Manager" to be just "Windows". We can create a new boot entry with the -c flag, and pass it the UEFI executable/loader with the -l flag, along with the new name as an argument to the -L (label) flag.
UEFI executables are located in the ESP. On the referenced FreeBSD machine, the ESP is mounted at /boot/efi. The Windows Boot Manager executable is located at /boot/efi/EFI/Microsoft/Boot/bootmgfw.efi (you can check with efibootmgr -v). So to add a new entry named "Windows", run the following:
# efibootmgr -c -l /boot/efi/EFI/Microsoft/Boot/Bootmgfw.efi -L "Windows"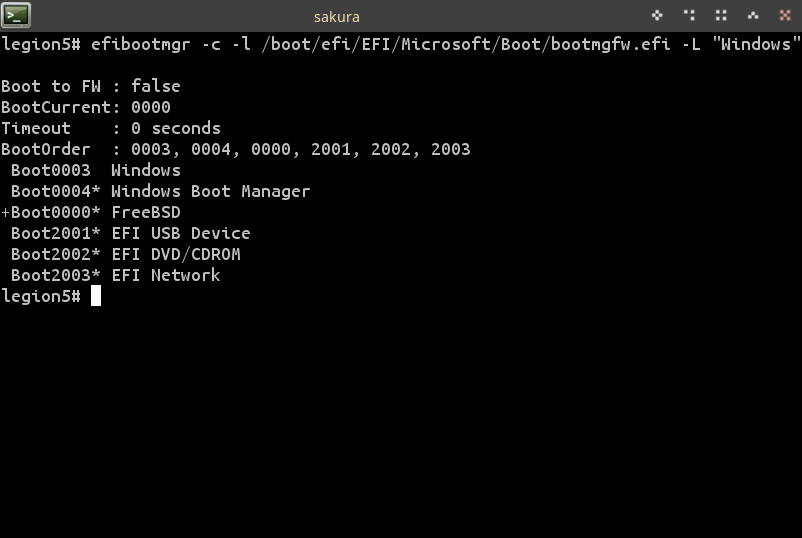
This created a new entry with ID 0003 (Boot0003) and placed it at the beginning of the list (i.e. it is now the default boot entry). Notice how it's not flagged as active (no asterisk), so we can't really boot from it just yet. To mark it as active, we pass the -a flag to efibootmgr while also specifying the ID of the entry with the -b flag:
# efibootmgr -b 0003 -a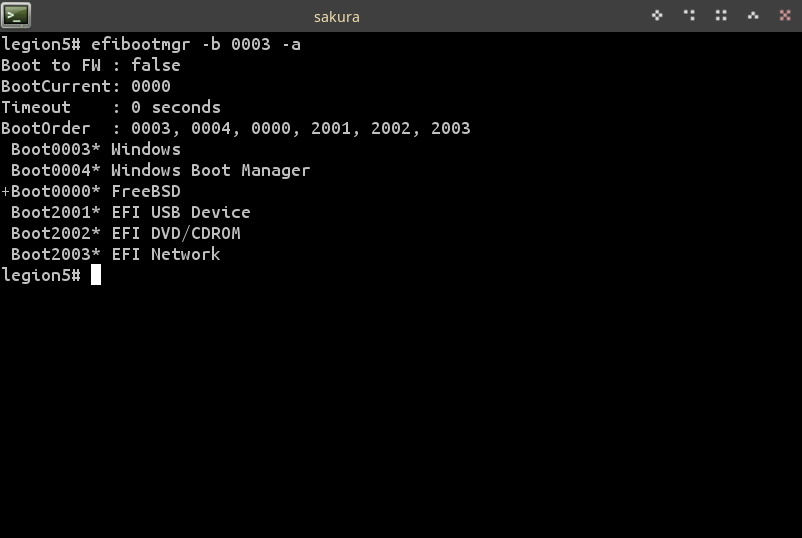
Now that we created an entry for Windows with an alternative label, let's delete the old "Windows Boot Manager" entry. We can do this with the -B flag:
# efibootmgr -b 0004 -B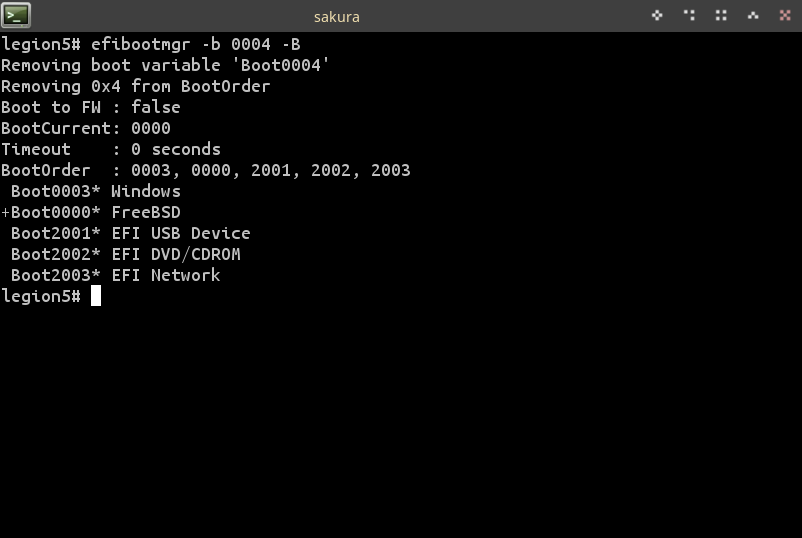
You can apply the same steps to change the "grub_uefi" entry that was created earlier in this guide to something like "Linux" or "Arch Linux", if you want.
Since I want FreeBSD to be the default OS to load, let's reorder the entries one last time:
# efibootmgr -o 0000,0003,2001,2002,2003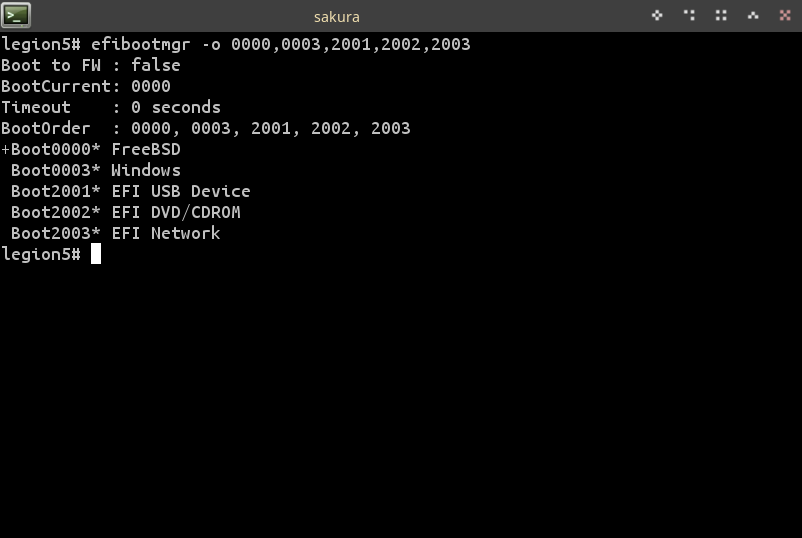
That's it for today!
UPDATE: so, apparently, after the first Windows boot, bootmgfw.efi (or Windows itself) was nasty enough to detect the label change and rename it back to "Windows Boot Manager", plus adding another "Windows Boot Manager" entry and making it the default:
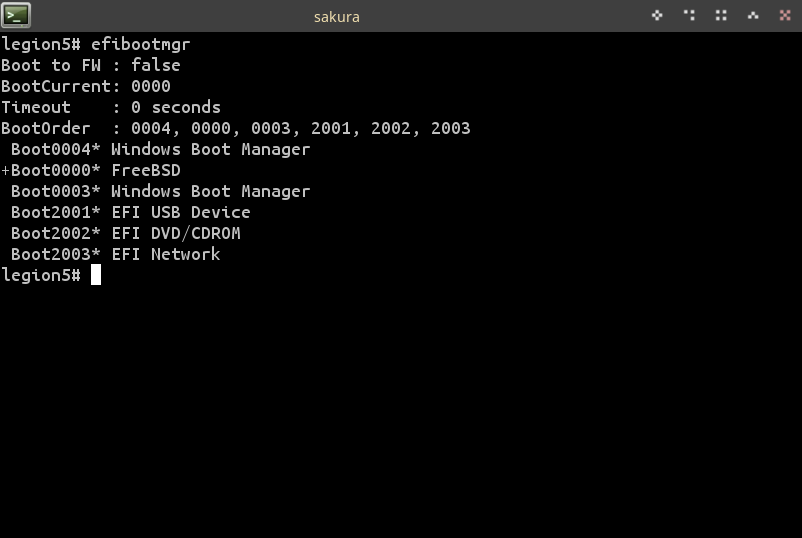
Not to worry, just delete the duplicate entry (and reorder if you want) and all should be good.